Creating Pretty Cards # 38

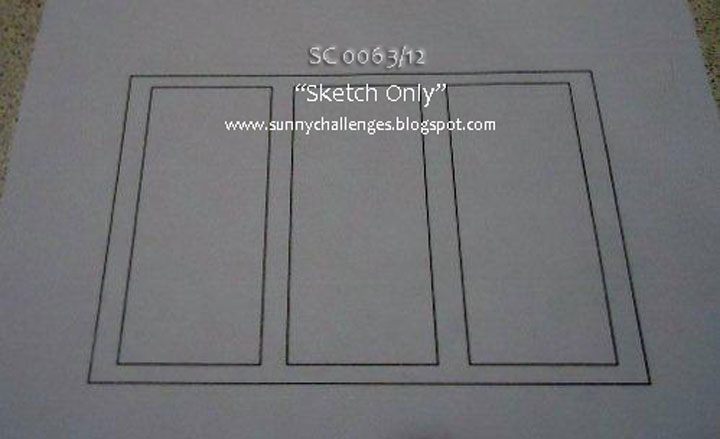
I’m in a bit of shock with this card as I’ve created it for a challenge.  I know, it has been so long since I’ve actually done a card 038a-147x300for a challenge.  When I saw this sketch, I knew exactly what stamp set I was going to use & the colours, so it come together super easy!  Don’t you love it when that happens?  I think we tend to overthink things a lot of the time & create stress on ourselves.

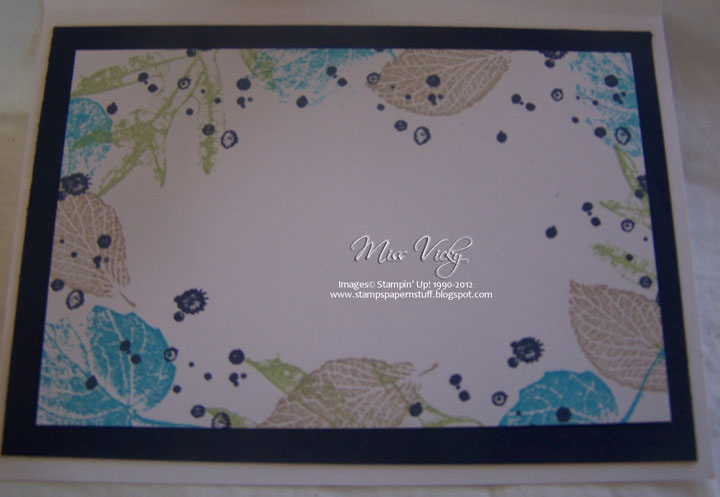
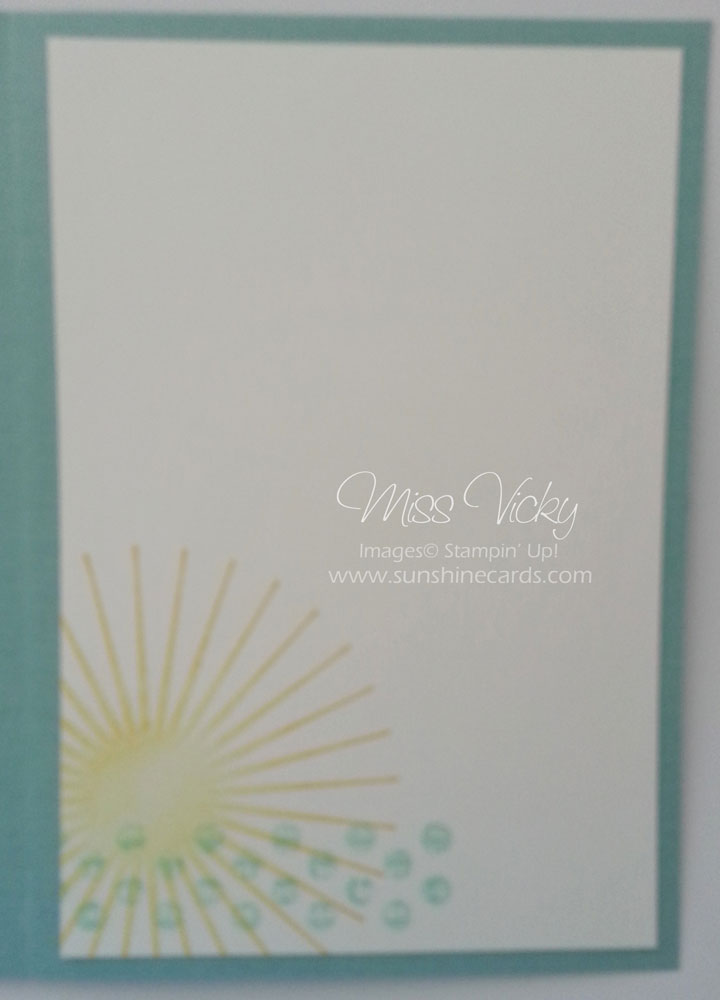
For the challenge over at Craft Project Central, I’ve used “Kinda Eclectic” – love every stamp in this set – plus a couple of the new In ColoursLost Lagoon & Tangelo Twist.  I didn’t actually do the card size of the sketch, but a standard size card – hope that will be ok?

Supplies –

  • Stamp Set – Kinda Eclectic, Label Something (Retired)
  • Ink – Lost Lagoon, Soft Sky, Daffodil Delight, Night of Navy, Tangelo Twist
  • Cardstock – Whisper White, Lost Lagoon, Night of Navy
  • Embossing Folder – Decorative Dots
  • Ribbon – 3/8″ Stitched Satin – Tangelo Twist
  • Punches – 7/8″ Scallop Circle, Bitty Butterfly
  • Accessories – Stampin’ Dimensionals, Big Shot, Multipurpose Liquid Glue, Pearl Basic Jewels

Measurements –

  • Base Card – Lost Lagoon – 8 1/4″ x 5 7/8″ or 21cm x 15cm
  • Layer 1 –  Whisper White – 5 5/8″ x 4″ or 14.5cm x 10cm
  • Layer 2 – Night of Navy – 4″ x 3″ or 10.5cm x 8cm
  • Layer 3 – Whisper White – 3 7/8″ x 2 7/8″ or 10cm x 7.5cm
  • Scrap Whisper White – Greeting, Leaf & Butterfly

Tutorial –

  1. Ink print image with Lost Lagoon Ink, stamp off onto scrap paper prior to stamping onto Layer 3 – Whisper White
  2. Mask stamped image, ink sun image in Daffodil Delight Ink & stamp off to LHS of card003-fb
  3.  Wrap Tangelo Twist Ribbon around bottom part of card tucking ends under & tying a bow
  4. Adhere to Layer 2 – Not Quite Navy
  5. Run Layer 1 – Whisper White through BS using Decorative Dots EF prior to adhering to Base Card – Lost Lagoon
  6. Adhere layered Night of Navy to top of embossed Base Card
  7. Stamp leaf image onto scrap Whisper White with Soft Sky, cut around image prior to adhering to Base Card with Stampin’ Dimensionals
  8. Stamp small Butterfly image onto scrap Whisper White with Tangelo Twist Ink, punch with Bitty Butterfly Punch & adhere to top of leaf
  9. Stamp greeting onto scrap Whisper White with Night of Navy Ink & punch with 7/8″ Scallop Circle Punch prior to adhering to card
  10. Complete card by randomly adhering small Pearl Basic Jewels around card & to centre of Butterfly

005---blogThank you ladies for a great sketch.

Until next time, Happy Stampin’

Vicky

Craft Project Central SC 29

For my card today, I liked the sketch from Craft Project Central – Creating Pretty Cards.  I’ve been following these sketches for some time but have never participated in them.  So today, I decided to do that!

Not only do they supply you with a mini tutorial on the sketch, along with measurements, but wait there’s more!  By playing along with this challenge, you get a chance to win a free month’s subscription of your choice to all their wonderful projects. 

Mind you, my card is nothing like I had in my head.  In fact it was going to be a Birthday Card, but I had all the papers, etc out on the desk & then just went along with the sketch.


Measurements –
Base Card – Midnight Muse – 8 1/4″ x 5 7/8″ or 21cm x 15cm
Layer 1 – Whisper White – 5 5/8″ x 4″ or 14.5cm x 9cm
Layer 2 – DSP – 5 1/2″ x 3 3/4″ or 14cm x 9.5cm
Layer 3 – Midnight Muse – 5″ x 3 1/4″ or 13cm x 8.5cm
Layer 4 – Whisper White – 4 7/8″ x 3 3/8″ or 12.5cm x 8cm
Layer 5 – DSP – 1″ x 34 7/8″ or 2.5cm x 8cm
Layer 6 – Midnight Muse – 2 1/8″ x 3/4″ or 5.5cm x 2cm
Layer 7 – Whisper White – 2″ x 5/8″ or 5cm x 1.5cm

Supplies –
Stamp Set – Special Season
Ink – Pool Party
Cardstock – Midnight Muse, Whisper White
MDS – “Merry Christmas”
DSP – Winter Frost Speciality
Ribbon – 1/8″ Silver
Accessories – Snail Adhesive, Dazzling Details – Silver, Glue Dots


Tutorial –
1.  Adhere Whisper White – 5 5/8″ x 4″ or 14.5cm x 9cm to Base Card – Midnight Muse
2.  Adhere DSP – 5 1/2″ x 3 3/4″ or 14cm x 9.5cm to top of Whisper White
3.  Stamp tree image onto LHS (Left Hand Side) Whisper White – 4 7/8″ x 3 3/8″ or 12.5cm x 8cm in Pool Party Ink
3.  Adhere DSP – 1″ x 34 7/8″ or 2.5cm x 8cm to RHS of Whisper White – 4 7/8″ x 3 3/8″ or 12.5cm x 8cm
5.  Adhere Ribbon down side
6.  Adhere to Midnight Muse – 5″ x 3 1/4″ or 13cm x 8.5cm prior to adhering to Base Card
7.  Create “Merry Christmas” in MDS
8.  Adhere to Midnight Muse – 2 1/8″ x 3/4″ or 5.5cm x 2cm
9.  Tie small bow with Silver Ribbon & adhere to Card with Glue Dot
10.  Randomly apply Dazzling Details to tree

 
If you want to enter, be sure to head over to Craft Project Central as there is only 1 1/2 days left to enter.
 
Until next time, Happy Stampin’
 
Vicky

SC 063/12…

For such an easy challenge over at Sunny Challenges, I had a hard time creating sometime that I truely liked.  I started about 4 times, blank, walked around, blank, cleaned, blank, BUT then went & did some “retail therapy’ which I don’t usually do & YES, it did the trick!  Thank you Retail Therapy – you are my new best friend!

Our challenge this week is the sketch only!  Because the layout was so open, I decided to try a technique……

Measurements –
Base Card – Whisper White – 5 3/4″ x 4 1/8″ or 11cm x 14.5cm
Layer 1 – Not Quite Navy – 4 7/8″ x 3 3/4″ or 12.5cm x 10cm
Layer 2 – Whisper White – 5″ x 4 3/4″ or 13cm x 9.5cm

Supplies –
Stamp Set – French Foliage, A Word for You
Ink – Versamark, Tempting Turquoise, Certainly Celery, Not Quite Navy, Crumb Cake
Cardstock – Whisper White, Not Quite Navy
Accessories – Snail Glue, Heat Tool, Embossing Powders – White & Clear, Sponge

Technique
Emboss Resist – Tutorial may be found here

To select my ink colours, I wanted to go with something that was different, soft, but with one colour which would be vibrant.  Once I had decided on the ink colours, the next big step was the Cardstock colour to bring the ink colours out even more.  With technique in hand, I sort of selected random colours until I was happy with the look behind the technique.

Inside Card…

Once I had applied the Emboss Resist Technique to my card, I proceeded to sponge the colours of Tempting Turquoise, Crumb Cake & Certainly Celery Inks around the images with a Sponge.  I did this until I was happy with the result.

I then decided that it wasn’t shinny enough & didn’t really show the technique to it’s full potential, so I decided to dab the Versamark Ink over the entire piece, poured Clear Embossing Powder over the top & heat set with my Heat Tool.

I proceeded to cut the stamped piece of cardstock into 3 equal pieces & adhered to the piece of Not Quite Navy Cardstock with Snail Adhesive.

I wanted to apply a greeting to the card, but didn’t want to stamp or place any pieces over the top of the stamped images, so instead to stamp the greeting on the right hand side of the card in Not Quite Navy Ink.  I then adhered the Not Quite Navy piece to the Base Card – Whisper White.

Can you see the shine…

I’m really happy with the final outcome, as it is something I had pictured in my mind.  It is a very clean card, but I like this sort of card.

With the greeting I used, I can now use it for any occasion I choose…….

Why not pop on over to Sunny Challenges & check out what Gwen & Kris have both created.  We would love for you to join us this week.

Until next time, Happy Stampin’

SC 052/12…

Our challenge this week over at Sunny Challenges & Creations has been brought to us by Christine Blain, who just happens to be our Guest Designer for the month. 

With Father’s Day coming up in September for Australia, it is the perfect challenge to start creating your cards or project using this challenge.  I opted to go for a male’s birthday card & used a set that I really like, but must admit, haven’t used it for sometime.  In fact, I am really happy with the final result!

Measurements –
Base Card – Soft Suede – 8 1/4″ x 5 7/8″ or 21cm x 15cm
Layer 1 – Very Vanilla – 5 3/4″ x 4″ or 14.5cm x 10cm
Layer 2 – DSP – 5 5/8″ x 3 7/8″ or 14cm x 9.5cm
Layer 3 x 2 – So Saffron – 4″ x 1/2″ or 14.5cm x 1cm
Layer 4 – Not Quite Navy – 4″ x 2″ or 14.5cm x 5cm
Layer 5 – Very Vanilla – 4″ x 1 7/8″ or 14.5cm x 4.5cm

Supplies –
Stamp Set – Totally Tool, Happiest Birthday Wishes
Ink – Soft Suede
Cardstock – Not Quite Navy, Soft Suede, Very Vanilla, So Saffron, Basic Grey
DSP – Well Worn
Accessories – Snail Adhesive, Crystal Effects, Crop-a-Dile, Stampin’ Up! Wirte Markers – So Saffron, Cherry Cobbler, Not Quite Navy

I inked my images with the Not Quite Navy Write Marker, stamped off once onto a scrap piece of paper & stamped onto the piece of Very Vanilla Cardstock.  I repeated this same step until I was happy with the look of the card.  I then stamped 3 images onto scrap Very Vanilla direct onto the card, cut the images out, coloured part of the images with Stampin’ Up! Write Markers – So Saffron, Not Quite Navy, Cherry Cobbler & set aside.

The piece of Very Vanilla was adhered to the piece of Not Quiet Navy, then So Saffron, to the piece of DSP, Very Vnailla & finally to the Base Card – Soft Suede all with Snail Adhesive.

I completely forgot to add my Silver Brads to the top left hand corner of the card, so I comprised a little.  I punched out 6 circles using my Crop-a-Dile, adhered 2 to the top LH corner with Tombow, 1 to the middle of the screwdriver, 1 to the handle of the spanner & 1 to the card where I wanted to place the hammer.

The tools were then adhered to the card – as per the photo with Tombow,with the spanner being my 3rd brad at the top LH corner.

The greeting was stamped in Soft Suede onto Very Vanilla, cut to size & adhered to the card prior to adhering the final Faux Brad it.

Don’t forget to pop over to Sunny Challenges & Creations to check out what Gwen, Kris & Christine have created.

We would love for you to join us!

Until next time, Happy Stampin’

SC 051/12…

Our sketch this week over at Sunny Challenges & Creations was to create a male card & of course we had to use the sketch too.


I set this sketch & for some reason or other found it very hard to do, but managed to get there in the end, I think.

Measurements –
Base Card – Not Quite Navy – 8 1/4″ x 5 7/8″ or 21cm x 15cm – Scored in the middle & folded in half
Layer 1 – Crumb Cake – 3 7/8″ x 5 5/8″ or 10cm x 14.5cm
Layer 2 – Not Quite Navy – 5″ x 1 1/2″ or 13cm x 4cm
Layer 3 – Ridinig Hood Red – 4″ x 3″ or 10.5cm x 7.5cm
Layer 4 – Crumb Cake – 3 7/8″ x 2 7/8″ or 10cm x 7cm

Supplies –
Stamp Set – Circle Circus, Perfect Punches
Ink – Basic Black, Crumb Cake
Cardstock – Crumb Cake, Not Quite Navy, Riding Hood Red
Punches – Large Oval, Decorative Label
Accessories – Simply Scoring Tool, Snail Adhesive, Regal Designer Buttons, Linen Thread, Crystal Effects

I stamped my large piece of Crumb Cake Cardstock using images from Circle Circus & Crumb Cake Ink.

Using my Simply Scoring Tool, I scored a couple of lines along the piece of Not Quite Navy prior to adhering it to the Crumb Cake Cardstock with Snail Adhesive.

I stamped the smaller piece of Crumb Cake Cardstock with random images in Basic Black Ink, tied some Linen Thread through 3 different sizes of  Regal Buttons & adhered to the centre of the images with Crystal Effects.  This piece was then adhered to the Riding Hood Cardstock & then to the Base Card with Snail Adhesive.

The sentiment was stamped onto a scrap piece of Crumb Cake Cardstock in Basic Black Ink, punched with the Large Oval Punch & adhered to a piece of Riding Hood Red which had been punched with the Decorative Label Punch & adhered to the Base Card with Snail Adhesive.

Why not pop over to check out what Gwen & Kris have created, create your project, post to your blog or on-line forum & then link to Mr Linky.  We would love for you to join us.
Happy Stampin’