SSC 241…

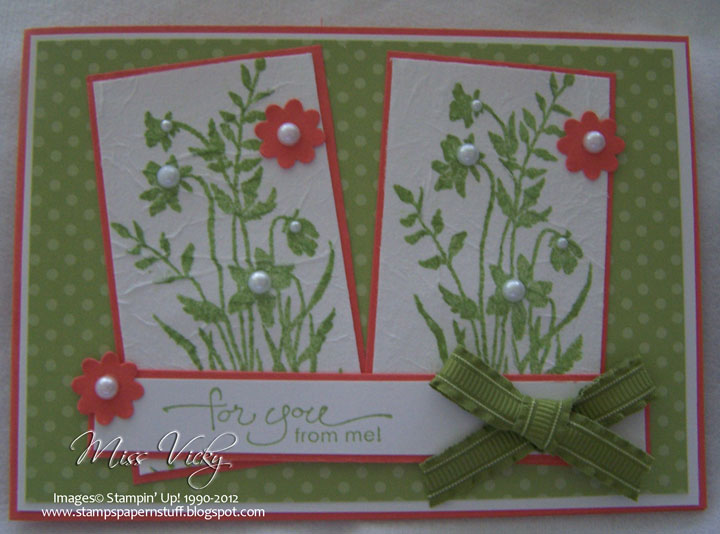
This is the card I created fo rthe new challenge over at Stamping 411.  As soon as I saw this sketch, I knew what I wanted to use & how it should look when I finished.  I wanted to try & create a shabby chic/vintage type card.  I think I have succeeded in getting the results I had in my head.

As usual the operators have provided us with all the basic measurements – all the hard work has been done for us –

Measurements –
Base: 8 1/2″ x 5 1/2″, scored and folded in half at 4 1/4″ – Very Vanilla
Layer 2: 4 x 5 1/4″ – Soft Suede
Layer 3: 4″ x 1 1/2″  – DSP
Layer 4: 2 1/2″ x 2 1/4″ – DSP
Layer 5: 2 3/8″ x 2 1/8″ – Very Vanilla

I Heat Embossed my image onto the piece of Soft Suede using Versamark & Clear Embossing Powder.

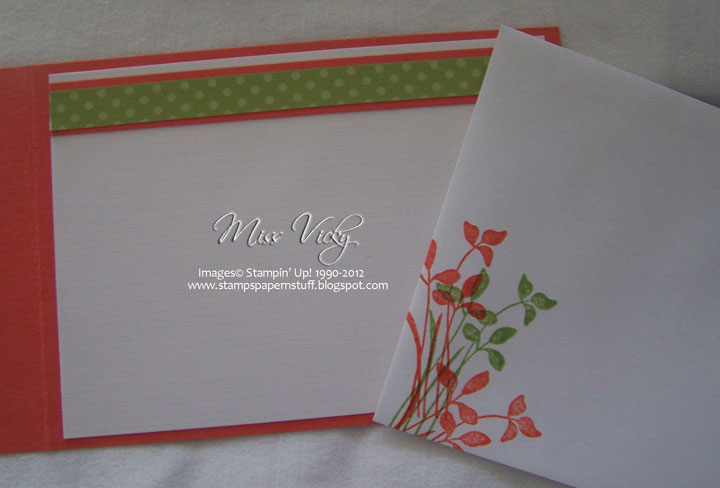
Envelope & Inside Card…

I adhered the DSP to a piece of Pink Pirouette so that I didn’t have the DSP straight onto the Soft Suede & to break the colours up a little.  I think it looks pretty with the little bit of Pink Pirouette showing as a small edge.  I then adhered this piece to the embossed piece using Snail Adhesive.

The Ribbon was adhered across the top part of the DSP & ends tucked under.  The whole piece was then adhered to the Base Card – Very Vanilla using Snail Adhesive.

Stamping the image onto the small piece using Versamark & Soft Suede Inks, I Heat Embossed it.  Using my Aqua Painter, I gently coloured the images with Pink Pirouette & Wild Wasabi Inks.  I nearly left the leaves clear, but after looking at it for a little time, decided to go ahead & colour them.  I like the little bit of green in the card!
 ?

Close Up of Clear Embossing & Flowers…

?
I applied Pearls to the centres of some of the flowers & adhered both pieces to the card as per the sketch.  I found a couple of small Butterflies that were in my packet of Pink Pirouette already cut out, so I used them on the card.  The large Butterfly was adhered with Multipurpose Glue & 2 small Pearls applied to the centre.  The Butterflies had been cut using the Beatuiful Wings Embosslits Dies.

I stamped my sentiment direct onto a piece of Very Vanilla using my SU Marker – Soft Suede, punched with the Modern Label Punch, dabbed a little Pink Pirouette around the edges, adhered to the card with Stampin’ Dimensionals & adhered the small butterfly to the sentiment.  I applied 3 small Pearls to the punched piece – 1 in the centre of the Butterfly & 2 to replace the “o” in the words.

Lastly, I tied a bow & applied to the card with Mini Glue Dots.

When I saw this sketch, it is very similar to a scrapbook layout I have completed for  a class I have this month, which I will post once the class is finished.

Supplies –
Stamp Set – Elements of Style, A Word for You
Ink – Pink Pirouette, Soft Suede, Versamark, Wild Wasabi
Cardstock – Pink Pirouette, Very Vanilla, Soft Suede
DSP – Beau Chateau
Embosslits Dies – Beautiful Wings
Punches – Modern Label
Ribbon – 1/2″ Seam Binding  – Very Vanilla
Accessories – Aqua Painter, Snail Adhesive, Heat Tool,
Pearls, Stampin’ Dimensionals, SU Marker – Soft Suede
Until next time, Enjoy!

Just Believe….

…is such a great stamp set & I find myself going to it constantly that I sometimes have to stop & grab another.

It is so long since I created a card for a challenge that I thought I would try the challenge over at Stampin’ Up! Only.  This site is where you have to use SU! products only on your creations.  This week the challenge is to use a Technique that you use infrequently.  I don’t do nearly enough techniques on my cards, so this is the perfect opportunity to try!

Knowing what I had to create on my card, I then went in search of a sketch.  What better place to start than Mary Jo’s.  This is the first of her sketches for the year.

For my card I choose the Technique – Faux Silk

Measurements –
Base Card – Calyspo Coral – 11 5/8″ x 4 1/8″ or 30cm x 10.5cm – Scored & Folded in the middle
Layer 1 – Whisper White – 5 5/8″ x 4″ or 14.5cm x 10cm
Layer 2 – DSP – 5 1/2″ x 3 7/8″ or 14cm x 9.5cm
Layer 3 x 2 – Calyspo Coral – 3 1/2″ x 2″ or 9cm x 5cm
Layer 4 x 2 – Whisper White – 3 3/8″ x 1 7/8″ or 8.5cm x 4.5cm
Layer 5 – Calyspo Coral – 5 3/4″ x 3/4″ or 14.5cm x 2cm
Layer 6 – Whisper White – 5 5/8″ x 5/8″ or 14cm x 1.5cm

I adhered the DSP to the piece of Whisper White Cardstock & then to the Base Card – Calyspo Coral using Snail Adhesive.

Envelope & Inside…
After stamping my image onto Tissue Paper using Pear Pizzazz Ink, let dry & scrunched the tissue,  adhered it to a piece of Whisper White Cardstock using Anywhere Glue.  I adhered this piece to the 2 pieces of Calyspo Coral Cardstock before adhering to the Base Card.

??

I stamped my sentiment onto the piece of Whisper White Cardstock using Pear Pizzazz Ink and adhered to the long piece of Calyspo Coral prior to adhering to the card. 

I punched 3 flowers in Calyspo Coral Cardstock using the Boho Punch & adhered to the card.  Pearls were applied to the centre as well as to some of the images.

I tied a bow & adhered to the card.

Supplies –
Stamp Set – Just Believe, A Word for You
Ink – Pear Pizzazz
Cardstock – Calyspo Coral, Pear Pizzazz, Whisper White
DSP – In Colours
Punches – Boho
Ribbon – 3/8″ Ruffled – Lucky Limeade
Accessories – Anywhere Glue, Snail Adhesive, Pearls
Non-SU – Tissue Paper
Until next time Enjoy!

SC 013/11…

Crikey, can you believe it!!!!!  This is week 13 of our challenge – time does fly when you’re having fun.

This week, the challenge was brought to you by our own Gwen & boy, has she made it very easy for us  – NO 2nd part of the challenge!!!!!  Yep, you read right – NO 2nd part of the challenge!!!!  In other words, you have a free hand on what you create as long as you stick basically to the sketch!!!!!!
Now, my mind went into overdrive & had so many ideas, but this is the one I ended up going with, as when I first saw the sketch, a kid’s birthday card popped into my head.  This card can be used for boy/girl!!!!
To check out my 2nd card, pop back in later on in the week!

Base Card – Poppy Parade – 8 1/4″ x 5 7/8″ or 21cm x 15cm – Scored & folded in half landscape
Layer 1 – Whisper White – 4″ x 5 3/4″ or 10cm x 14.5cm
Layer 2 – DSP – 3 7/8″ x 5 5/8″ or 9.5cm x 14cm
Layer 3 – Poppy Parade – 4″ x 2 3/8″ or 10cm x 6cm
Layer 4 – DSP – 3 7/8″ x 2 1/4″ or 9.5cm x 5.5cm

I layered my DSP onto Whisper White Cardstock & then onto the Base Card – Poppy Parade, using Snail Adhesive.  I layered the smaller piece of DSP onto the piece of Poppy Parade Cardstock, then onto the middle of the Base Card with Snail Adhesive.

I punched a piece of Whisper White Cardstock with my Scallop Circle Punch & layered a piece of Wild Wasabi Cardstock onto it.  This piece had been punched with the 1 3/8″ Circle Punch.  I punched a So Saffron circle from my 1 1/4″ Circle Punch & adhered to the top of Wild Wasabi circle.
?

With Envelope…

?
With my Early Expresso Ink, I stamped the bottom of the cupcake, while the top was stamped using So Saffron Ink.  I punched both pieces with my Cupcake Builder Punch, stamped over the So Saffron top with Early Expresso Ink – this put the “chips” onto the “icing” & adhered this piece to the top of the cupcake bottom with Snail Adhesive.  I drew dots around the circle with my SU Marker – Early Expresso & adhered the whole cupcake to the So Saffron Circle with Su Dimensionals.

I stamped the greeting in Early Expresso Ink onto a scrap of Whisper White Cardstock, cut around it ensuring I allowed enough card at both ends of the greeting, one end to slide under the Scalloped Circle, while the other end, I snipped a “V” into it.  I then used my scissors to shape the pennant & adhered the left hand end to the card with Snail Adhesive.

For something a little different, I decided to have another cupcake for the inside, but I wanted it to pop up when opened.  For this, I cut a piece of Whisper White Cardstock 4″ x 5 3/4″ or 10cm x 14.5cm, measured the middle along the long side & marked with a pencil.  To get the bit to stand, I measured 1/8″ or 3mm either side of the halfway mark.  I then drew a line on both sides about 1 1/8″ or 2.5cm down, scored across the bottom to where both sides meet & cut along the lines to the score mark.
?

Inside – Pop Up Cupcake…

?
I again stamped my images using Early Expresso & So Saffron Inks onto Whisper White Cardstock, punched using my Cupcake Builder Punch & adhered to the piece with Snail Adhesive.  I punched the cherry from DSP with the same punch.  I inked my wording with my SU Marker – Poppy Parade & stamped in the middle. 

For the bottom half, I cut a strip of DSP, adhered to a piece of Early Expresso Cardstock, then to the Whisper White Cardstock, allowing a small edge of the White to show at the bottom.

All in all a very simple card but with a bit of a WOW, I think!!!!!  I would relly like to know what you think?

Supplies –
Stamp Set – Create a Cupcake, A Word for You
Ink – Early Expresso, So Saffron
Cardstock – Whisper White, Poppy Parade, Wild Wasabi
DSP – Just Add Cake
Punches – 1 3/8″ Circle, 1 1/4″ Circle, Scallop Circle, Cupcake Builder
Accessories – SU Dimensionals, Snail Adhesive, SU Markers – Early Expresso & Poppy Parade
Don’t forget to hop over to Sunny Challenges & Creations to check out what Gwen & Kris have created using the same sketch.  While there, create your own card, link it to your blog or online group.forum with Mr Linky.  Both Mr Linky & ourselves would really love to see your creation.  Who knows, you could be our next “Ray of Sunshine“.
Until next time, Enjoy!

SAH 170…

With the rain about today, I decided that I would sit & attempt a couple of challenges.  This one is from Stamp-a-Holics which I have done before.  It looked too easy not to attempt & upon seeing the sketch, though immediately of “Circle Circus”.  I love this set & can’t seem to get enough of it.  I’ve also used colours that are not me, but they just sort of jumped into my hands.

Now one of the conditions for this Sketch Challenge is – A card must be completed in 15 minutes or less.  Yep, I had 68 seconds left.  Boy, does the time fly when you are having fun.

Base Card – Whisper White – 5 7/8″ x 4 1/8″ or 15cm x 10.5cm – Score & Fold in half
Layer 1 – Old Olive – 5 3/4″ x 4″ or 14.5cm x 10cm – Cut from bottom about 1″.  This allows you to attach the Basic Black Scalloped Edge
Layer 2 – Basic Gray – 4 1/2″ x 1 1/2″ or 11.5cm x 4cm

I punch an edge along a scrap piece of Basic Black Cardstock & layered it along the bottom half of Old Olive Cardstock.  I adhered the other half of Old Olive across the top of the Basic Black.

I punched 3 Whisper White squares & stamped them randomly using different images & Olid Olive, Basic Gray & Basic Black Inks.  These were adhered to the Basic Gray Cardstock, ensuring that they were placed evenly.This was then adhered to the Olive Olive Cardstock.

I stamped the sentiment directly onto Old Olive Cardstock using Basic Black Marker.  I then drew a couple of scriggley lines under the sentiment using my Basic Black Marker.

I again stamped 2 images onto Whisper White Cardstock, one in Old Olive Ink & the other using Basic Gray Ink.  I punched these images using 2 punches & adhered to the card.

The whole card was then adhered to the Base Card – Whisper White.  I drew white dots in the middle of the scalloped edge to lift it a little using my Gel Pen.

Supplies –
Stamp Set – Circle Circus, A Word for You
Ink – Basic Gray, Old Olive, Basic Black
Cardstock – Whisper White, Basic Gray, Basic Black, Old Olive
Punches – 1 1/4″ Circle, 3/4″ Circle, Scallop Edge, 1 1/4″ Square
Accessories – Snail Glue, Gel Pen, SU Markers

As I said 68 seconds left.  A great male’s card.

Medallion…

As I have to make a couple of male birthday cards this month & not having any cards in my stash – haha – this is the prefect sketch to complete a couple of cards.

Gotta love how all the measurements are done for you –

Layer 1  – Cardbase cut at 5.5 x 8.5″, scored & folded
Layer 2 – 4 x 5.25″
Layer 3 – 4 x 1.75″

I’ve used Baja Breeze for my card base, scored & folded
Cut smaller piece of Early Expresso Cardstock
Cut DSP – Pear Pizzazz
Cut Very Vanilla Cardstock
Stamp image directly onto Very Vanilla using Early Expresso Ink
Using your Early Expresso SU Marker, colour in sentiment & stamp directly onto Very Vanilla
Adhere both pieces to the Early Expresso Cardstock
Adhere Ribbon – Pear Pizzazz across the join, tuck ends under & tie knot
Adhere Early Expresso Cardstock to base card – Baja Breeze

This is a great sketch for that 5 minute card.

Supplies –
Stamp Set – Mediallion, A Word for You
Inks – Early Expresso, Pear Pizzazz
Cardstock – Very Vanilla, Baja Breeze, Early Expresso
DSP – Pear Pizzazz
Ribbon – 1/2″ Stitched-Poly Pear Pizzazz
Accessories – Multipurpose Liquid Glue, Snail Glue, SU Markers
Until next time, Enjoy!