CCMC 162…

The jury is still out on this card, but thought I would use a stamp set which hasn’t been out of its box for some time, & give it a little bit of ink.
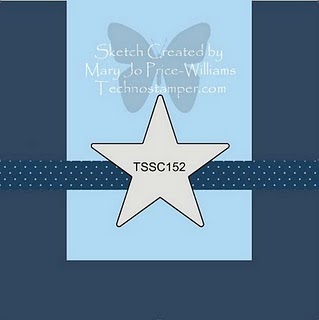
I’ve taken the sketch from Create with Connie & Mary which looked a great easy sketch until I blocked myself into a corner & out come the colour-coach.  I then re-did a couple of colours as I wasn’t too happy with the original take on it.  This is the first time I have done a sketch from here, but they are always have great sketches.
Base Card – Not Quite Navy – 5 7/8″ x 4 1/4″ or 15cm x 10.5cm – ie once it has been scored in half
Layer 1 – Crumb Cake – 5 3/4″ x 4″ or 14.5cm x 10cm
Layer 2 – DSP – 4″ x 1″ or 10cm x 2.5cm
Layer 3 – Ribbon
Layer 4 – Not Quite Navy – Large Circle
Layer 5 – Very Vanilla – Smaller Circle
I coloured my ribbon with Crumb Cake Re-Inker & set aside to dry.

?

Inside Card…

?

Using Crumb Cake Ink I stamped my image randomly onto the Crumb Cake Cardstock, adhered the DSP to the top of the Crumb Cake.  I wanted to make it look like bubbles coming up from the bottom of the ocean.  I made a mask of the Seahorse from scrap paper & cut it out.  I stamped the seahorse image onto Very Vanilla Cardstock using Garden Green Ink, I attached the mask over the top of the seahorse, using another image & Garden Green Ink, I stamped off twice before stamping over the mask.  I repeated again.  I then inked my image again using Not Quite Navy Ink & stamped over the top twice.
I cut my 2 circles using the Circles Die, adhered the Very Vanilla circle to the Not Quiet Navy Circle & then to the Cumb Cake Piece.  I then ran the ribbon across the middle where the 2 pieces met & tied a bow off-centre.  Using SU Dimensionals, I adhered the whole piece to the Base Card.
?
With Envelope…

?

I stamped 3 shell images onto Very Vanilla Cardstock using Baja Breeze & cut them out.  These were applied to the card as per the sketch with the back one being adhered direct to the card while the front 2 were adhered using SU Dimensionals – gotta love these SU Dimensionals.
I repeated my masking for the inside of my card, adhered the Very Vanilla straight to the base card.  The masking was again repeated for my envelope.
Supplies –
Stamp Set – Ocean Commotion, Circle Circus
Ink – baja Breeze, Garden Green, Not Quite Navy
Cardstock – Crumb Cake, Not Quite Navy, Very Vanilla
DSP – Elegant Soiree
Ribbon – 3/8 Taffeta – Whisper White
Dies – Circles #2
Accessories – Snail Glue, Bigshot, Re-Inker – Crumb Cake, SU Dimensionals
Until next time, Enjoy! 

TSSC 186…

Just as I was cleaning up my desk, which is usually a mess after my craft session, I suddenly had an urge to do another card using Black, Red & White.  Why?  Who knows, but create I did.  So to make it a little easier, I went in search of a sketch & as usual Mary-Jo to the rescue.  She always has great sketches!
Mine started off to be a male card, but after looking at the end result, it could either be male or female.  My apologies to Mary-Jo as I didn’t strictly keep to the sketch.
Base Card – Riding Hood Red – 5 7/8″ x 4 1/4″ or 15cm x 10.5cm
Layer 1 – Basic Black – 5 3/4″ x 4″ or 14.5cm x 10cm
Layer 2 – Very Vanilla – 5 5/8″ x 3 7/8″ or 14cm x 9.5cm
Layer 3 – DSP – 1 1/2″ x 3 7/8″ or 4cm x 9.5cm
?
Card Inside…

? I stamped 3 identical images onto Very Vanilla Cardstock using Basic Black Ink.  I punched 3 circles in Riding Hood Red & layered them over the top of the stamped images.  I adhered the DSP to the bottom of the Very Vanilla & run the whole lot through the Bigshot using Square Lattice Embossing Folder.  This was adhered to Basic Black Cardstock & then to the Base Card – Riding Hood Red.

I stamped 3 smaller identical images onto Very Vanilla Cardstock again in Basic Black, punched them out & adhered on top of the Riding Hood Red circles.

The greeting was inked using Basic Black Ink onto Very Vanilla Cardstock & punched with the Large Oval Punch.  I punched another large oval in Basic Black Cardstock, cut in half & adhered to the back of the Very Vanilla with just a small edge showing top & bottom.  This was adhered over the top of the DSP using SU Dimensionals.

Supplies –
Stamp Set – Circle Circus, Well Scripted
Ink – Basic Black
Cardstock – Very Vanilla, Riding Hood Red, Basic Black
DSP – Love Letter
Punches – 3/4″ Circle, 1″ Circle, Extra Large Oval
Embossing Folder – Square Lattice
Accessories – Snail Adhesive, Bigshot, SU Dimensionals
Until next time, Enjoy!

SAH 170…

With the rain about today, I decided that I would sit & attempt a couple of challenges.  This one is from Stamp-a-Holics which I have done before.  It looked too easy not to attempt & upon seeing the sketch, though immediately of “Circle Circus”.  I love this set & can’t seem to get enough of it.  I’ve also used colours that are not me, but they just sort of jumped into my hands.

Now one of the conditions for this Sketch Challenge is – A card must be completed in 15 minutes or less.  Yep, I had 68 seconds left.  Boy, does the time fly when you are having fun.

Base Card – Whisper White – 5 7/8″ x 4 1/8″ or 15cm x 10.5cm – Score & Fold in half
Layer 1 – Old Olive – 5 3/4″ x 4″ or 14.5cm x 10cm – Cut from bottom about 1″.  This allows you to attach the Basic Black Scalloped Edge
Layer 2 – Basic Gray – 4 1/2″ x 1 1/2″ or 11.5cm x 4cm

I punch an edge along a scrap piece of Basic Black Cardstock & layered it along the bottom half of Old Olive Cardstock.  I adhered the other half of Old Olive across the top of the Basic Black.

I punched 3 Whisper White squares & stamped them randomly using different images & Olid Olive, Basic Gray & Basic Black Inks.  These were adhered to the Basic Gray Cardstock, ensuring that they were placed evenly.This was then adhered to the Olive Olive Cardstock.

I stamped the sentiment directly onto Old Olive Cardstock using Basic Black Marker.  I then drew a couple of scriggley lines under the sentiment using my Basic Black Marker.

I again stamped 2 images onto Whisper White Cardstock, one in Old Olive Ink & the other using Basic Gray Ink.  I punched these images using 2 punches & adhered to the card.

The whole card was then adhered to the Base Card – Whisper White.  I drew white dots in the middle of the scalloped edge to lift it a little using my Gel Pen.

Supplies –
Stamp Set – Circle Circus, A Word for You
Ink – Basic Gray, Old Olive, Basic Black
Cardstock – Whisper White, Basic Gray, Basic Black, Old Olive
Punches – 1 1/4″ Circle, 3/4″ Circle, Scallop Edge, 1 1/4″ Square
Accessories – Snail Glue, Gel Pen, SU Markers

As I said 68 seconds left.  A great male’s card.

Circles, Circles…

…and more circles.

When I saw this challenge, I knew that I wanted to create a male card by using Circle Circus.  Then to top it off, I found some DSP that would match perfectly with the stamp set & sketch.  I will admit I am very happy with the way it turned out.  Got to love it when that happens!

Base Card – Baja Breeze Cardstock – Cut, score & fold
Layer 1 – Very Vanilla Cardstock – 5 5/8″ x 3 7/8″ or 14cm x 10cm
Layer 2 – DSP – 2 1/2″ x 3 7/8″ or 6,5cm x 10cm

Stamp sentiment bottom RHS of Very Vanilla Cardstock in Soft Suede Ink.  With my Bigshot, Embossing Folder – Perfect Polka Dots & the bottom half of Very Vanilla Cardstock, I run the Cardstock through the Bigshot.  I then asdhered the DSP to the top half of Very Vanilla and adhered to the base card.

Again with the Bigshot, I cut an oval in Soft Suede Cardstock using the Ovals Dies.  I also cut a smaller one in Very Vanilla.  I grabbed my stamp set, Soft Suede and Baja Breeze Inks and the Very Vanilla Oval and proceeded to stamp.  I adhered this oval to the Soft Suede Oval & then adhered to the card base.
All in all a very easy card, but none the less a very nice one!

Supplies –
Stamp Set – Circle Circus, Sincere Salutations
Inks – Baja Breeze, Soft Suede
Cardstock – Very Vanilla, Baja Breeze, Soft Suede
DSP – Elegant Soiree – Love this DSP
Bigshot Dies – Ovals
Embossing Folder – Perfect Polka Dots
Accessories – Snail Adhesive, Multipurpose Liquid Glue, Bigshot

Until next time, Enjoy!
 

Birthday…

Challenge # 1 –
I come across a Colour Challenge over at http://stampinwithstacey.blogspot.com/ which ask for the colours Real Red, Old Olive, Chocolate Chip & Certainly Celery to be used. 

Challenge # 2 –
Putting my thinking cap on, I then needed a layout, which brings me to the Sketch Challenge at http://technostamper.blogspot.com/  Mary Jo always has great challenges.
Seeing Masry Jo’s sketch, I knew I wanted to create a male’s card & the first stamp set which sprung to mind was “Circle Circus“.  An oldie, but a goodie.
Challenge # 3 –
Not to be outdone, my Yahoo Group is celebrating 100 challenges.  The theme being “CELEBRATING“.  The mind is full of options.
To complete my card, I embossed the Chocolate Chip Cardstock using the Bigshot & Perfect Polka Dots
For the middle of the card, I used the Technique – Faux Tiles.  To see how this technique is done, please look under Techniques on the RHS of the bar.
I then stamped my images over the top of the technique.  I adhered this piece to Real Red.  Adhering Grosgrain 5/8″ Ribbon – Certainly Celery across the middle, I attached the whole lot to Old Olive Cardstock.
I stamped the greeting from the stamp set Well Scripted, punched it out using the Extra Large Oval punch & wiped the edge through Chocolate Chip ink.  I then adhered this to the middle of the rribbon using SU Dimensionals.
Supplies –
Stamp Set – Circle Circus, Well Scripted
Ink – Real Red, Chocolate Chip, Certainly Celery, Old Olive
Cardstock – Whisper White, Real Red, Old Olive, Chocolate Chip
Punches – Extra-Large Oval
Embossing Folder – Perfect Polka Dots
Accessories – Mutlipurpose Liquid Glue, Grosgrain 5/8″ Ribbon – Certainly Celery, Bigshot, Dimensionals
Until next time, Enjoy!