2 Easy Scrapbook Pages | The Scrap Room | Simple Stories

G’Day Crafty Friends,

I found a couple of old blank pages that I thought would be perfect to include in the album I’ve been creating.  Sometimes the simplest scrapbook pages are the most enjoyable to create. This easy 6 x 8 scrap page came together using a mix of scraps from the Simple Vintage Timeless Harmony Collection by Simple Stories, along with a few die cuts, Journal Bits and Brads for added interest.

I love using up those smaller pieces of patterned paper that are too pretty to throw away! Layering the scraps together creates a lovely patchwork-style background without needing to spend lots of time measuring and cutting.

Mix, Match & Layer

For this page, I kept things very relaxed.  Scraps of patterned paper were layered together with die cuts, journal pieces and brads, giving the page lots of little details to discover.

Some of the embellishments have been tucked inside the pockets, while others have been added to the outside of the pockets.  This creates different layers and adds a little dimension without making the page feel too busy.

Add Your Photos Your Way

One of my favourite things about this style of page is that the photos can be arranged however you wish.  You can move them around, swap them out or add as many or as few as you like.

Don’t be afraid to leave some spaces for journaling or embellishments, either.  A pocket doesn’t always need to hold a photograph — a little journal card, patterned paper or decorative piece can be just as effective.

Keep It Simple

There really is no right or wrong way to create this type of page.  Cut, layer, tuck and embellish until you’re happy with the result.

Supplies – The Scrap Room

Want to create your own Simple Vintage Timeless Harmony pages?  Shop the collection and all your scrapbook essentials at The Scrap Room Shop.

I hope you have enjoyed seeing all these pages come together as much as I’ve enjoyed creating them.  Over the next couple of weeks, I hope to do a video of the finished album & post it on my YouTube Channel.

Until next time – stay inspired & keep creating!

Vicky
Inspiring Heartfelt Creations, One Beautiful Layer at a Time

A Halloween Gift Box | Polkadoodles Crafts

G’Day Crafty Friends,

It’s time to get spooky with a little Halloween fun for Digi Choosday !

Our theme this week is all about Halloween BUT Something for a Party – NOT a card!  I am just loving the themes for our Digi Choosdays – they are so much fun!

Halloween is the perfect excuse to get crafty and create something a little spooky — and today I’m sharing a terror-ific Halloween gift box that’s just the thing for filling with lollies, chocolates, treats and other spooky goodies!

A Little Bit Spooky… A Lot of Fun!

This little Halloween gift box is the perfect size for filling with your favourite treats.  Whether you’re making them for Halloween parties, trick-or-treaters, teachers, friends or simply as a fun surprise for someone special, these boxes are sure to bring a smile.

And of course, no Halloween project would be complete without a few cute and creepy characters!

Coloured with Copic Markers

For the focal image, I again used the Dracula Boo Digi Stamp  and coloured it with my Copic markers prior to fussy cutting part of the image.  Digital stamps are such a fun way to add a personalised touch to your projects — you can resize them to suit your project and print as many as you need.

Of course, the Halloween Trick or Treat Printable Papers Bundle 2 are so bright that they match perfectly with little Drac!

Fill It With Treats!

Once your box is assembled, all that’s left to do is fill it with goodies –

  • Mini chocolates
  • Lollies
  • Halloween-themed treats
  • Small toys or novelty items
  • A little handmade note or Halloween tag

You could even make a whole collection of these spooky boxes, using different colours and digital stamps to create a fun assortment.

Products Used

Ready to get crafty?  Head over to the shop to grab today’s featured products and have a peek at all the other lovely digi stamps, printable papers, sentiments and crafty goodies available — there’s plenty to inspire your next creative project!

I hope this Halloween Terror-ific Gift Box inspires you to get out your markers, grab some cardstock and create something spooky and sweet!

Don’t forget to stop by the blog for more inspiration.  We’d love to see what you create, so if you make something using any of Nikki’s product, be sure to share it with us.

Thanks so much for stopping by today.  I hope today’s project inspires you to dig through your stash to create a card of your own.

Until next time – stay inspired & keep creating!

Vicky
Inspiring Heartfelt Creations, One Beautiful Layer at a Time

Violet Dreams Card Pack Collection | The Scrap Room

G’Day Crafty Friends,

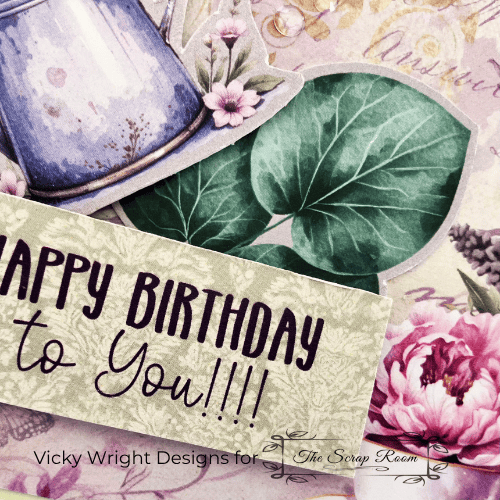
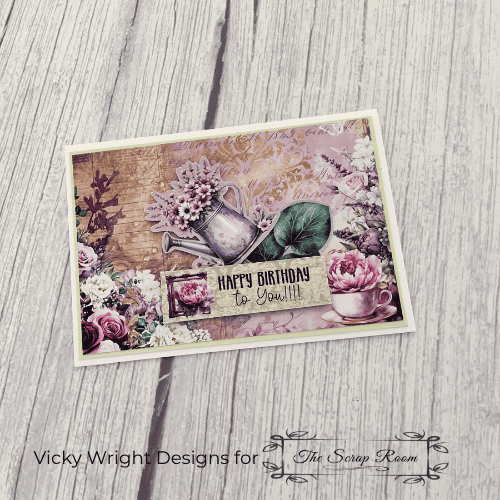
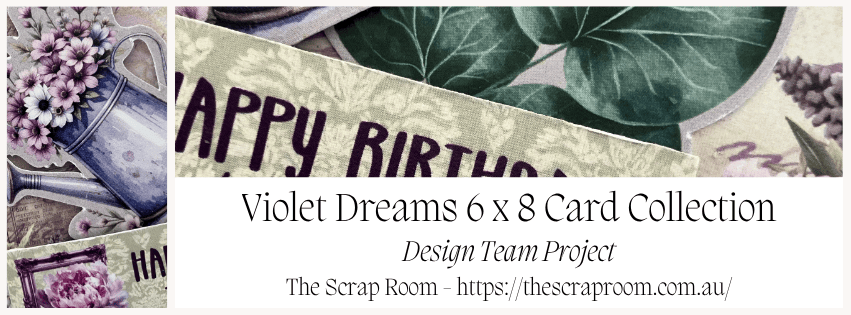
Today I’m sharing a card I created using the gorgeous Violet Dreams Card Pack Collection by 3Quarter Designs.

I actually made this card a few weeks ago but somehow forgot to share it with you!  Better late than never, though, because this is definitely a card worth sharing.

If you love purple, then I think you’re going to love this one.  The beautiful papers from the Violet Dreams Card Pack Collection do most of the work, with all those pretty shades of purple and soft, dreamy details.

I’ve added a light green panel to the card to pick up the soft greens featured in the patterned paper.  I also used some of the die cuts included in the pack, layering them onto the card to add extra interest and dimension.

And, of course, I couldn’t resist adding a little bling to finish everything off!  It’s amazing how a few sparkly touches can bring a card together.

I’m really happy with how this one turned out — pretty, purple and just a little bit sparkly!

Supplies – The Scrap Room

Shop the collection and all your scrapbook essentials at The Scrap Room Shop.

If purple is your colour, the Violet Dreams Card Pack Collection is definitely one to add to your collection.

Until next time – stay inspired & keep creating!

Vicky
Inspiring Heartfelt Creations, One Beautiful Layer at a Time

School Days Easy Fun Fold | Paper Rose Studio

G’Day Crafty Friends,

There’s something so special about the School Days Collection by Paper Rose Studio — the bright colours, playful patterns and school-themed elements make it perfect for cards celebrating teachers, students, school milestones and all those wonderful back-to-school memories.

Today I’m sharing an easy fun fold card that lets the gorgeous patterned paper do most of the work.  Add a few coordinating die cuts and you have a fun, dimensional card that looks impressive without being difficult to make!

The book-style fold is one of my favourites because it gives the card a little extra interest when it opens, while still being quick enough to make when you need a card in a hurry.  I actually took the inspiration from a scrapbook layout lol.

Card Measurements

Basic White Smooth –
  • Card Base  – 1 x 4 1/8″ x 5 7/8″ /
  • A – 1 x 3 3/4″ x 5 1/2″ /
  • B – 1 x 3 1/2″ x 4″ / 8.8cm x 10.1cm – score 1/2″ / 1.2cm down 3 1/2″ / 8.8cm side
  • C – 1 x 3 1/2″ x 3″ / 8.8cm x 7.6cm – score 1/2″ / 1.2cm down 3 1/2″ side
  • D – 1 x 2 1/2″ x 2 1/2″ /
Pacific Smooth Cardstock –
  • E – 1 x  3 7/8″ x 5 5/8″ /
  • F – 2 x 3 7/8″ x 3/4″ /
  • G – 1 x 2 7/8″ x 2 7/8″ /
  • H – 1 x 2 7/8″ x 2 7/8″ /
Pattern Paper –
  • I – 2 x 5 /8″ x 3 3/4″ /
  • J – 1 x 2 3/4″ x 3 3/4″ /
  • K – 1 x 2 3/4″ x 2 3/4″

How to Make the Fun Fold Card

  1. Adhere A – Basic White Smooth to E – Pacific Smooth leaving a narrow border of colour showing around all sides
  2. Adhere both pieces of I – Pattern Paper to both pieces of F – Pacific Smooth leaving a narrow border of colour showing around all sides
  3. Adhere 1st panel of Pacific Smooth panel to top of Basic White Smooth card matching sides & the 2nd panel of Pacific Smooth to bottom of Basic White Smooth card matching sides
  4. Burnish & fold along scored line of B & C – Basic White Smooth with Bone Folder
  5. Adhere J – Pattern Paper to F – Pacific Smooth panel leaving a narrow border showing around all sides
  6. Adhere Pacific Smooth panel to B – Basic White Smooth leaving a narrow border showing around all sides
  7. Apply Adhesive to inside of scored section prior to adhering to back of left side of Pacific Smooth layer ensuring sides are straight & even
  8. Repeat Steps 5 to 7 but this time adhering K – Pattern Paper to H – Pacific Smooth & then to C – Basic White Smooth & adhering to right side of Pacific Smooth so that it overlaps the left panel
  9. Adhere D – Basic White Smooth to top of right panel covering part of the Pattern Paper
  10. Arrange & adhere School Days Embossed Die Cuts of choice to panel with Foam Tape & Adhesive
  11. Stamp or adhere sentiment to inside of card or adhere School Days Layered Embossed Die Cuts to inside
  12. Optional – Complete card by randomly adhering Embellishment to front panel

Let’ Shop –

Ready to Create Your Own School Days Projects?

Bring a little school-day fun to your next crafting session with the School Days Collection! With coordinating patterned papers, die cuts and fun school-themed elements, you’ll have everything you need to create cards and projects that are full of colour, character and creativity.

Shop the School Days Collection and all the coordinating products.

I hope you have fun creating your own School Days fun-fold card.  I’d love to see what you make — especially which patterned paper and die cuts you choose!

Until next time – stay inspired & keep creating!

Vicky
Inspiring Heartfelt Creations, One Beautiful Layer at a Time
6 x 8 Scrapbook Page | The Scrap Room

G’Day Crafty Friends,

Another page created with the lovely and gorgeous Simple Vintage Timeless Harmony Collection by Simple Stories.

This page will hold three photos, with plenty of room to let the memories shine.  I’ve added some of the sweet Journal Bits, along with tags from the 6 x 8 Paper Pad and a few of the gorgeous Chipboard Pieces to bring everything together.

I just love how these collections make it so easy to create a page that feels beautifully layered and full of little details. The vintage colours, patterns and embellishments work so perfectly together, creating that timeless harmony that makes this collection such a joy to scrapbook with.

I’m looking forward to adding the three photos and seeing the page come to life!

Supplies – The Scrap Room

Want to create your own Timeless Harmony pages?  Shop the collection and all your scrapbook essentials at The Scrap Room Shop.

Until next time – stay inspired & keep creating!

Vicky
Inspiring Heartfelt Creations, One Beautiful Layer at a Time