??????????Our card last Friday at
Crafty Creations was to do the
Technique – Basic Masking. I choice to go with
Chocolate Chip, Certainly Celery & Pink Pirouette– not colours I would normally put together, but I am really loving the final result. Mind you, when I started the card, I had no idea where I was going, only knowing that I wanted to use the stamps I had sitting on my desk.
????
 |
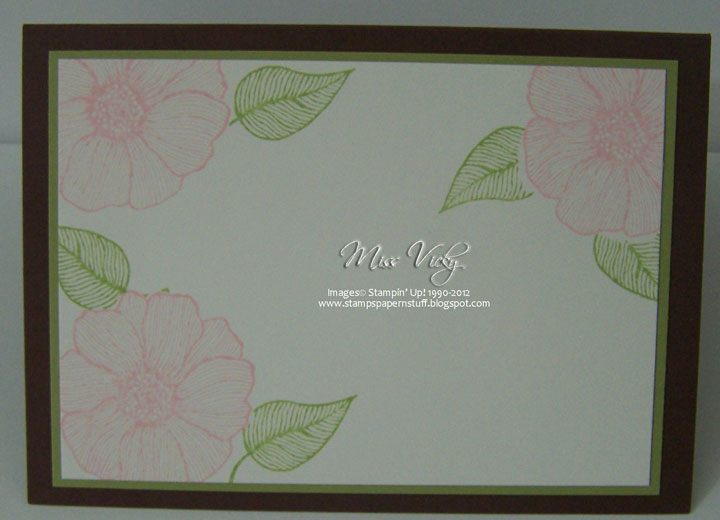
| Inside Card…. |
I am also finding myself going back to the softer colours which I think are sadly being neglected – by me anyhow!
?
Measurements –
Base Card – Chocolate Chip – 8 1/4″ x 5 7/8″ or 21cm x 15cm
Layer 1 – Certainly Celery – 5 3/8″ x 3 5/8″ or 14cm x 9.5cm
Layer 2 – DSP – 5 1/8″ x 3 3/8″ or 13cm x 8.5cm
Layer 3 – Pink Pirouette – 3″ x 2″ or 8cm x 5cm
Layer 4 – Certainly Celery – 3″ x 2 3/8″ or 7.5cm x 6cm
Layer 5 – Whisper White – 2 7/8″ x 2 1/4″ or 7cm x 5.5cm
Supplies –
Stamp Set – Summer Solstice, En Francis, Short & Sweet
Ink – Chocolate Chip, Pink Pirouette, Certainly Celery
Cardstock – Whisper White, Chocoate Chip, Pink Pirouette, Certainly Celery, Glossy
DSP – Neutrals Designer Series Paper
Ribbon – 5/8″ Satin – Certainly Celery
Accessories – Snail Adhesive, 2-Way Glue Pen, Dazzling Diamonds, Stampin’ Dimensionals, Rhinestones, Sponge, Dotto, Mni-Glue Dots
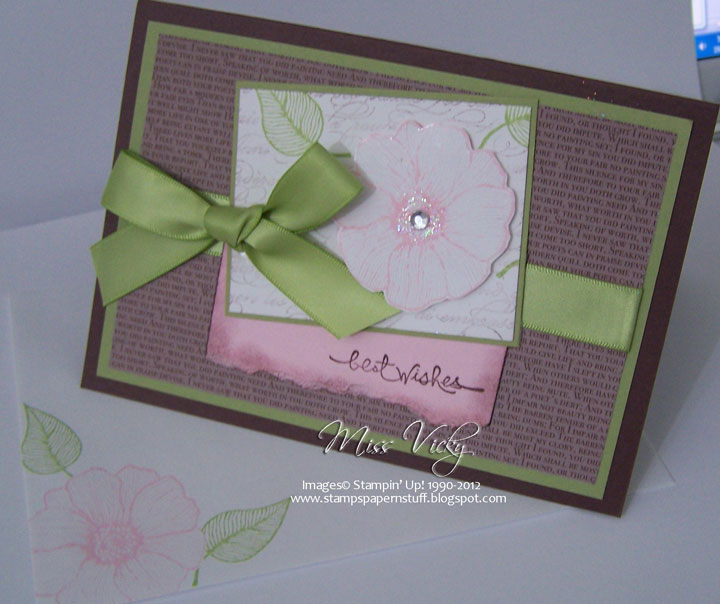
I adhered a piece of Ribbon across the middle of the DSP, tucked ends under, adhered to the piece of Certainly Celery & finally to the Base Card – Chocolate Chip, all with Snail Adhesive.
The piece of Pink Pirouette Cardstock was torn along the bottom, sponged across the tear & around the edges & adheredd over the top of the Ribbon using Snail Adhesive.
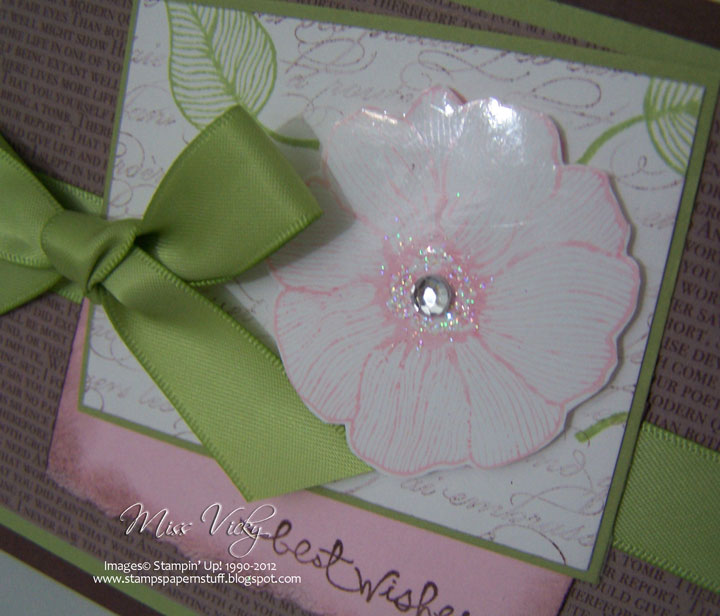
I stamped my flower image onto the piece of Whisper White Cardstock with Pink Pirouette Ink, stamped again onto a scrap piece of paper, cut it out & used this one piece for my Mask. While the stamp was inked in Pink Pirouette, I again stamped onto a scrap piece of Glossy Cardstock, cut out & set aside. This was by accident as I didn’t realise it was glossy until I was cutting it out, but decided to leave it the way it was.
I stamped the leaf images around the flower & created 2 Masks for the leaves.
After applying Dotto to the back of my Masks, I adhered them over the matching images prior to inking my background stamp in Chocolate Chip, stamping off twice & then stamping onto the piece of Whisper White Cardstock & over the masked images.
This piece was adhered to the piece of Certainly Celery & finally to the Base Card. I adhered the Glossy image to the top of the stamped image with Stampin’ Dimensionals, added some Dazzling Diamonds to the middle with my 2-Way Glue Pen & popped a Rhinestone in the middle.
I tied a bow with the Ribbon & adhered to the card with a Mini Glue Dot. The sentiment was stamped onto the bottom of the piece of Pink Pirouette in Chocolate Chip Ink.
Until next time, have a great day!


 My card today has been created for a swap that I was asked to join last month at Soul Scrappers. I’ve been a member of this group for a few years now & are a lovely bunch of ladies. Great place to see so many wonderful photos, ideas, challenges & scrapbook pages.