…. with new items from the upcoming “Sale-A-Bration“!
My card today is one I created for “Try Stamping on Tuesday“. Along with the sketch, we could use Polka Dots if we wanted. For me it was the perfect chance to create a birthday for my niece next week.
It was the perfect chance to use some of the gorgeous stuff from SAB! I must say I love, love the Embossing Folder AND the DSP. I don’t think I will get enough of these 2 items.
When I first saw this stamp set in the current “Occasions Catalogue”, I immediately thought of birthdays, not Christmas! Mind you, I did use it for some of my Christmas Cards, but I can see myself getting a lot of use out of throughout the year for birthday cards.
… was the stamp set we used in our Technique Class for April. The Technique we did was “Ghosting/VersaMark Resist“. What a fun class this turned out to be with lots of fun, not to mention different backgrounds.
As normal in this class we create a card using the Technique but with a different fold. Our fold for this class was the “Shadow Box“. If you haven’t had a go at this fun fold, then have a go as it is super easy & lots of fun.
We have also been using lots of new stamps from the current Seasonal Catalogue & in this class we showcased “By the Tide“.
Supplies – Stamp Set – By the Tide – 129120, Create a Cupcake – 121982 Ink – VersaMark – 102283, Midnight Muse – 126860, Crumb Cake – 126975, Marina Mist – 126962, Bashful Blue – 126961 Cardstock – Bashful Blue – 106565, Whisper White – 106549, Soft Suede – 119982 Framelits – Ovals Collections – 129381 Accessories – Snail Adhesive – 104332, Sticky Strip – 104294, Sponge – 101610
Shop Online Here to purchase your own supplies to create your card
Pop on back in a couple of days & I will show you the 2nd card we created using the same Stamp Set & Technique.
I would like to take this opportunity to wish all the mums out there a very “Happy Mother’s Day“! I hope you have all been spoilt with lots of chocolates, flowers & brekkie in bed.
This week’s challenge at Sunny Challenges & Creations has been given to us by Kris. As well as the sketch, we have to create a card, 3-D project or scrapbook page for kids!
How easy can it be? Well, not so easy I found out!
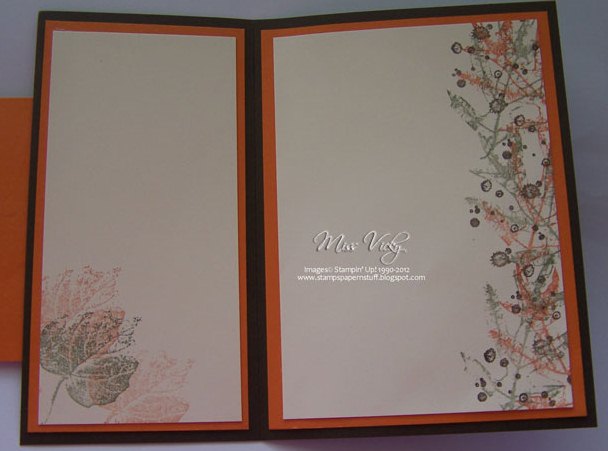
Inside Card….
Why is it that are there easiest are sometimes the hardiest. Maybe I was thinking too much into it, who knows. I think I got there in the end though, as I am fairly happy with the final result. ??The card also fits the challenge over at Latenight Stampers – saying goodbye to our Retiring Colours. For both challenges I’ve used “Pretty in Pink“. This is one colour I will be sad to see “retire”, but will gladly welcome the new colours.
What little girl doesn’t love “Pink“! I even managed to sneak some bling onto it too. Along with the Pink Icing, I think it is the perfect card for a little girl!
Today, we have no print out for the tutorial – Google is playing up, but the tutorial is below for you, just in a different format.
Supplies –
Stamp SetCreate a Cupcake – 121982
InkChocolate Chip – 126979
CardstockWhisper White – 106549, Pretty in Pink – 106568, So Saffron – 108611,
1 x Whisper White Cardstock11 ¾” x 41/8” or 29cm x 10.5cm
1 x DSP – So Saffron1 ¾” x 4 1/8” or 4.5cm x 10.5cm
1 x Whisper White Cardstock1 5/8” x 4 1/8” or 4cm x 10.5cm
1 x DSP – So Saffron3 ¼” x 3” or 8.5cm x 8cm
1 x Whisper White Cardstock3 1/8” x 2 7/8” or 8cm x 7.5cm
1 x Whisper White Cardstock1 ½” x 5 7/8” or 4cm x 15cm
1 x DSP – Pretty in Pink1 3/8” x 5 7/8” or 3.5cm x 15cm
Scraps Cardstock So Saffron, Pretty in Pink & Regal Rose
Instructions –
1.Run 1 5/8” x 4 1/8” or 4cm x 10.5cm & 3 1/8” x 2 7/8” or 8cm x 7.5cm Whisper White Cardstocks through Big Shotusing Perfect Polka Dots Embossing Folder
2.Adhere 1 5/8” x 4 1/8” or 4cm x 10.5cmembossed Whisper White to 1 ¾” x 4 1/8” or 4.5cm x 10.5cmSo Saffron DSPprior to adhering to Base Card – Whisper White
3.Adhere 1 3/8” x 5 7/8” or 3.5cm x 15cm DSP – Pretty in Pink to 1 ½” x 5 7/8” or 4cm x 15cm Whisper Whiteprior to adhering to Base Card – Whisper White
4.Adhere 3 1/8” x 2 7/8” or 8cm x 7.5cm embossed Whisper white Cardstock to 3 ¼” x 3” or 8.5cm x 8cm DSP – So Saffron prior to adhering to Base Card – Whisper White with Stampin’ Dimensionals
5.Punch 4 cupcake bottoms from scrap So Saffron Cardstock prior to running through Big Shot using Woodgrain EF
6.Space cupcake bottoms to square embossed Whisper White prior to adhering with Multipurpose Liquid Glue
7.Punch 4 cupcake tops from scrap Pretty in Pink Cardstock prior to running through Big Shot using Elegant Lines EF
8.Adhere to cupcake bottoms with Stampin’ Dimensionals
9.Punch 4 small flowers from scrap Rose Red Cardstock with small Flower from Itty Bitty Punch Pack
10.Adhere small Rhinestone to centre of each flower prior to adhering to top of cake with Multipurpose Liquid Glue
11.Stamp greeting/sentiment to direct to Pretty in Pink DSP with Chocolate Chip Ink
For our 2nd card in our Technique Class – “Faux Mother of Pearl“, I wanted to show the ladies that you could use this technique to create a male’s card. The Stamp Set – French Foliage is one of my favourite & find myself turning to this set time & time again to create all sorts of projects.
Along with this technique, we did a little sponging using our Brayer & Sponges, as well the Technique – Rock & Roll. What fun!!!!!
?
Close Up of Front…
Inside…
Don’t forget to check back in a coupl eof days & I will show you the card we created at Crafty Creations last Friday arvo.
Crikey, can you believe it!!!!! This is week 13 of our challenge – time does fly when you’re having fun.
This week, the challenge was brought to you by our own Gwen & boy, has she made it very easy for us – NO 2nd part of the challenge!!!!! Yep, you read right – NO 2nd part of the challenge!!!! In other words, you have a free hand on what you create as long as you stick basically to the sketch!!!!!!
Now, my mind went into overdrive & had so many ideas, but this is the one I ended up going with, as when I first saw the sketch, a kid’s birthday card popped into my head. This card can be used for boy/girl!!!!
To check out my 2nd card, pop back in later on in the week!
Base Card – Poppy Parade – 8 1/4″ x 5 7/8″ or 21cm x 15cm – Scored & folded in half landscape Layer 1 – Whisper White – 4″ x 5 3/4″ or 10cm x 14.5cm Layer 2 – DSP – 3 7/8″ x 5 5/8″ or 9.5cm x 14cm Layer 3 – Poppy Parade – 4″ x 2 3/8″ or 10cm x 6cm Layer 4 – DSP – 3 7/8″ x 2 1/4″ or 9.5cm x 5.5cm
I layered my DSP onto Whisper White Cardstock & then onto the Base Card – Poppy Parade, using Snail Adhesive. I layered the smaller piece of DSP onto the piece of Poppy Parade Cardstock, then onto the middle of the Base Card with Snail Adhesive.
I punched a piece of Whisper White Cardstock with my Scallop Circle Punch & layered a piece of Wild Wasabi Cardstock onto it. This piece had been punched with the 1 3/8″ Circle Punch. I punched a So Saffron circle from my 1 1/4″ Circle Punch & adhered to the top of Wild Wasabi circle. ?
With Envelope…
? With my Early Expresso Ink, I stamped the bottom of the cupcake, while the top was stamped using So Saffron Ink. I punched both pieces with my Cupcake Builder Punch, stamped over the So Saffron top with Early Expresso Ink – this put the “chips” onto the “icing” & adhered this piece to the top of the cupcake bottom with Snail Adhesive. I drew dots around the circle with my SU Marker – Early Expresso & adhered the whole cupcake to the So Saffron Circle with Su Dimensionals.
I stamped the greeting in Early Expresso Ink onto a scrap of Whisper White Cardstock, cut around it ensuring I allowed enough card at both ends of the greeting, one end to slide under the Scalloped Circle, while the other end, I snipped a “V” into it. I then used my scissors to shape the pennant & adhered the left hand end to the card with Snail Adhesive.
For something a little different, I decided to have another cupcake for the inside, but I wanted it to pop up when opened. For this, I cut a piece of Whisper White Cardstock 4″ x 5 3/4″ or 10cm x 14.5cm, measured the middle along the long side & marked with a pencil. To get the bit to stand, I measured 1/8″ or 3mm either side of the halfway mark. I then drew a line on both sides about 1 1/8″ or 2.5cm down, scored across the bottom to where both sides meet & cut along the lines to the score mark. ?
Inside – Pop Up Cupcake…
? I again stamped my images using Early Expresso & So Saffron Inks onto Whisper White Cardstock, punched using my Cupcake Builder Punch & adhered to the piece with Snail Adhesive. I punched the cherry from DSP with the same punch. I inked my wording with my SU Marker – Poppy Parade & stamped in the middle.
For the bottom half, I cut a strip of DSP, adhered to a piece of Early Expresso Cardstock, then to the Whisper White Cardstock, allowing a small edge of the White to show at the bottom.
All in all a very simple card but with a bit of a WOW, I think!!!!! I would relly like to know what you think?
Accessories – SU Dimensionals, Snail Adhesive, SU Markers – Early Expresso & Poppy Parade
Don’t forget to hop over to Sunny Challenges & Creations to check out what Gwen & Kris have created using the same sketch. While there, create your own card, link it to your blog or online group.forum with Mr Linky. Both Mr Linky & ourselves would really love to see your creation. Who knows, you could be our next “Ray of Sunshine“.
First up I must aplogise for not having the measurements for you in this post, but if anyone is wanting them, please email me. I really have to think what I actually used here….
?
I did this card sometime ago – early September to be exact & did make it with a little boy in mind, but ended up sending it off to my uncle. He turned 81!!! He is always stirring me, so I thought this would be a great way to get one up on him….. He thought it fantastic, but the best part, the great-grandkids loved it!!!!!!
After adhering the base card together using Wild Wasabi & So Saffron Cardstocks, I adhered DSP onto Early Expresso then onto the So Saffron. This formed the front of the card.
Using my Scallop Circle Punch, I punched a circle with Early Expresso, adhered a circle of Wild Wasabi Cardstock to the top which had been punched using the 1 1/4″ Circle Punch. I punched another piece of Cardstock in Whisper White with the 1 3/8″ Circle Punch & adhered to the top of the Wild Wasabi circle.
?
Envelope…
?I stamped my image onto Whisper White Cardstock using Early Expresso Ink,punched the image with the new Petite Pennants Builder Punch & adhered to the circle with Snail Adhesive. I stamped the top onto Whisper White using So Saffron Ink, cut it out, dotted some dots using my SU Marker – Early Expresso, placed white gel dots around the scallop with my Gel Pen & adhered to the top of the cone with SU Dimensionals. The whole scallop circle was adhered to the card with SU Dimensionals. For my greeting, I stamped onto Whisper White Cardstock in Early Expresso Ink, punched it out with the Large Oval Punch & adhered to a piece of Baja Breeze which had been punched with the Scallop Oval Punch. I again placed white gel dots around the scallop with my Gel Pen & adhered to the bottom of the card with SU Dimensionals.
As I wanted the card to be flat for posting, instead of gluing all sides together, I left one side open & placed 3 SU Dimensionals to the inside of the card.
Supplies –
Stamp Set – Create a Cupcake, Pennant Parade
Ink – Early Expresso, So Saffron
Cardstock – Whisper White, So Saffron, Baja Breeze, Wild Wasabi