Ornate Garden

G’Day Stampers,

Today’s card is one that we created in our Friday’s class a couple of weeks ago.

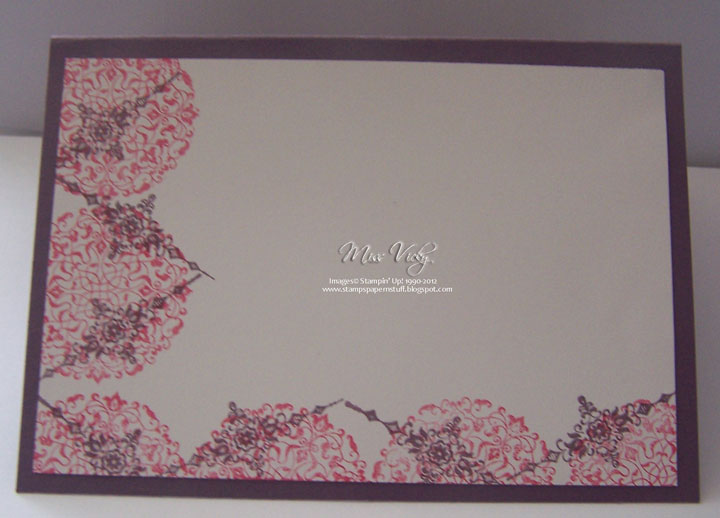
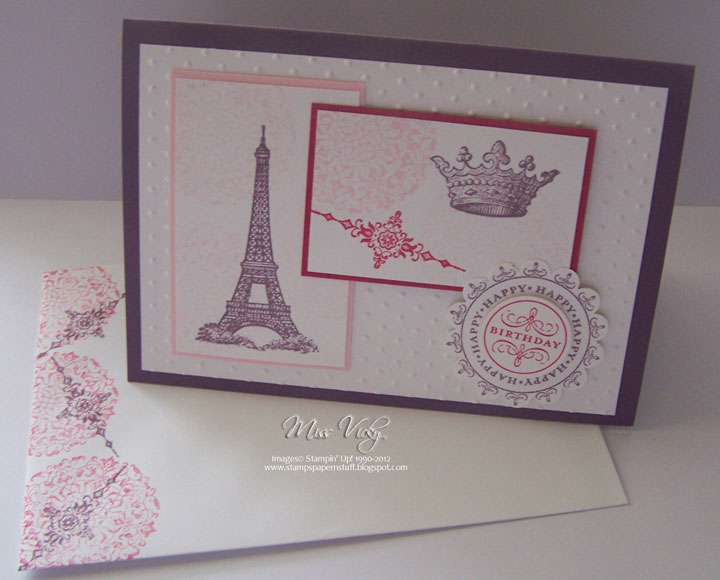
I’m not sure about you but I love the Ornate Style Stamp Set. It is perfect to practice your colouring whether it is with the Stampin’ Blends, Watercolour Pencils or the Stampin’ Blends. Of course you have to have the matching Ornate Layers Dies too!!!!!

To create your own card, all you have to do is click on the link below to download the tutorial which inlcudes the Instructions, List of Products plus all the Measurements.

820. It’s Your Day – Ornate Style Bundle

Have you subscribed to our Stamp & Card Club? September is now open. Tag Buffet Stamp Set will be the star of the club with lots of additional ideas & tutorials shared throughout the month.

Our Scrappin’ On the GO! September Class is now open. September is all about the lovely returning Christmas Gleaming Variety Bundle. If you love to scrapbook, you will want to join us for September as we have lots of lovely bonus pages to share with you throughout the month.

By using the September Host Code QZ97UAX at the bottom of your Shopping Cart, I am able to spoil with –

  • A special Handmade Card created just for you each month when shopping through me!
  • A 4” x 6” pack of DSP for orders over $35
  • DSP Card Kit for orders over $75
  • All the above for orders over $100
  • Go into the monthly draw for a special prize but shhhhhhhhh it’s a surprise!

~~~~~~~~~~

~~~~~~~~~~~~

Stamp, Ink, Paper Classroom – Classes for Demos

Scrappin’ On the GO! – Monthly subscription classes

Stamp & Card Club – We’re playing with the fun Tag Buffet Stamp Set

Surprise Kits in the Mail – Lots of fun each month with a mystery card kit

~~~~~~~~~~~~

Please feel to contact me if you have any questions.

Happy Stamping!

Vicky

Cupboard….

… Stampin’ Up! style.
 
This is another card I cased from Pinterest.  Thank you Michelle for your inspiration.  The ladies at Crafty Creations loved it!  Mind you it is now quiet some time we created it!

This card makes for heaps of possibilities with some of the ladies creating the card aimed at babies, kids & in general.  It would perfect for the teenager too!
  

Supplies –

Stamp Set            Happiest Birthday Wishes (Retired)
Ink                           Pretty in Pink (Retired), Crumb Cake – 126975
Cardstock             Very Vanilla – 106550, Chocolate Chip – 108599
Ribbon                   Natural Trim – 129287, Pretty in Pink (Retired)
Embossing Folder Fancy Fan – 127751
Punches                 Decorative Label – 120907
Accessories           Big Shot – 113439, Snail Adhesive – 104332, SU Sponge – 101610, Pearls – 119247

Front – 
 
 Cupboards Closed – 
Tutorial to create your Cupboard
 
  •  To order Stampin’ Up! products online, please Shop Here
  • Want to join my family, and be a part of a group that loves to stamp together, Join Here
  • To check out available classes or to attend any of the classes, please Click Here, click on the “Classes/Workshop” Page or email me vickiawright@bigpond.com
Until next time, Happy Stampin’
 Vicky

066/12

Our challenge over at Sunny Challenges & Creations has been given to us by Gwen.  Along with the sketch, we had to use the colour of Perfect Plum.  I must admit I haven’t used this colour for quiet some time, but alway love the end result when I do.

Measurements –
Base Card – Perfect Plum – 8 1/4 x 4 1/8″ or 21cm x 15cm
Layer 2 – Whisper White – 5 3/4″ x 3 7/8″ or 14cm x 9.5cm
Layer 1 – Pink Pirouette – 3 1/4″ x 2″ or 8.5cm x 5cm
Layer 2 – Whisper White – 3 1/8″ x 1 7/8″ or 8cm x 4.5cm
Layer 3 – Rose Red – 3″ x 1 7/8″ or 7.5cm x 5cm

Supplies –
Stamp Set – Artistic Etchings, Happiest Birthday Wishes
Ink – Rose Red, Perfect Plum, Pink Pirouette
Cardstock – Perfect Plum, Rose Red, Whisper White, Pink Pirouette
Embossing Folder – Perfect Polka Dots
Accessories – Big Shot, Scallop Circle Punch, 1″ Circle Punch, Stampin’ Dimensionals, Tombow Multipurpose Glue, Snail Adhesive

I run my large piece of Whisper White Cardstock through the Big Shot using Perfect Polka Dots Embossing Folder.  I adhered this to the Base Card – Perfect Plum with Snail Adhesive.

I inked my image in Pink Pirouette Ink, stamped off once & then onto the piece of Whisper White Cardstock.  I repeated this twice before stamping my main image over the top with Perfect Plum Ink.  This piece was adhered to a piece of Pink Pirouette prior to adhering to the Base Card with Tombow Multipurpose Glue.

The middle section was stamped onto Whisper White Cardstock with Pink Pirouette Ink.  I stamped off once prior to stamping one image, while the other was direct to paper.  I then inked the crown with Perfect Plum, stamped direct to paper while the 3rd image I used Rose Red.  This piece was adhered to a layer of Rose Red Cardstock & finally to the Base Card.  Part of the section was adhered  with Snail Adhesive while the other part was adhered with a couple of Stampin’ Dimensionals.

The greeting was stamped twice onto a scap of Whisper White Cardstock, once in Perfect Plum Ink, punched out with the Scallop Circle Punch & the 2nd image in Rose Red & the middle punched with the 1″ Circle Punch.  The Rose Red image was then adhered to the middle of the Perfect Plum image with a Stampin’ Dimensional prior to adhering to the card.  Again, I used Snail Adhesive for the top part, while the bottom part is supported by a Stampin’ Dimensional.

We would love for you to join us this week in our challenge.  So hop on over to check what the other girls have created & then link your creation back using Mr Linky.

Until next time, Happy Stampin’

SC 058/12…

Our challenge this week is to use Black & White only on our cards as well as going by the sketch.  Usually I don’t have a problem with this sort of thing, but for the life of me, hard a hard time.  Thanks Kris!


Measurements –
Base Card – Basic Black – 8 1/4″ x 5 7/8″ or 21cm x 15cm – Scored in the middle & folded in half
Layer 1 – Whisper White – 5 1/2″ x 3 3/4″ or 14cm x 9.5cm
Layer 2 – Basic Black – 5 3/8″ x 2 1/4″ or 13.5cm x 5.5cm

Supplies –
Stamp Set – Happiest Birthday Wishes (Retired)
Ink – Basic Black, Versamark
Cardstock – Whisper White, Basic Black
DSP – Neutrals Designer Packs (Basic Black)
Punches – 1″ Circle, 1 1/4″ Circle, Scallop Circle, Scallop Border Trim
Embossing Folder – Square Lattice
Accessories – Stampin’ Dimensionals, Simply Scoring Tool, Big Shot, Tombow Multi Purpose Glue, Heat Tool, Embossing Powder – Clear, Bone Folder, Sticky Strip

Technique – Faux Leather

My piece of Whisper White was run through the Big Shot using the Square Lattice Embossing Folder prior to adhering to the Base Card – Basic Black.

Prior to adhering the piece of Basic Black to the card, I applied the Faux Leather Technique to it, punched along one of the edges with the Scallop Trim Border Punch & adhered to the Card with Tombow Glue.

For my Rosette, I cut a 12″ strip of DSP at 1 1/4″ wide, scored with my Simply Scoring Tool, punched along one edge with the Scallop Trim Border Punch & put together with Sticky Strip prior to adhering to the Base Card.

I stamped my sentiment twice onto a scrap piece of Whisper White Cardstock, punched 1 with the Scallop Circle & the middle of the 2nd one with the 1″ Circle Punch.  I adhered the smaller piece to the large piece with a Stampin’ Dimensional prior to adhering to the Rosette with Tombow Multi Purpose Glue.

A very easy & simple card but a couple of different techniques to complete my card.

Don’t forget to pop over to Sunny Challenges & Creations to check out what Kris, Gwen, Christine & Carole  have created for you.  We would love for you to play along as well.

Have a great week with heaps of stampin’


SC 052/12…

Our challenge this week over at Sunny Challenges & Creations has been brought to us by Christine Blain, who just happens to be our Guest Designer for the month. 

With Father’s Day coming up in September for Australia, it is the perfect challenge to start creating your cards or project using this challenge.  I opted to go for a male’s birthday card & used a set that I really like, but must admit, haven’t used it for sometime.  In fact, I am really happy with the final result!

Measurements –
Base Card – Soft Suede – 8 1/4″ x 5 7/8″ or 21cm x 15cm
Layer 1 – Very Vanilla – 5 3/4″ x 4″ or 14.5cm x 10cm
Layer 2 – DSP – 5 5/8″ x 3 7/8″ or 14cm x 9.5cm
Layer 3 x 2 – So Saffron – 4″ x 1/2″ or 14.5cm x 1cm
Layer 4 – Not Quite Navy – 4″ x 2″ or 14.5cm x 5cm
Layer 5 – Very Vanilla – 4″ x 1 7/8″ or 14.5cm x 4.5cm

Supplies –
Stamp Set – Totally Tool, Happiest Birthday Wishes
Ink – Soft Suede
Cardstock – Not Quite Navy, Soft Suede, Very Vanilla, So Saffron, Basic Grey
DSP – Well Worn
Accessories – Snail Adhesive, Crystal Effects, Crop-a-Dile, Stampin’ Up! Wirte Markers – So Saffron, Cherry Cobbler, Not Quite Navy

I inked my images with the Not Quite Navy Write Marker, stamped off once onto a scrap piece of paper & stamped onto the piece of Very Vanilla Cardstock.  I repeated this same step until I was happy with the look of the card.  I then stamped 3 images onto scrap Very Vanilla direct onto the card, cut the images out, coloured part of the images with Stampin’ Up! Write Markers – So Saffron, Not Quite Navy, Cherry Cobbler & set aside.

The piece of Very Vanilla was adhered to the piece of Not Quiet Navy, then So Saffron, to the piece of DSP, Very Vnailla & finally to the Base Card – Soft Suede all with Snail Adhesive.

I completely forgot to add my Silver Brads to the top left hand corner of the card, so I comprised a little.  I punched out 6 circles using my Crop-a-Dile, adhered 2 to the top LH corner with Tombow, 1 to the middle of the screwdriver, 1 to the handle of the spanner & 1 to the card where I wanted to place the hammer.

The tools were then adhered to the card – as per the photo with Tombow,with the spanner being my 3rd brad at the top LH corner.

The greeting was stamped in Soft Suede onto Very Vanilla, cut to size & adhered to the card prior to adhering the final Faux Brad it.

Don’t forget to pop over to Sunny Challenges & Creations to check out what Gwen, Kris & Christine have created.

We would love for you to join us!

Until next time, Happy Stampin’

SC 031/12…

Our challenge over at Sunny Challenges this week has been bought to us by Kris.  Along with the sketch, she wants us to use the Technique – Chalkboard.  Tutorial at the end of post.  Now, I am not a lover of this technique as I find it very messy, but will be the first to admit it does leave you with a very lovely effect.  In fact, this is the first time that I have ever felt that I liked something well enough to post.
Maybe, just maybe you may find me attempting to create more using this technique.  I decided to use a Stamp Set that is a little different from the usual ones used for Chalkboard!   Using the stamp I used, I had to change the shape of the oval a little, so hopefully Kris will forgive me for this.  Mind you, that is the beauty about challenges, as long as you basically stay within the sketch, you have a free hold & it challenges you to use products, colours, techniques, etc you would not normally attempt.  In other words, “out of your comfort zone“.  I even used colours that are way out of my comfort zone!!!!!
Measurements –
Base Card – Cherry Cobbler – 8 1/4″ x 4 1/4″ or 21cm x 15cm – Scored in middle & folded in half
Layer 1 – So Saffron – 3 7/8″ x 4″ or 10cm x 14.5cm
Layer 2 & 3 – Whisper White – 4 1/2″ x 1 7/8″ or 11.5cm x 5cm
Layer 4 – Bashful Blue – 2 3/8″ x 3″ or 6cm x 8cm
Layer 5 – Cherry Cobbler – 2 1/4″ x 2 7/8″ or 5.5cm x 7.5cm

Supplies –
Stamp Set – Lovely as a Tree, Happiest Birthday Wishes
Ink – White Craft, Cherry Cobbler, Bashful Blue
Cardstock – Whisper White, Cherry Cobbler, Bashful Blue, So Saffron
Embossing Folder – Perfect Polka Dots
Ribbon – 1/4″ Grosgrain – Bashful Blue
Accessories – Stampin’ Pastels, Bigshot, Snail Adhesive, Multipurpose Glue
Non-SU – Cotton Buds
Instructions –
Stamp image onto Cherry Cobbler Cardstock using White Craft Ink
Chalk image using Cotton Buds
Adhere to piece of Bashful Blue Cardstock with Snail Adhesive
Adhere Ribbon around bottom & tie knot. Set aside
Randomly stamp sentiment onto both pieces of Very Vanilla Cardstock using Cherry Cobbler Ink Prior to stamping, stamp off onto a scrap piece of paper
Run both pieces through Bigshot using Embossing Folder – Perfect Polka Dots
Adhere to So Saffron Cardstock as per sketch using Multipurpose Glue
Adhere chalked piece to Base Card as per sketch

Technique Tutorial –
Ink a solid image onto a dark Cardstock using White Craft Ink
With SU! Pastels & a Cotton Bud, apply chalk to your image, ensuring you dab over all the white ink
Add as many colours as you wish using the above step
With a Tissue, remove the excess chalk very carefully

Tips –
When using SU! Pastels, no need for the ink to dry
When using Pencils, allow the ink to dry
Use SU! Sponges instead of Cotton Buds

Ok, now it is your turn. Pop on over to Sunny Challenges, check out what Kris & Libby have created, create your card, scrapbook page, etc & then come back to Sunny Challenges & link to My Linky.

Until next time, Happy Stampin’

Birthday…

I’ve finally managed to play with a new stamp set.  Mind you, this is one of the sets I pre-ordered prior to the new Catalogue coming out!  I loved this set from the moment I saw it, but have had a bit of a hard time creating with it.

Base Card – Island Indigo – 7 1/4″ x 5 7/8″ or 18.5cm x 15cm – scored & folded at 3″ or 7.5cm
Front –
Layer 1 – Lucky Limeade – 5 3/4″ x 2 7/8″ or 14.5cm x 7.5cm
Layer 2 – Whisper White – 5 5/8″ x 2 3/4″ or 14cm x 7cm
Inside LHS –
?

Inside – RHS…

?

Layer 1 – Pool Party – 5 3/4″ x 2 7/8″ or 14.5cm x7.5cm
Layer 2 – Whisper White – 5 5/8″ x 2 3/4″ or 14cm x 7cm
Inside RHS –
Layer 1 – Lucky Limeade – 5 3/4″ x 4 1/8″ or 14.5cm x 10.5cm
Layer 2 – Whisper White – 5 5/8″ x 4″ or 14cm x 10cm
Inside LHS –

In stamped my image in the RHS corner using Lucky Limeade Ink onto Whisper White Cardstock, adhered to Pool Party & then to Base Card – Island Indigo.  I applied a Basic Rhinestone to centre of image.

Inside RHS
I randomly stamped images onto Whisper White using Lucky Limeade, Island Indigo & Pool Party Inks, run it through the Bigshot using Embossing Folder – Square Lattice, adhered to Lucky Limeade Cardstock & then to Base Card – Island Indigo.  I again applied Basic Rhinestones to some of the images.
??

Inside – LHS…

??

Front –
I repeated the above step for the front of the card, including the embossing.  I stamped my greeting twice onto a scrap of Whisper White Cardstock with Lucky Limeade & Island Indigo Inks.  I adhered the Lucky Limeade greeting to a piece of Pool Party Cardstock with SU Dimensionals.  This piece had been punched using my 2 1/2″ Scallop Circle Punch.  I punched the centre out of the Island Indigio greeting with my 1″ Circle Punch & adhered this to the centre of the Lucky Limeade greeting with SU Dimensionals.

I again randomly applied Basic Rhinestones to the stamped images & put dots around the scallop circle with my White Gel Pen.

Don;t you just love the names SU call their Cardstock & Inks, especially the In Colours – they always have such catchy names.

Supplies –
Stamp Set – Delicate Doilies, Happiest Birthday Wishes (Hostess)
Ink – Lucky Limeade,  Island Indigio, Pool Party
Cardstock – Lucky Limeade, Pool Party, Whisper White, Island Indigio
Embossing Folder – Square Lattice
Punches – 2 1/2″ Scallop Circle, 1″ Circle
Accessories – SU Dimensionals, Snail Adhesive, Basic Rhinestones, Bigshot
Until next time, Enjoy! 

One for a Challenge…

… but too late.

I created this card for a challenge which didn’t make the deadline, but not too worry.  The challenge called for a clean & simple (CAS) card & as I had my embossing stuff out, thought I would do a little embossing.  I also dug out one of my favourite stamps & dusted the dust off of it.

Base Card – Poppy Parade – 5 7/8″ x 4 1/8″ or 15cm x 10.5cm – once scored & folded in half
Layer 1 – Whisper White – 5 3/4″ x 4″ or 14.5cm x 10cm
Layer 2 – Wild Wasabi – 4″ x 1″ or 10cm x 2.5cm
Layer 3 – DSP – 4″ x 1 1/2″ or 10cm x 4cm
Layer 4 – Blushing Bride – 3 5/8″ x 2 1/2″ or 9cm x 6cm
Layer 5 – Crumb Cake – 3 1/2″ x 2 3/8″ or 8.5cm x 5.5cm

Using the Eyelet Border Punch, I punched along one longer side of Wild Wasabi Cardstock & adhered to the LHS of Whisper White Cardstock.  The DSP strip of paper was adhered over the top of the punched edge.  The whole piece was then adhered to the Base Card using Snail Adhesive.

?

Inside…

I rubbed my Embossing Buddy over the piece of Crumb Cake, stamped my image with Versamark, poured White Embossing Powder over the top, tapped excess powder from the cardstock & set it using my Heat Tool.  This piece was the adhered to the piece of Blushing Bride & finally to the Base Card.

My flowers are from my stack I have in a drawer, they could be SU or they may not be.  I do know that I had dyed a couple of flowers sometime ago using Re-Inkers.  So being a little lazy & not wanting to hunt for my flowers, I used the first couple I laid my hands on.  I adhered the white flower to the smaller of the pink flowers & stuck a Pink Rhinestone in the middle.  Again, the rhinestone was from a stash I have on hand for my wedding invitations.

For my sentiment, I stamped it onto a scrap of Whisper White Cardstock using Wild Wasabi Ink & punched the centre out with my 1″ Circle Punch.  I adhered this to the centre of the large flower using SU Dimensionals.  Both flowers were adhered to the card with SU Dimensionals with the larger flower at the front.

Supplies –
Stamp Set – Fifth Avenue, Happiest Birthday Wishes
Ink – Versamark, Wild Wasabi
Cardstock – Poppy Parade, Whisper White, Crumb Cake,
Wild Wasabi, Blushing Bride
DSP – Flirtatious Speciality
Punches – 1″ Circle, Eyelet Border
Accessories – SU Dimensionals, Snail Adhesive, Embossing Buddy,
Embossing Powder – White, Heat Tool, Flowers
Non-SU – Pink Rhinestones, Flowers
Until next time, Enjoy!