Category: Just Believe Stamp Set
SC012/11…
This card has been created for the challenge over at Sunny Challenges & Creations It is not too late to link your creation. You have until Saturday arvo, so why not have some fun & have a go! You could be our “Ray of Sunshine”
For the inspiration of this card, I actually saw a dress in a shop window yesterday using these colours. Amazing where your inspiration comes from.
The measurements for my card will make it easier for you. Along with the sketch, don’t forget to use flowers on your card.
Base Card – Crumb Cake – 8 1/4″ x 5 7/8″ or 21cm x 15cm – score @ 4 1/8″ or 10.47cm & fold in half
Layer 1 – Cherry Cobbler – 5 3/4″ x 4″ or 14.5cm x 10cm
Layer 2 – Very Vanilla – 5 5/8″ x 4 1/8″ or 14xm x 10.5cm
Layer 3 – Crumb Cake – 4″ x 1 1/4″ or 10cm x 3cm
Layer 4 – Very Vanilla – 4″ x 1 1/4″ or 10cm x 3cm
I stamped my background mage onto Very Vanilla using Crumb Cake Ink – I didn’t stamp off. I stamped over the stop with another image using Cherry Cobbler Ink.
I cut this stamped piece at 1″ & 1 1/4″ which gave me 2 x 1″ pieces & 1 x 1 1/4″. I adhered these pieces onto the piece of Cherry Cobbler & then to the Base Card – Crumb Cake, ensuring the larger piece went into the middle & smaller pieces either side.
With my Eyelet Border Punch, I punched the longer side of the piece of Crumb Cake Cardstock, stamped my sentiment with Cherry Cobbler Ink onto Very Vanilla piece & run it through the Bigshot using the Embossing Folder – Perfect Polka Dots.
Using a sponge, Cherry Cobbler Ink & a piece of White Taffeta Ribbon, I sponged the ribbon until it was the colour I wanted, let dry, adhered to the Embossed Very Vanilla Cardstock, tucked ends under, adhered to the punched piece of Crumb Cake & finally to the Base Card.
I punched 3 flowers with one of the punches from the Itty Bitty Set, adhered them to the Very Vanilla Embossed Cardstock & adhered a Basic Pearl on each.
Lastly, I adhered butterflies to the top of the card after they had been cut from the Bigshot & Embosslit Die. I applied Basic Pearls to the butterflies & to the flowers.
SC 009/11…
As well as the sketch provided, I thought it would be a great opportunity to dig out those Heat Tools & to do a little Heat Embossing. How long is it since you have used your Heat Gun? I know it has been some time for me. With all the new products coming out from Stampin’ Up!, we seem to forget about our favourites sometimes.
Base Card – Pumpkin Pie – 5 7/8″ x 4 1/8″ or 15cm x 10.5cm – once scored & folded in half
Layer 1 – Early Expresso – 5 3/4″ x 4″ or 14.5cm x 10cm
Layer 2 – DSP – 5 5/8 x 3 7/8″ or 14cm x 9.5cm
Layer 3 – Early Expresso – 4 1/2″ x 2″ or 11.5cm x 5cm
Layer 4 – Whisper White – 4 3/8″ x 1 7/8″ or 11cm x 4.5cm
Layer 5 – Early Expresso – 1 1/2″ x 3″ or 3.5cm x 7.5cm
Layer 6 – Whisper White – 1 3/8″ x 2 7/8″ or 3cm x 7cm
Close-Up of Greeting… |
I adhered the DSP to piece of Early Expresso using Snail Adhesive & set aside.
I rubbed my Embossing Buddy over both pieces of Whisper White Cardstock, stamped my image using first Versamark, then Early Expresso Ink, stamped direct onto the longer piece of Whisper White Cardstock, poured Clear Embossing Powder over the top & heat set with my Heat Tool. I adhered this piece to the longer piece of Early Expresso Cardstock.
?
Close-Up – Double Bow & Pearl… |
?
I adhered a piece of Satin Ribbon along the bottom half of the longer embossed Whisper White piece, adhered to DSP, then to the base card, tied a double bow, attached a Flower Brad & a Basic Pearl to the centre.
?
Inside… |
?
??????Basic Pearls were applied randomly over the embossed images.
Crimping…
I sponged around the edges of both top & bottom using my SU Sponge & Concord Crush Ink. Are you sick of Concord Crush yet????? I wrapped Satin Ribbon – Not Quiet Navy around the top part of the envelope & tied a bow off centre at the front.
Placing the bottom half of the card into the Crimper sideways, I proceeded to put it through the Crimper.
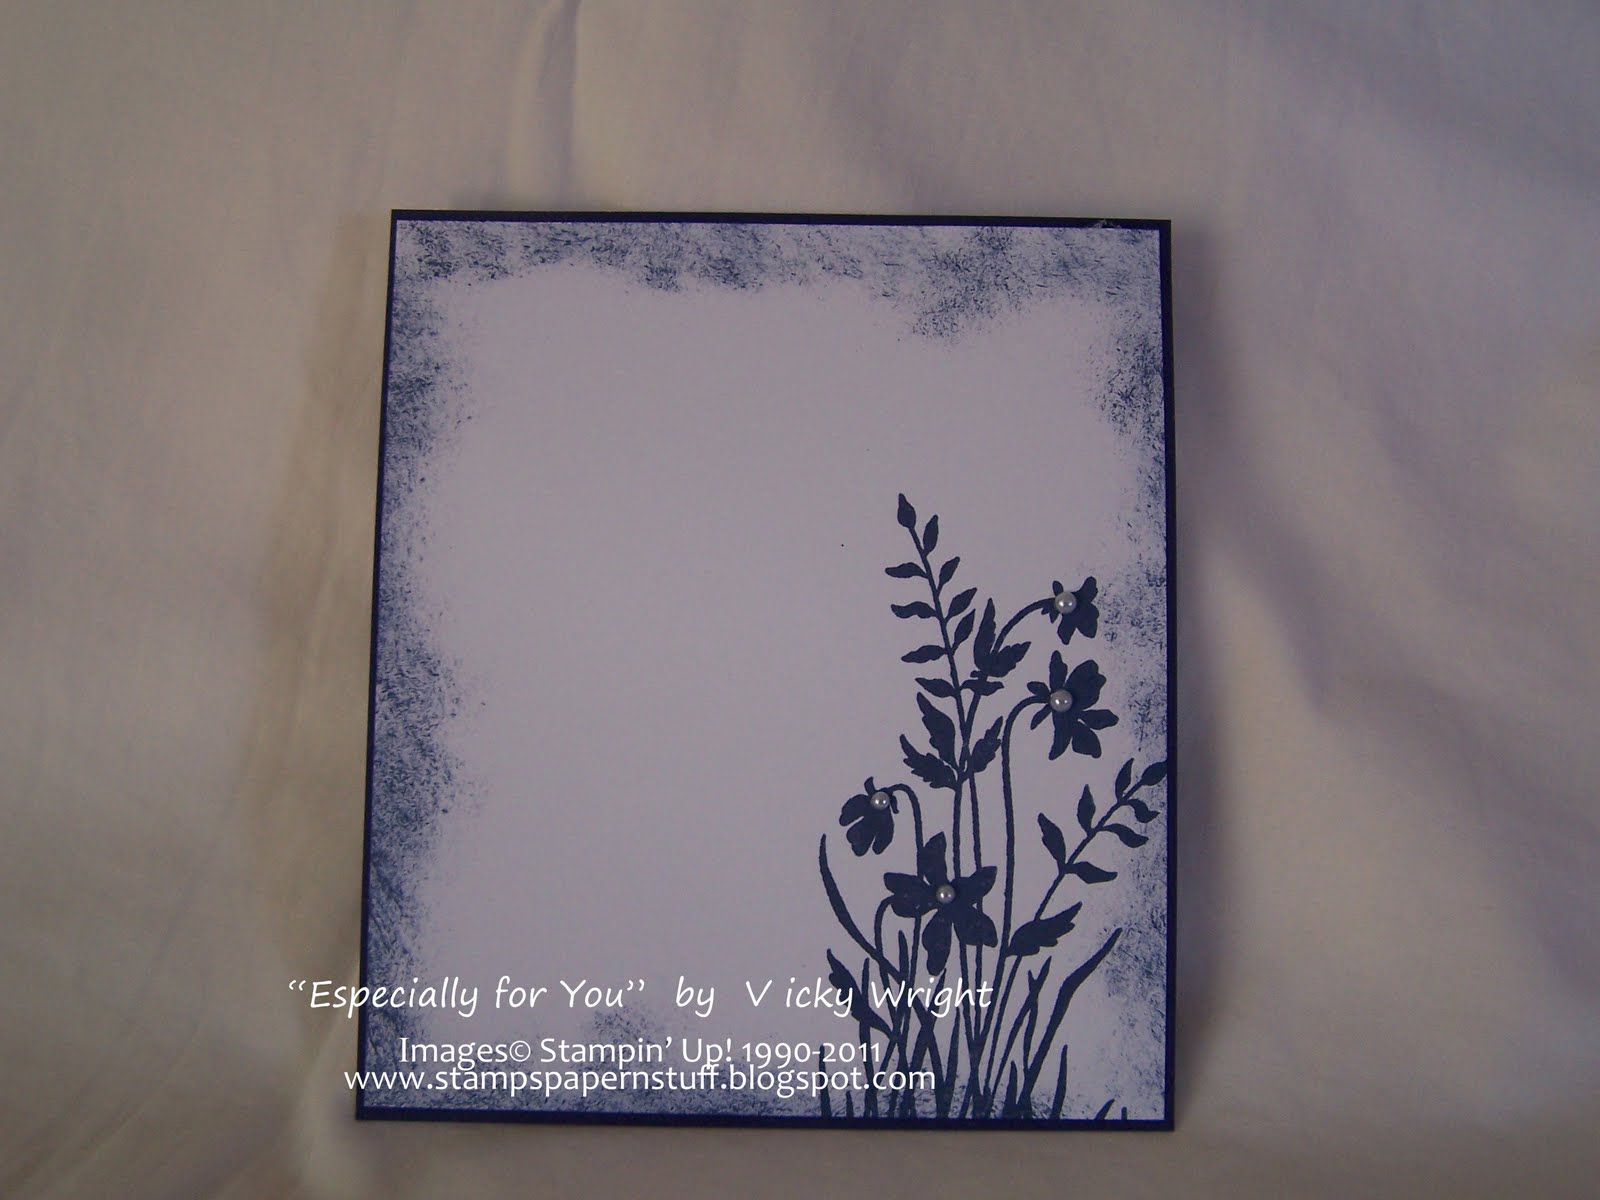
I stamped my greeting onto a piece of Whisper White Cardstock in Not Quiet Navy – yep, I’ve changed colours…… Punched the greeting out using my Large Oval Punch, sponged around the edges with Not Quiet Navy, adhered to card with a SU Dimensional & placed a small Pearl in the center of the greeting, as well as a larger Pearl to the centre of the Medallion Stamp.
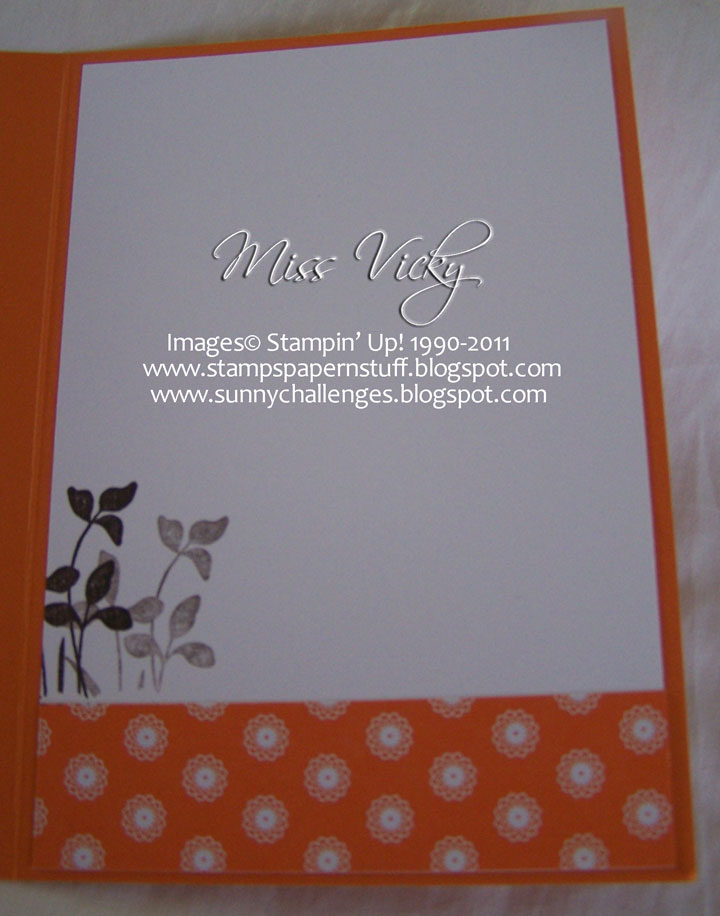
For the inside, I cut a piece of Concord Crush Cardstock – 4 1/2″ x 4″ or 11.5cm x 10cm. I cut another piece using Whisper White Cardstock – 4 3/8″ x 3 7/8″ or 11cm x 9.5cm. I stamped my image using Not Quiet Navy Ink, sponged the edges in the same colour & adhered to the Concord Crush Cardstock. I placed a couple of small Pearls to the centre of the flowers.
All in all a really lovely creative card using a techinque which has been around for yonks, but not seen that much now. It is still one of my favourites & probably always will be. Note to self – start using Crimper more often!
Supplies –
Stamp Set – Medallion, Just Believe, Oval All
Cardstock – Whisper White, Concord Crush
Ink – Not Quiet Navy, Concord Crush
Punches – Large Oval
Ribbon – Satin – Not Quiet Navy
Accessories – Crimper, SU Envelope, Snail Adhesive, Basic Pearls, SU Sponge, SU Dimensionals
Inkspirations Challenge #73…
I was recently asked if I stamped my envelopes to match my cards. Ever since I started making cards, I had to match the envelopes to my cards. I know the ladies I used to do cards with, thought it funny & strange, but that was me – has to match. I also do the inside to match as well. In future, I will show you both the envelope & inside, along with the card.
Layer 5 – Early Expresso – 3″ x 2 1/2″ or 8cm x 6.5cm
Layer 6 – Very Vanilla – 2 78″ x 2 1/8″ or 7.5cm x 6cm