
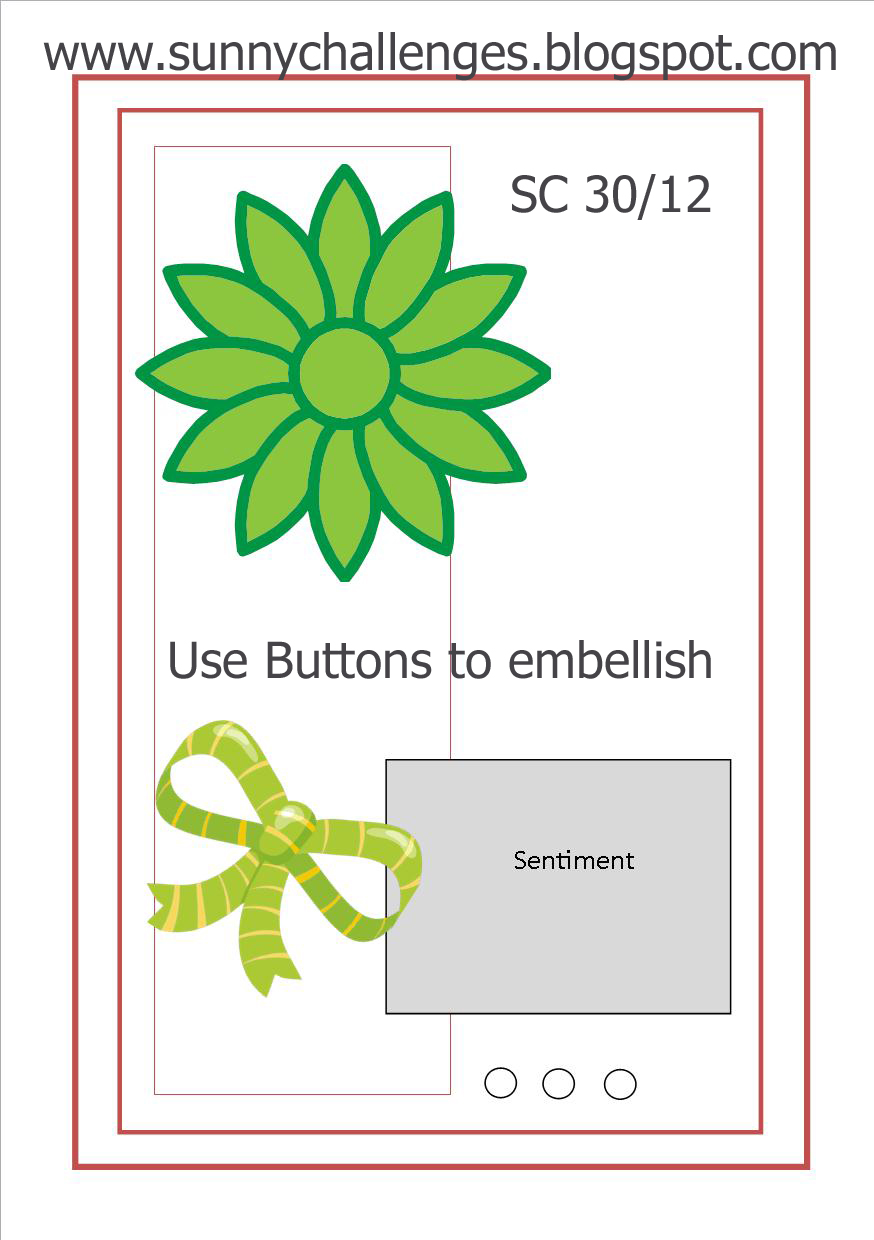
Today’s challenge is brought to us by Libby Buttons are to be used on our sketch this week!
I created my own Buttons for this card, only because the real buttons look a little too bit for the card…..
Measurements –
Base Card – Basic Black – 8 1/4″ x 4 1/8″ or 21cm x 15cm – scored in half & folded down middle
Layer 1 – Whisper White – 5 3/8″ x 3 3/4″ or 13.5cm x 9.5cm
Layer 2 – Real Red – 5 1/4″ x 3 5/8″ or 13cm x 9cm
Layer 3 – Whisper White – 4 3/4″ x 1 7/8″ or 12cm x 5cm
Supplies –
Stamp Set – Fabulous Florets, Short & Sweet
Ink – Real Red, Basic Black, Versamark
Cardstock – Whisper White, Real Red, Basic Black
Ribbon – 1/4″ Grosgrain Ribbon – Real Red
Punches – Scallop Oval, Large Oval, Itty Bitty Set – Flower
Accessories – Bone Folder, Crystal Effects, Heat Tool, Embossing Powder – Clear & Basic Black, Mini-Glue Dots, Paper Piercing Tool, Rhinestones, Embossing Buddy, Snail Adhesive
Non-SU – Ruler
Faux Buttons
Make a button template using Whisper White Cardstock, piece 2 holes in the middle with your Paper Piercer & set aside
Using the small Flower Punch from the Itty Bitty Punch set, punch 4 flowers in Whisper White & 2 in Basic Black
Create 2 buttons by adhering 2 of the Whisper White Flowers together, paper piece the holes, using your button template & apply Crystal Effects over the top
Repeat same steps to create the 2nd Whisper White Flower Button & the Basic Black Flower Button
Set all 3 aside to dry – this may take a couple of hours\
Card –
Score Real Red Cardstock at 1/2″ intervals diagonally with a Ruler & Bone Folder, turn 180 deg & repeat
Adhere this piece to Whisper White & finally Base Card – Basic Black with Snail Adhesive
Repeat above step onto a scrap of Whisper White, except use Real Red Ink instead of Basic Black. Cut around flower image & set aside
Ink flower image with Versamark & then Real Red
Stamp inked image direct onto scrap piece of Whisper White
Clean stamp & repeat above step for 2nd flower
Adhere the embossed piece of Card to the Base Card
Adhere the 2 Real Red flower images to the top of the embossed black image using Stampin’ Dimensionals in between flowers & to adhere to the Base
Adhere the cut out red flower image over the top of the black embossed image with Stampin’ Dimensionals
Tie a small bow with Real Red Grosgrain Ribbon & adhere to the card with Mini-Glue Dots
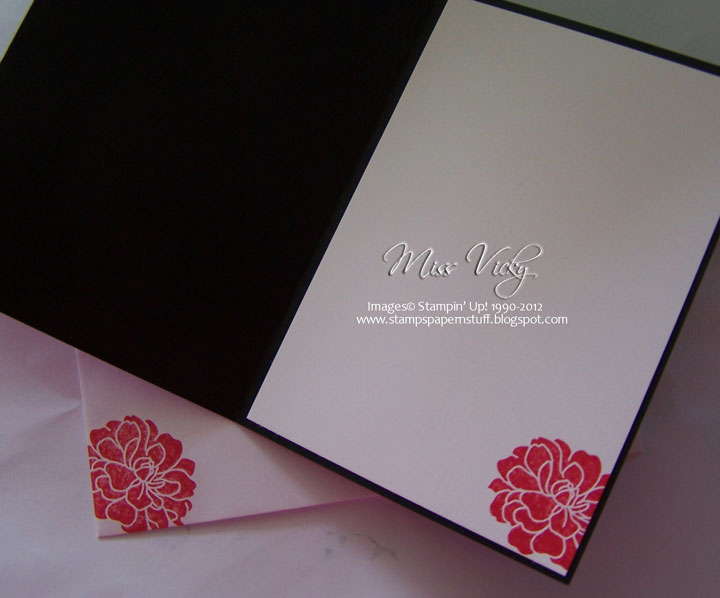
Stamp your sentiment with Basic Black Ink onto a piece of scrap Whisper White
Adhere your Faux Buttons to the card using Mini-Glue Dots
We’re very excited over at Sunny Challenges & Creations as this week is the start of a new month & therefore, a new Guest Designer. It also sees some of our past entries who received the Ray of Sunshine join us for a week in designing samples too. It is our way of saying a big thank you for supporting our challenges each week.
Be sure to join us for this challenge.
Happy Stampin’

