Thinking of You

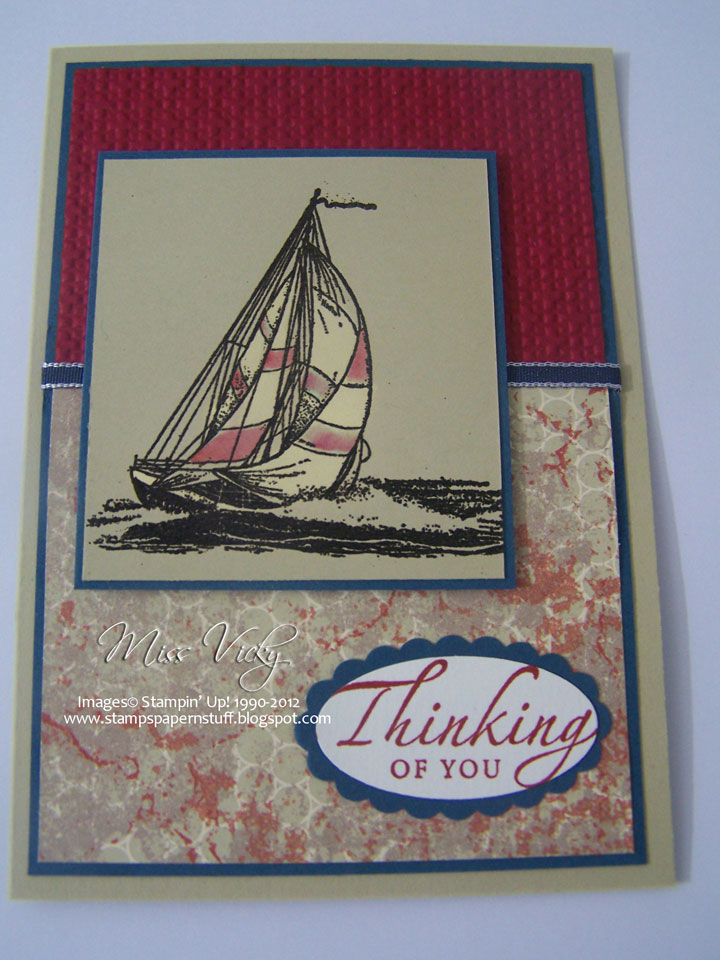
I had use for another “Thinking of You” card last week & decided to use the gorgeous Stamp Set – Wetlands. 20140631aI took my inspiration from a technique class we did a couple of weeks ago & played with colours until such time as I was happy with the result.

Mind you, half way through the card, I was not a happy person & chopped & changed it about 3 times  I nearly gave up about a number of times.   It is amazing once you add layering, a little twine, Shimmer & a Greeting how it starts to evolve & come together before your eyes.

It is a very simple card, but that is what I was aiming for.  I only hope it is well received.

20140630a
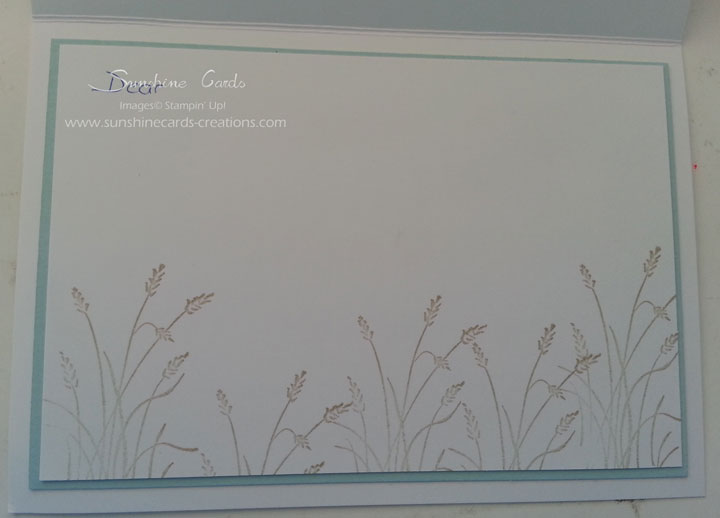
For the inside, I stamped the Reed image a couple of times direct onto Whisper White Cardstock in Crumb Cake Ink prior to layering onto Soft Sky & finally to the inside of the card.

Yep, you can see I started to write prior to taking a photo.

Please click onto the link below to download a copy of the tutorial

Wetlands – Thinking of You

Until next time, Happy Stampin’


Products used for this card –

By the Seashore

I found a lovely little card on Pinterest with the colours of Pistachio Pudding & Smokey Slate. I have spent a 20140715_143507acouple of hours trying to find it but do apologise for not being able to give you credit. I have put my own spin on it & well, looking at the card now, it doesn’t resemble the one I took my inspiration from.  Strange how that can happen hey.

I love this stamp set & am so very glad it didn’t retire. I ended up posting this to a good friend of mine the other day who is having a bit of a hard time. I just thought it would be very different to flowers, etc.  I only hope she likes it!

20140715_143545aIt would make for a very good male card too by just changing out the colours.

For the inside of the card, I stamped the images direct onto a piece of Very Vanilla CS using Crisp Cantaloupe, Pistachio Pudding & Smokey Slate Inks, prior to attaching with Multipurpose Glue.

By clicking on the link below, you are able to download & print your copy of the Tutorial.

“By the Seashore”

Until next time, Happy Stampin!

Vicky

Products used –

Technique Class….

A couple of weeks ago we had fun learning & playing with the “Sunburst” Technique.  If you haven’t played with this, do yourself a favour & do so.

The best part about this technique, we all started out with the same kit BUT all ended up with different results!

I actually cased the card on Page 110 of the Catalogue.  I did swap a couple of things from the original card.  Gotta admit, this is fantastic when you hit a blank wall.  We also played with the Clay & Molds in this class & were a huge hit with everyone!

Supplies –
Stamp Set – For You – 130538
Cardstock – Whisper White – 106549, Smokey Slate – 131291, Coastal Cabana – 130024
Ink – Crushed Curry – 131173, Smokey Slate – 131179
DSP – Eastern Elegance – 130131
Embossing Folders – Perfect Polka Dots – 130131
Punches – Scallop Edge Border – 119882
Accessories – Big Shot – 113439, Simply Scoring Tool – 122334, Snail Adhesive – 104332, Simply Pressed Clay – 130685, Buttons & Blossoms Clay Molds – 131272, Aqua Painter – 103954

Pop back in a couple of days & I will show you our 2nd card we created in this class. 
  •  To order Stampin’ Up! products online, please Shop Here
  • Want to join my family, and be a part of a group that loves to stamp together, Join Here
  • To check out available classes or to attend any of the classes, please Click Here, click on the “Classes/Workshop” Page or email me vickiawright@bigpond.com
Until next time, Happy Stampin’
 
Vicky 

Thinking of You….

I love the way this card turned out.  It is one of the cards we created in our Technique Class on Sunday – Bleaching….  What a fun technique!  I know I will be doing more of this one….

Some people find it hard to create a male’s card, so we will be mixing our cards so that we cater for males, females, kids, etc as well as ocassions.  I find what works the best for male cards is to stick to basic layouts – can’t go wrong!
???

Inside Card…
?
Until next time, Happy Stampin’

Distressing….

I did a one on one class with the lovely Lynne last Friday.  As she had purchased some new ink pads, she wanted to know how to use them, so I put my thinking cap on & come up with the following card using Stampin’ Up! Inks.

We had a lot of fun creating this, although our fingers did get very inky….  Lynne’s was a little different to mine, especially as she used different inks too.

Note to self – wash fingers prior to touching cardstock!!!!!!

The layout itself is a basic one, as I wanted the techniques to showcase themselves.

Measurements –
Base Card – Perfect Plum – 8 1/4″ x 5 7/8″ or 21.5cm x 15cm
Layer 1 – Verey Vanilla – 4″ x 5 3/4″ or 10cm x 14.5cm
Layer 2 – Perfect Plum – 4 1/2″ x 2 1/2″ or 11.5cm x 6.5cm
Layer 3 – Very Vanilla – 4 3/8″ x 2 3/8″ or 11cm x 6cm

Supplies –
Stamp Set – French Foliage, Sincere Salutations
Ink – Certainly Celery, Rose Red, Perfect Plum, Versamark
Cardstock – Very Vanilla, Certainly Celery, Perfect Plum
Punches – Scallop Oval, Large Oval
Ribbon -12″ Seam Binding – Very Vanilla
Accessories – Snail Adhesive, SU! Dimensionals, Antique Brads, Heat Tool, Embossing Buddy, Embossing Powder – White, SU! Sponge Daubers

Until next time, Happy Stampin!