Circle Circus…..

…. meets Triple Time Stamping!

 I created this card for the challenge on Stampin’ Fun & Friends, but was too late to enter it, so thought I would still share.  The challenge was to use Red, Green & Silver, but as I said, I was too late, so I left the Silver & added Chocolate Chip instead.

Measurements –
Base Card – Chocolate Chip – 8 1/4″ x 4 1/8″ or 21cm x 10.5cm
Layer 1 – Whisper White – 5 5/8″ x 3 7/8″ or 14.5cm x 10cm
Layer 2 – Chocolate Chip – 4 5/8″ x 2 7/8″ or 12cm x 7.5cm
Layer 3 – Whisper White – 4 1/2″ x 2 3/4″ or 11.5cm x 7cm
Layer 4 – Chocolate Chip – 3 5/8″ x 2 1/8″ or 9cm x 9.5cm
Layer 5 – Whisper White – 3 1/2″ x 2″ or 8.5cm x 9cm

Supplies –
Stamp Set – Circle Circus, Petite Pairs
Ink – Chocolate Chip, Riding Hood Red, Lucky Limeade
Cardstock – Whisper White, Chocolate Chip
Accessories – Snail Adhesive
.
To create your card, adhere the 3 pieces of Whisper White Cardstock  on top of each other using a  little bit of Temp Glue or Temp Snail Adhesive to the back.  I tend to use Snail Ahesive & then rub some of it off.

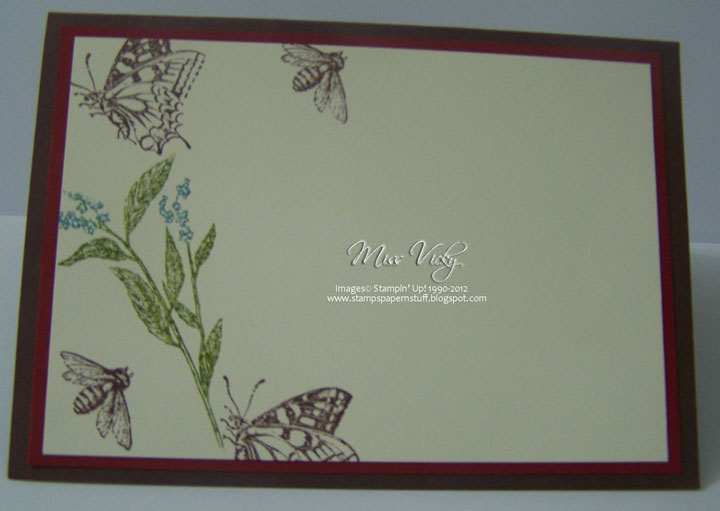
Firstly, I stamped my sentiment on the top layer with Chocolate Chip Ink.  I then proceeded to stamp random images & colour of Lucky Limeade & Riding Hood Inks around the 3 layers.

Once my stamping was complete, I carefully separatley the 3 layers & mounted them onto the corresponding Chocolate Chip pieces of Cardstock with Snail Adhesive.  I then carefully adhered them on top of each other ensuring that I had all my images matched as close as I could.

I decided not to add any embellishment to the card as I didn’t want to take away from the sentiment.

Until next time, Happy Stampin’

SC 067/12….

What a great challenge we were set this week over at Sunny Challenges & Creations.  All we have to do is create a Shaker Card – NO layout!!!!!  If you are like me, then I haven’t created one for so long that I can’t remember the last time I did one.

Measurements –
Base Card – Chocolate Chip – 8 1/4″ x 4 1/8″ or 21cm x 15cm
Layer 1 – Cherry Cobbler – 5 5/8″ x 3 7/8″ or 14.5cm x 10cm
Layer 2 – DSP – 5 1/2″ x 3 3/4″ or 14cm x 9.5cm
Layer 3 – Chocolate Chip – 3 1/4″ x 3 1/4″ or 8.5cm x 8.5cm
Layer 4 – Very Vanilla – 3 1/8″ x 3 1/8″ or 8cm x 8cm
Layer 5 – Window Sheet or Acetate – 3 1/8″ x 3 1/8″ or 8cm x 8cm

Supplies –
Stamp Set – Petite Pairs, Nature Walk
Ink – Chocolate Chip
Cardstock – Chocolate Chip, Cherry Cobbler, Very Vanilla
DSP – First Edition Speciality
Ribbon – 1/2″ Seam Binding – Cherry Cobbler, Crochet Trim – Victoria
Punches – 2 1/2″ Circle
Accessories – Snail Adhesive, Stampin’ Dimensionals, Sticky Strip, Glimmer Brad – Champagne, Glass Stampin’ Glitter – Gold (Retired), Stampin’ Markers – Marina Mist & Old Olive, Mini Glue Dots

I randomly stamped images over the DSP with Chocolate Chip Ink, prior to adhering to the Cherry Cobbler Cardstock.  I ran a piece of Cherry Cobbler Ribbon across the middle, tucked ends under & adhered to the Base Card with Snail Adhesive.

For my window, I inked my image with Stampin’ Markers – Old Olive & Marina Mist, stamped direct onto Very Vanilla, inked my sentiment in Chocolate Chip Ink & stamped onto the same piece of Very Vanilla Cardstock.  I placed my images onto the Cardstock, so that they would be able to be seen once I had adhered the top piece of Chocolate Chip Cardstock.

As I didn’t have any Double Sided Mounting Tape, I made my own.  I applied Sticky Strip all around the outer edge of my stamped piece of Very Vanilla Cardstock, ensuring that all sides were covered.  I cut 2 pieces of thick Cardboard – from the Glitter Paper – & adhered to the tops of the Sticky Strip, ensuring that all areas were covered as I didn’t want any pieces of the glitter to escape, applied another layer of Sticky Strip, carefully poured Glitter onto my image – not too much as you don’t want it to take over – punched a circle into the middle of the Chocolate Chip Cardstock with the 2 1/2″ Circle Punch, adhered the Window Sheet to the wrong side & then finally to the top of the Sticky Strip.  I applied Stampin’ Dimensionals to the back of this piece & adhered to the card.

I tied a bow with the Cherry Cobbler Seam Binding, found 2 small pieces of Crochet Trim that happen to be in the same container as my Ribbon & decided to use them as well.  A Glimmer Brad was attached to the middle & finally adhered to the card with Mini Glue Dots.

We hope you will jon us this week for this fun challenge.  Head over to Sunny Challenges & Creations to chek out what both Kris & Vicki have created, create your project, post to your blog or on line group & then link back with Mr Linky.  We would love to see your creation!

Have a great week

Merry Christmas Embossed….

Today’s card is my version of the one we created in Crafty Creations yesterday.

A lot of the ladies all had this lovely Christmas Tree stamp & wanted to recreate one of the cards Naomi had made using the stamp – sorry don’t have a photo of the original.

After coming home & in the middle of preparing tea, I had an idea pop into my head on how to recreate a card that was similar using SU! Lovely as a Tree.  I’m really happy with the way it turned out, especially the background & the greeting on the front which I repeated for the inside.  Mind you, I sort of come across this from making something I wasn’t going to like…… , but then that happens so much when stamping.

Measurements –
Base Card – Very Vanilla – 8 1/4″ x 5 3/4″ or 8 1/4″ or 21cm x 14.5cm
Layer 1- Gold Glitter Paper – 5″ x 3 3/4″ or 13cm x 9.5cm
Layer 2 – Whisper White – 4 3/4″ x 3 1/2″ or 12cm x 8.5cm

Supplies –
Stamp Set – Lovely as a Tree, Petite Pairs
Ink – Versamark
Cardstock – Whisper White, Very Vanilla, Gold Glimmer Paper
Accessories – Snail Adhesive, Shimmer Paint, Embossing Powder – Gold, Heat Tool, Sticky Strip
Non- SU – Thread, Paint, Pearls, Gold Paint, Glad Wrap

I stamped direct onto the piece of Whisper White Cardstock with Versamark, poured Gold Embossing Powder over the top, tapped excess off & heat set with Heat Tool.

I then proceed to mix a tiny bit of Gold Paint that I had lying around into a little bit of Frost Shimmer Paint.  The amount of Gold Paint I started out with was a about a small pin head & then built from there.  I didn’t want too much gold as I just wanted it to blend into the background.  I spread this with a piece of Glad Wrap which I just scrunched into a ball.

For my sentiment, I wanted to emboss it in the Gold, but as I previously stated, didn’t like the look after tapping off the excess.  I then proceeded to brush all the Embossing Powder off the sentiment & was left with the faint image.  It looks a little like stamping off a couple of times with ink, except I’ve done it with Embossing Powder

I tied the Thread around the bottom of the card twice, tied a bow & adhered to the Gold Glitter Paper with Sticky Strip.

The whole piece was adhered to the Base Card – Very Vanilla with Snail Adhesive.

To finish it off, I adhered Pearls to the top & bottom.

All in all, a very simple, easy card, but am so happy with the final result!

Until next time, have a great day!

Lovely as a Tree……

….  meets a Gatefold Fold.

This is one of our cards we craeted in our Technique Class on Sunday – Shaving Cream!  Now if you have never used this to create a background for your creations or anything else for that matter – do it! 

We had a lot of fun on Sunday, with heaps of laughs, shaving cream everywhere including in one of the ladies hair.  The best part about this technique – everyone’s cards will be different!

 
Pop back in a coupl eof days & I will be posting the 2nd card we created using this same technique.
 
Until next time, Happy Stampin’
 

SC 065/12…

Can you believe t?  We actually had rain last night & boy it cool this morning, but hey who cares – Rain, we have Rain!!!!!!  A great day for stampin & catching up on all those little projects that we tend to lend for “Ron” – later on!  Rain!!!!  did, I mention we have Rain!!!!!!!!!

Our challenge this week over at Sunny Challenges & Creations is to create a “Sympathy” card along with the great sketch layout!  This is a type of card that we don’t like creating, but is always good to have in your stash.

Measurements –
Base Card – Bashful Blue – 8 1/4″ x 4 1/8″ or 21cm x 15cm
Layer 1 – Whisper White – 3 3/4″ x 2 1/2″ or 9.5cm x 6.5cm
Layer 3 – Whisper White – 3 1/2″ x 3 3/4: or 9cm x 9.5cm

Supplies –
Stamp Set – Just Believe, Petite Pairs
Ink – Nil
Cardstock – Whisper White, Bashful Blue
Embossing Folder – Perfect Polka Dots
Punches – Scallop Trim Border, Oval
Embosslits – Beautiful Wings
Ribbon – 5/8″ Organza – Whisper White
Accessories – Snail Adhesive, Pearls, Stampin’ Up! Markers – Rose Red & Wild Wasabi, Stampin’ Dimensionals, Mini Glue Dots, Bone Folder, Big Shot

I wanted to use a colour I haven’t touched in a lot time, so it was basically a toss up between the new “In Colours” or Bashful Blue, which won in the end.

I inked my main image with Stampin’ Markers of Wild Wasabi & Rose Red & stamped directly onto the larger piece of Whisper White Cardstock. I did this twice, with the 2nd time stamping a little lower onto the Cardstock, the second time around.

Inside….

The smaller piece of Whisper White was run through the Big Shot with the Embossing Folder – Perfect Polka Dots, punched along one of the edges with the Oval Punch & adhered to the bottom of the larger piece of Whisper White Cardstock with Snail Adhesive.
I adhered a piece of Ribbon towards the bottom of the embossed piece.  The whole piece was then adhered to theBase Card – Bashful Blue – with Snail Adhesive.  I stamped my sentiment with Rose Red & Wild Wasabi Markers, punched out the Oval Punch & adhered to the top of the Ribbon.  I tied a small bow & adhered to the bottom part of the punched oval with a Mini Glue Dot.

A scap piece of Whisper White Cardstock was run through the Big Shot with the Beautufil Wings Embosslits Folder, wings curled a little with my Bone Folder & attached ramdomly to the card with Tombow Multipurpose Glue.

??To finish the card, I applied small Pearls to the flowers & also to the centre of the butterflies.

All in all a very simple & easy card, but one I am happy with.

Don’t forget to pop on over to Sunny Challenges & Creationsto check out what Gwen, Kris & our Weekly Guest Designer Alison have created.  We would love for you to join us this week.

“Who Me………….”

In finishing, I thought I would share with you my little helper this past week.  I’ve had a big year with weddings & receptions, so all the help is very much appreciated, no matter what form it may be.  She usually gets into a little mischief when she thinks she has been neglected long enough. 

Until next time, Happy Stampin’