FTL 136…

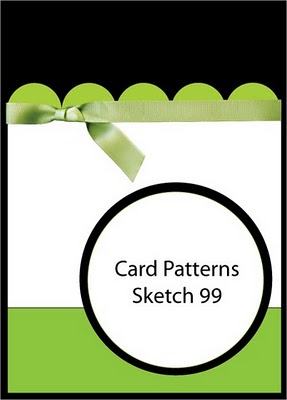
Today’s card is for the challenge over at Clean & Simple Stamping  On seeing this sketch, “DSP – Sweet & Sour Speciality” jumped into my hands.

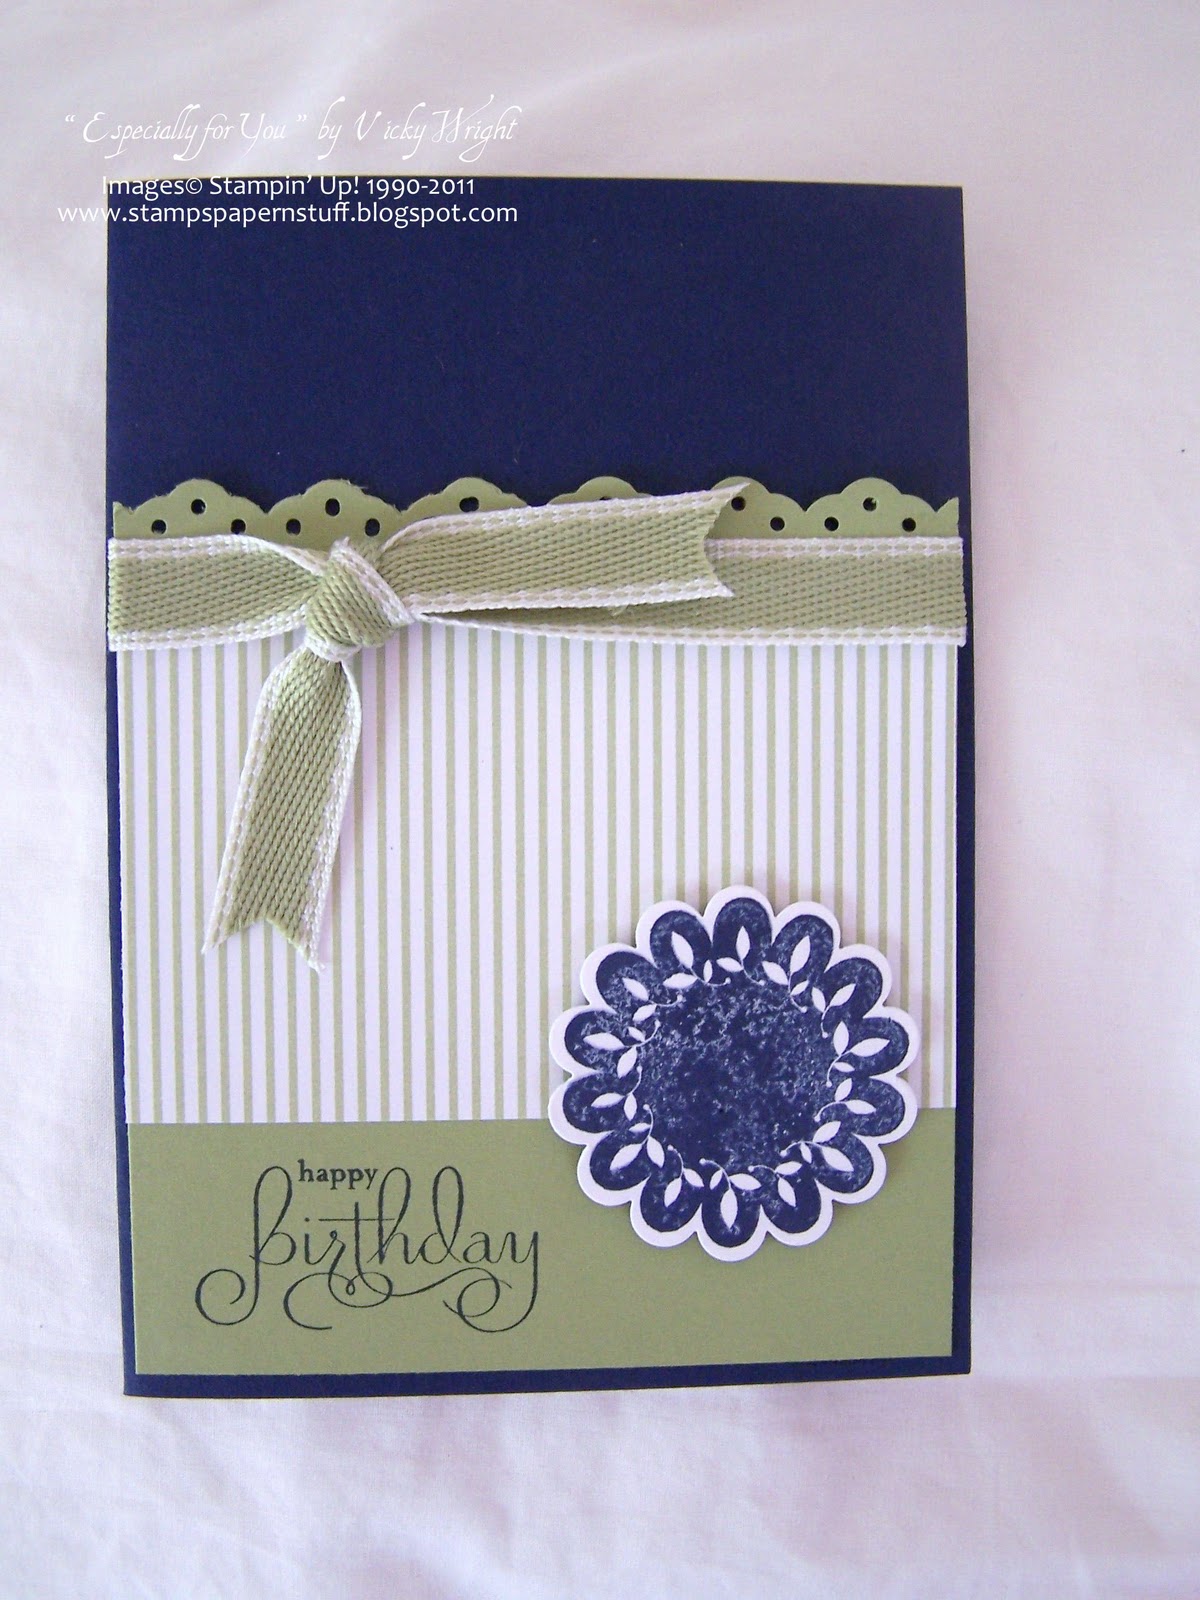
Base Card – Rose Red – 5 7/8″ x 4 1/8″ or 15cm x 10cm – Fold & Score
Layer 1 – Very Vanilla – 5 3/4″ x 4″ or 14.5cm x 9.5cm
Layer 2 – DSP – 3″ x 3 7/8″ or 7.5cm x 9cm
Layer 3 – DSP – 1 1/2″ x 3 7/8″ or 7.5cm x 9cm

I adhered my 2 pieces of DSP onto Very Vanilla Cardstock & adhered this to the Rose Red Base Card

For my ribbon, I decided to use a piece of DSP, but fold it for a little bit of a different look.  I cut a strip of DSP & scored along the piece.  I then proceeded to fold the DSP so that the folds would run down the card similiar to a ladder.  I adhered this to the card.
After cutting Very Vanilla Cardstock with my Bigshot & Sizzlit Dies, I sponged the edges with Pumpkin Pie Ink & a Dauber.  I stamped the sentiment in Basic Black Ink.  I cut my butterfly with the Bigshot & Embosslit Dies & sponged using my Dauber & Pumpkin Pie.  I adhered this to the sentiment & using SU Dimensionals, adhered it to the card.  I adhered Basic Pearls to the middle of the Butterfly.

All in all a great sketch!

?Supplies –
Stamp Set – Short n Sweet
Ink – Basic Black, Pumpkin Pie, Rose Red
Cardstock – Very Vanilla, Rose Red
Embosslit Dies – Beautiful Wings, Lots of Tags
DSP – Sweet & Sour Speciality
Accessories – Multipurpose Glue, SU Dauber, Basic Pearls
Until next time, Enjoy!

SSC 199…

I know, 2 days in a row, wonders will never cease!

Today’s card is taken from the sketch challenge over at Stamping 411  They always have a great sketch, not to mention the measurements!

Layer 1: 5-1/2 x 8-1/2″, scored at 4-1/4″ – Very Vanilla

Layer 2: 4 x 5-1/4″ – Wild Wasabi
Layer 3: 2-3/4 x 3-1/4″ – Rose Red
Layer 4: 2-5/8 x 3-1/8″ – Watercolour Paper

I stamped random images from “Growing Green” onto Wild Wasabi Cardstock, using Wild Wasabi Ink

I stamped the same image onto Water Colour Paper in Chocolate Chip Ink & using my Aqua Painter, coloured the image with Wild Wasabi Ink.  The flower image was stamped onto a scrap of Water Colour Paper again using Chocolate Chip Ink, coloured it with Rose Red Ink & my Aqua Painter.  I cut around the flower & adhered it to the Water Colour Paper using SU Dimensionals.  I stamped the sentiment in Chocolate Chip Ink.

I adhered this to a piece of Rose Red Cardstock, tied my ribbon across the top & adhered the whole section to my base card which is Very Vanilla Cardstock.

Supplies –
Stamp Set – Great Friend, Growing Green
Ink – Rose Red, Wild Wasabi, Chocolate Chip
Cardstock – Very Vanilla, Wild Wasabi, Rose Red, Watercolour Paper
Ribbon – 3/7″ Taffeta Real Red
Accessories – Multipurpose Glue, SU Dimensionals, Aqua Painter

Until next time, Enjoy!

TSSC 161…

I am loving this set from the current SAB and have used it yet again in today’s card.

The sketch is from Techostamper and is a Blog Hop.  This means you can click on anyone’s card & you will be taken directly to their blog.

For my card I decided to use the “DSP – Love Letter” along with stamp set “Bliss”

Basecard – Riding Hood Red – 5 3/4″ x 5 3/4″ or 15cm x 15cm
Layer 1 – DSP – Love Letter – 5 5/8″ x 5 5/8″ or 14.5cm x 14.5cm
Layer 2 – Riding Hood Red – 5″ x 2 1/4″ or 13cm x 6cm
Layer 3 – DSP – Love Letter – 4 7/8″ x 2 1/8″ or 12.5cm x 5.5cm
Layer 4 – Riding Hood Red – 3″ x 3″ or 8cm x 8cm
Layer 5 – DSP – Love Letter – 2 7/8″ x 2 7/8″ or 7.5cm x 7.5cm
Layer 6 – Very Vanilla – 2 3/4″ x 2 3/4″ or 7cm x 7cm

I stamped the image onto Very Vanilla Cardstock using Basic Black Ink.  I then stamped the flower images using Riding Hood Red Ink.  I also stamped the word “Bliss” using Riding Hood Red Ink.

After layering the card, I applied Basic Pearls to the middle of the flowers.  I tied a bow using the Crochet Trim and adhered it to the card.

All in all a very easy sketech & a very easy card.

Supplies –
Stamp SetBliss*
Inks – Basic Black, Riding Hood Red
Cardstock – Riding Hood Red, Very Vanilla
DSP – Love Letters
Ribbon – Crochet Trim – Chantilly**
Accessories – Snail Adhesive, Basic Pearls

* SAB
** Summer Mini-Catalogue

Until next time, Enjoy!

Seaworthy…

I pulled out my Colour Coach today to find a colour combination that would be a little different & for colours that I would never think to use together.  I went with the “Getting Started” Combination, which has gone perfectly with today’s card.
I’ve used the sketch from Clean and Simple which just cries for a clean & simple card!
I’ve also combined it with my groups weekly challenge for Late Night Stampers.  Challenge 108 – Let’s Hear it for the Boys – Masculine Cards

Base Card – Old Olive – 5 7/8″ x 4 1/8″ or 15cm x 10.5cm – cut, score & fold in half
Layer 1 – Marina Mist – 5 7/8″ x 2″ or 15cm x 5cm
Layer 2 – Real Red – 2 1/2″ x 3 1/2″ or 10cm x 6cm
Layer 3 – Whisper White – 2 3/8″ x 3 3/8″ x 9.5cm x 5.5cm
For my card, I randomly stamped Marina Mist Cardstock using Marina Mist Ink.  I then adhered this down the LHS of Old Olive.  Using Marina Mist Ink, I stamped the image directly onto the Whisper White.  I stamped the greeting in Real Red Ink off to the right of Whisper White Cardstock.  I adhered this to Real Red Cardstock & tore the bottom of the Real Red Cardstock
Using Hemp Twine, I tied this around the middle of the Whisper White & adhered the whole lot to the base card.  I threaded a piece of Hemp Twine through a buttom & adhered to the card.
Supplies –
Stamp Set – Seaworthy, Sincere Salutations
Inks – Real Red, Marina Mist
Cardstock – Whisper White, Old Olive, Real Red, Marina Mist
Ribbon – Hemp Twine
Accessories – Snail Adhesive, Multipurpose Glue, Button – Real Red
Until next time, Enjoy!

Birthday…

After a couple of days of not creating, I think maybe I am slowing getting back into it.
The creation for this card came from the fun challenge over at Card Patterns  The inspiration in my colours was taken from the sketch.  I love these colours together, so thought Why Not?
Base Card – Night of Navy Cardstock – Cut, score & fold
Layer 1 – Pear Pizzazz Cardstock – 4″ x 4 1/2″ or 11.5cm x 10cm
Layer 2 – Pear Pizzazz DSP – 2 1/2″ x 4″ or 6.5cm x 10cm
Using your Eyelet Border, punch an edge along the short side of Pear Pizzazz Cardstock
Adhere Pear Pizzazz DSP to the Pear Pizzazz Cardstock
Adhere Ribbon across the top of the DSP & tie knot
Adhere to Base Card
Stamp image onto Whisper White Cardstock, using Night of Navy Ink, punch out using Scallop Circle Punch & adhere to Card with SU Dimensionals
Stamp greeting directly onto Pear Pizzazz Cardstock with Night of Navy Ink
Supplies –
Stamp Set – Printed Petals, Well Scripted
Inks – Night of Navy
Cardstock – Night of Navy, Pear Pizzazz, Whisper White
DSP – Pear Pizzazz
Punches – Scallop Circle, Eyelet Border
Ribbon – 1/2″ Stitched Poly – Pear Pizzazz
Accessories – Snail Adhesive, SU Dimensionals
Until next time, Enjoy!