Scrappy Saturday….

Great news – I am actually posting this on time & the right day!!!!

Today, we will discuss tips on how to organise your photos.  These are my tips & how I like to organise my photos – everyone is different & you have to find the right system which suit you.

Organising your Photos –

The experts will always tell you to start from the most current event. This way it will be much easier & you will not feel so overwhelmed with all the photos in front of you. I am no expert by a longshot, but do agree with this.

I have what I call “A Working Album”. This is an album where I have my photos, papers, embellishments, etc altogether in a 12” x 12” plastic sleeve, including a rough sketch layout, so that when I am ready to scrap this page, it is all there for me. If I am using stamps to complete my page, I just scribble the name of the stamp set on the sketch page. Once this page is completed, I then transfer it to my current album in order that the event occurred. 
It may sound like a lot of work & double handling, but this system works great for me. Everyone is different & eventually you will have a system which works for you.

I also keep a photo album & put ALL my photos in this album. It is in date order. I do not have separate albums for separate events, etc, although a lot of scrappers do this. I often go through my albums & select a couple of good ones that I think would look nice scrapped. I either enlarge these photos or play with them until I am happy with the size I want to use on a page.   These are the photos that go onto a scrapbook pages & then into Scrapbook Albums.

Another way I have heard & seen people do is to sort photos into groups & store them in envelopes. I would then write on the front of the envelope everything about the photos & may even include a start of a layout if you wanted. I would then put these envelopes into a box & mark the box “Photos ready to be scrapped”.  I used to do this with my negatives, when we had negatives.

Mind you, after not doing any for a couple of years, it was great to go back to my photos & find them all sorted with either all the information I needed to complete the page or even bits of what was ideas forming.  All I have to do is follow through on my ideas.

I even found layouts completed just waiting to have the right photo added to the page.  I don’t do it this way very often as I like to scrap to suit my photos.  In saying that, I do know of a lot of friends who scrap pages they have seen or have done in a class, but I am always wondering if they ever do complete their pages with their photos or are they just sitting in their albums never to be used!!!!

Beginners –
If you are just beginning, I would pick a few photos of a recent event, eg birthday party, wedding, picnic, beach, fishing, kids, etc. The photos you select should be enough to finish 1 or 2 pages. Please remember that you do not have to scrap ALL the photos, only the ones that you want. You can always rearrange your pages at a later date.  Don’t feel overwhelmed, take it slow until such time as you feel you can do more.

Special Occasion –
If you have decided that you are going to do an album for a milestone or gift, eg 50th birthday, 25th wedding anniversary, etc collect a group of photos to start with. For this sort of album, they would be best in order, although again you don’t have to scrap them in order. A good starting point is about 30-40 photos remembering that the album will be double-sided.

My introduction into scrapbooking was a 50th Birthday present & boy did I dive in the deep end!  Even though I had only selected a couple of photos from what I thought were important events in the person’s life, it didn’t help that the person had done so much in the 50 years. What started as 1 album turned into 2 & then 3.  I stopped at 3!!!!!!  That was having 1 or 2 photos of each big event!  I must say at the end of the 18 months, yep 18 months, & after presenting it to the person, I was very happy with the albums, received a lot of lovely comments, but more importantly the person was over the moon with it.

That began my scrapbooking journey!

Since then, I have completed another album for a 50th Wedding Anniversary, numerous albums for different people, including many for myself.

I hope the above information is of help in some way to you.

Now on with today’s sketch & page……

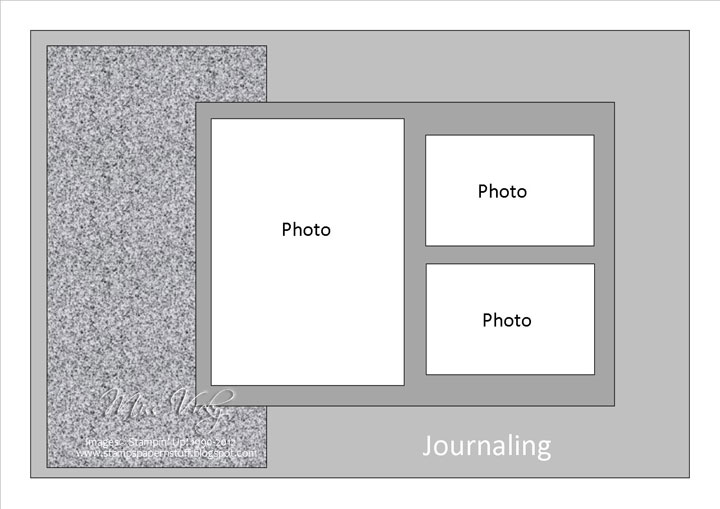
I found a lot of old sketches I had drawn up in an old torn, ripped notedbook which had been packed in a box & out of sight.  I don’t even remember doing any of them but thought they would be great to use before being tossed out. 

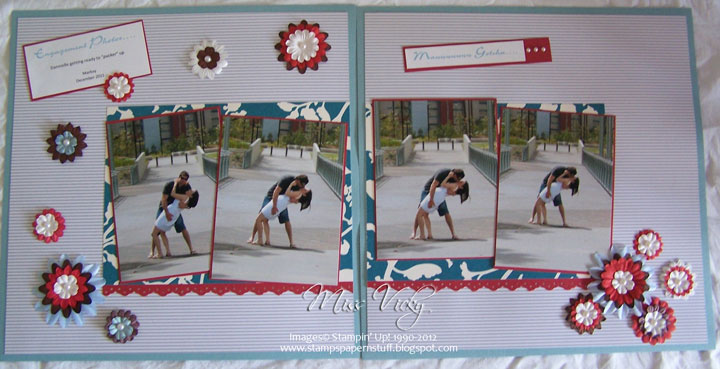
Don’t forget, when looking for inspiration, go back through your albums, dig out a layout you really like & reuse, reuse, reuse!!!!   You will be amazed at the difference between the 2 when using new papers, embellishments, stamps, ribbon, etc.

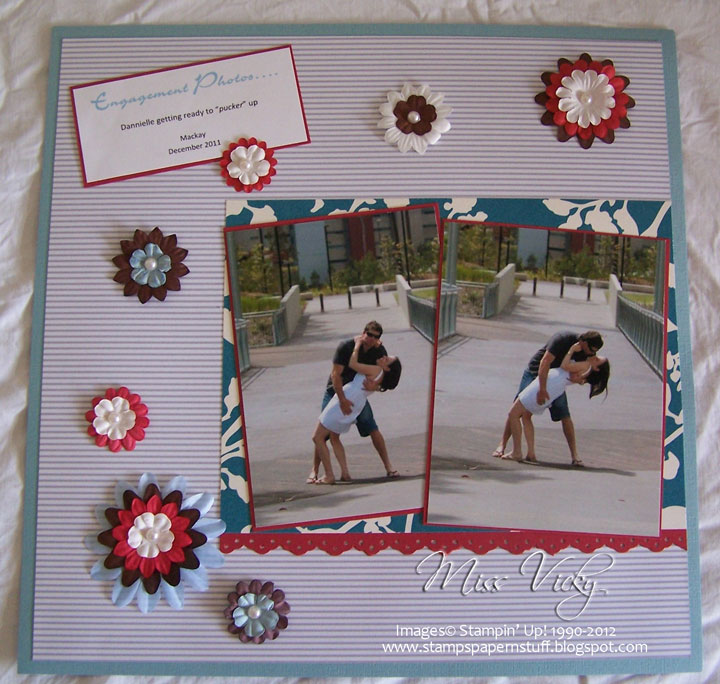
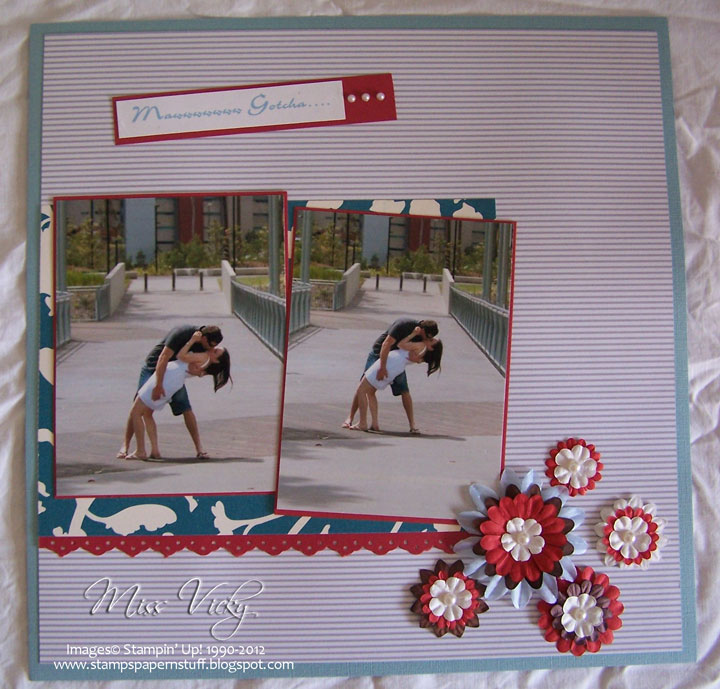
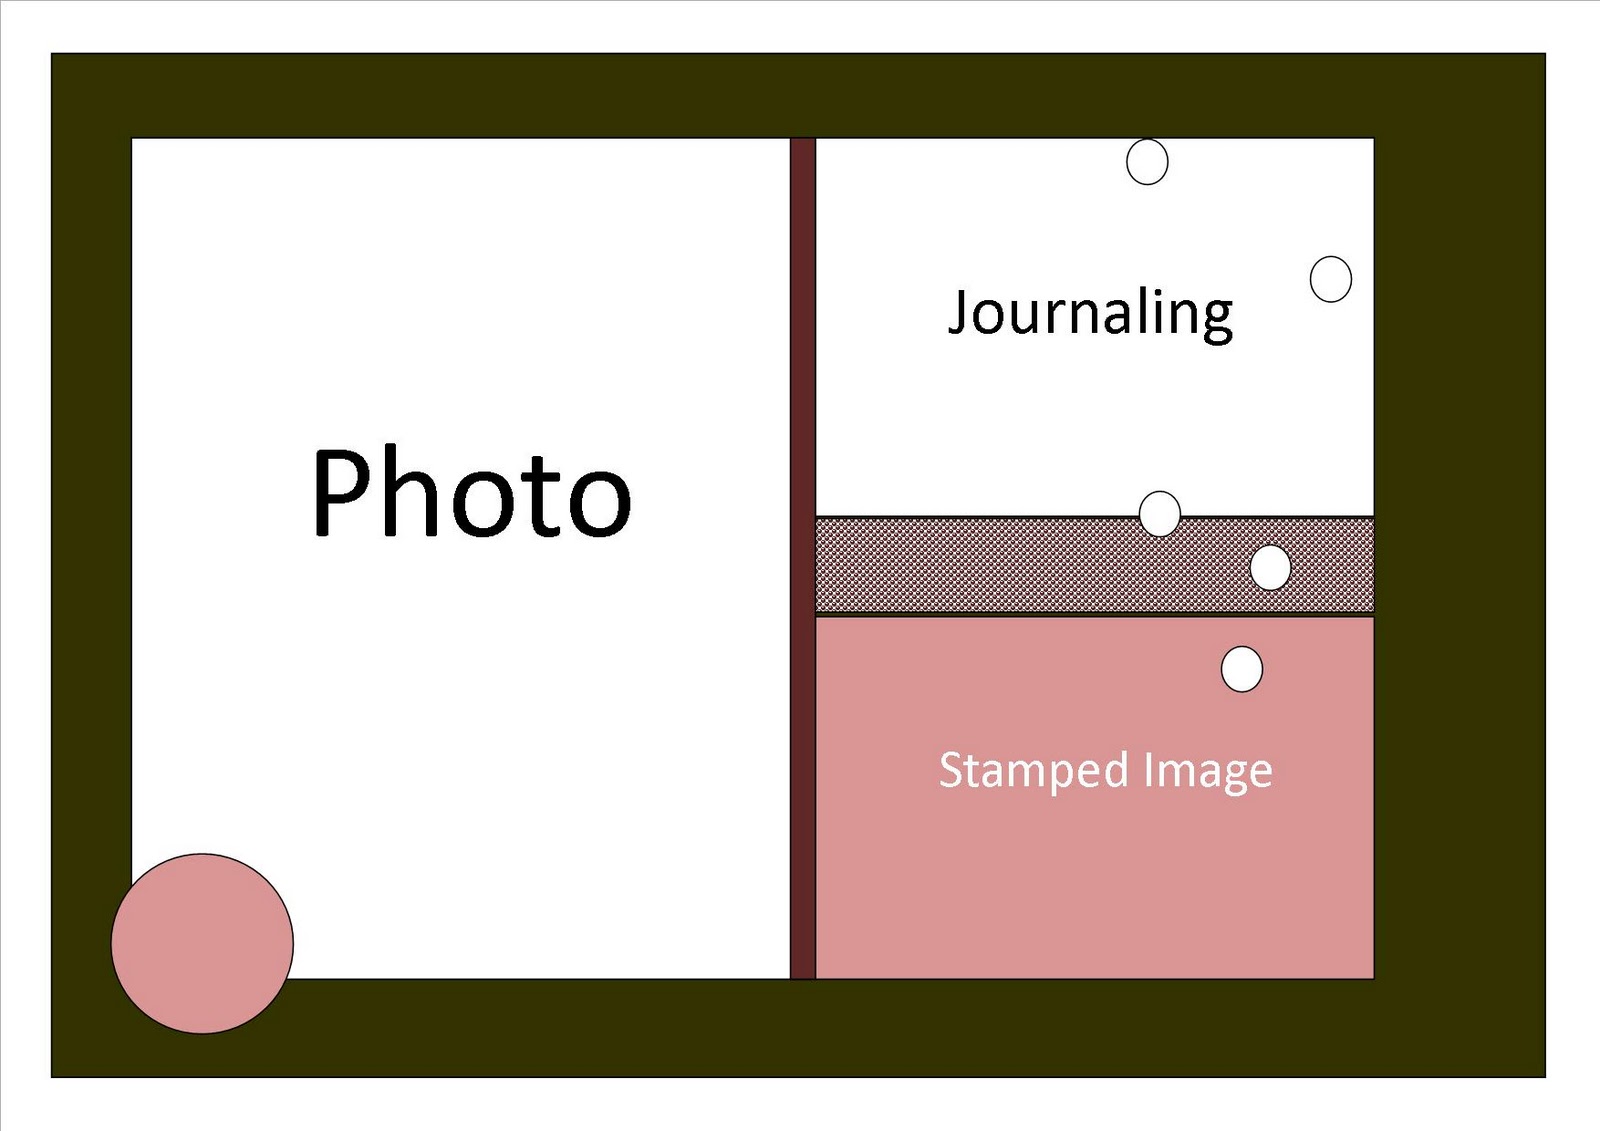
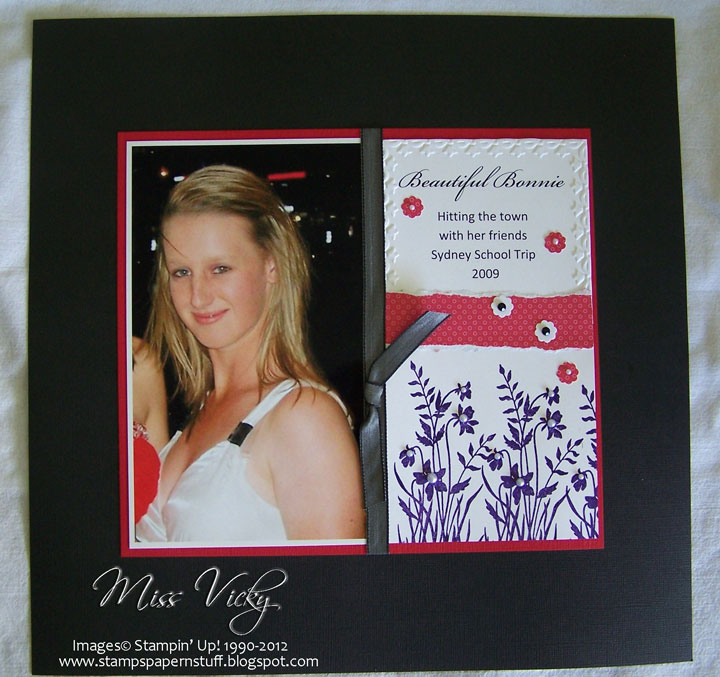
Again this sketch is fairly basic, but it is a good place to start.  Once you know your basic layout & where your photos will go, then it is just a matter of selecting colours, DSP & embellishments to finish your page.

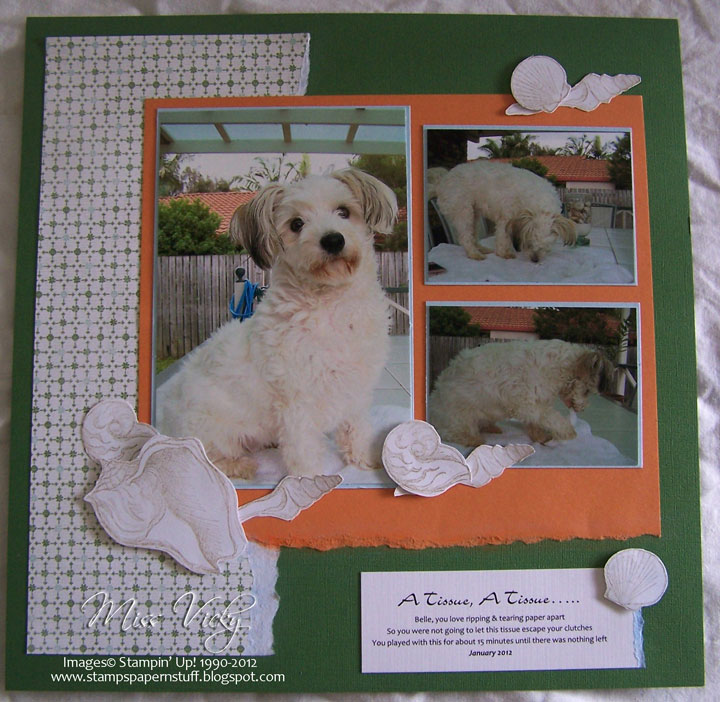
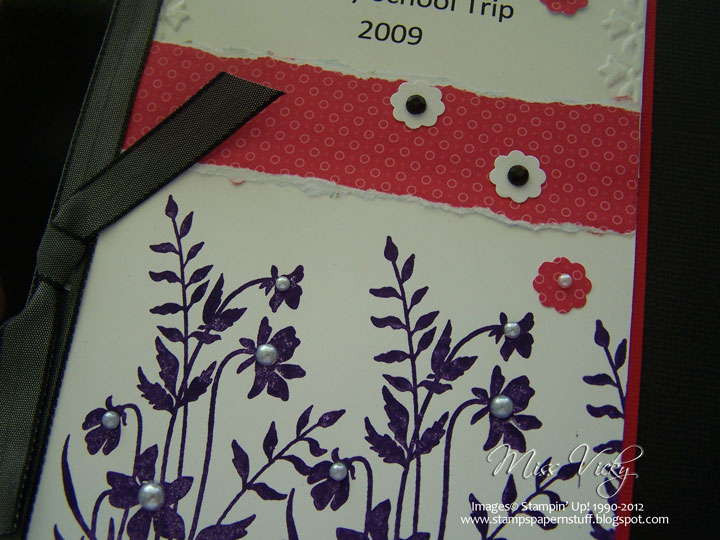
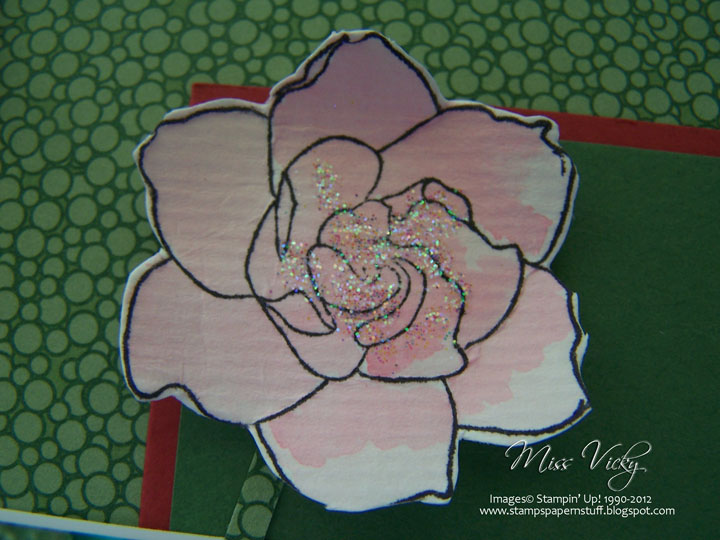
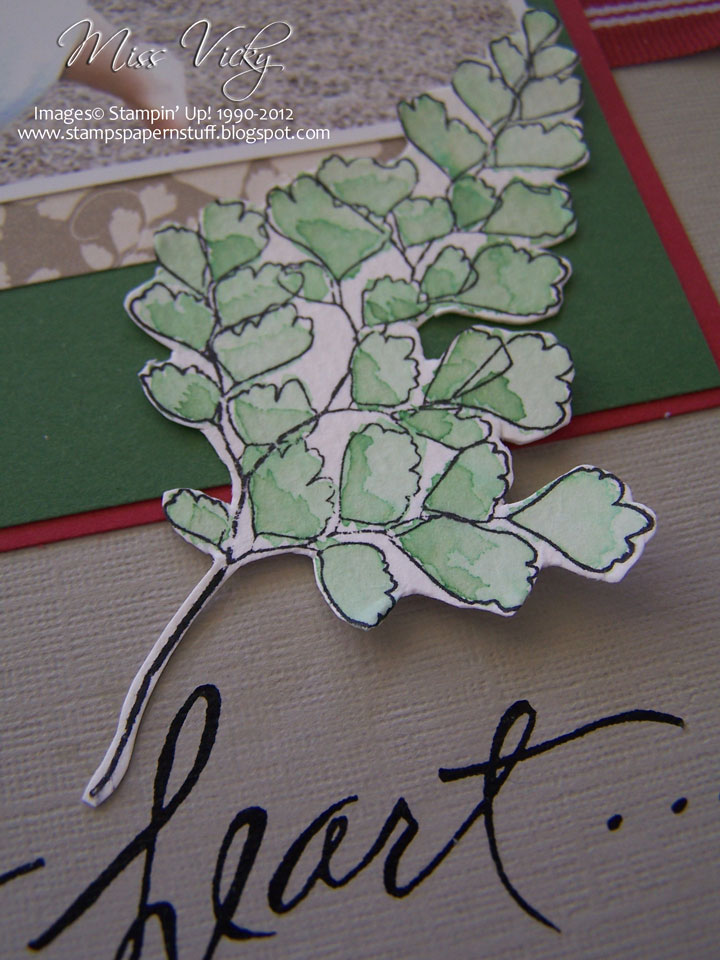
For my page, I went with all the colours in the photos, even though maybe just hints of the colours. I didn’t even consider the colour of the dog – which I just realised but palyed a major factor in the “white” – haha.  For my embellishments, I took the vase of shells on the table that can be seen in one of the photos. 

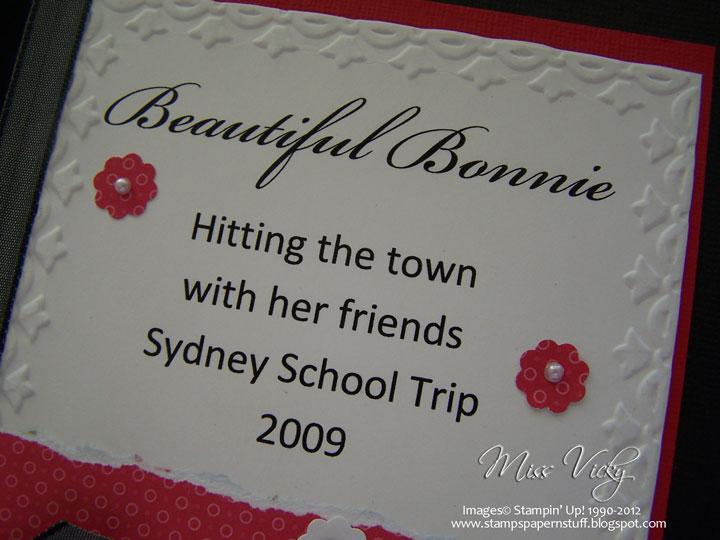
For my journaling, I just typed it on my PC & printed out!

Supplies –
Stamp Set – Seaside (Retired)
Ink – Crumb Cake
Cardstock – Textured Garden Green, Pear Pizzazz, Bashful Blue, Whisper White
DSP – Afternoon Tea (Retired)
Accessories – Snail Glue, Stampin’ Dimensionals, Chalks
Remember, Scrapbooking is mean to be FUN!!!!!

Pages 4 & 5…

One of the pages is using the layout sketch from yesterday

The great thing about layouts is you are able to use them as a base & then give your take on it.

My photos are of my niece & her finace getting their Engagement Photos taken.  I have previously completed a couple of pages of the same day, but instead of doing them all the same, I wanted to create different layouts using different colours, DSP & Embellishments.  I think it gives each page an individual look.  Everyone is different as some would prefer them to be all the same as it was the same event & same location, etc…..

I have tried to pick up the blue in the poles, the colour of the cement & the coloured panel in the building.

As the photos have been taken in sequence, I thought it a good idea to have a couple of the photos on the same page.  This way you are able to see them in order!!!!

I think they are great photos & show them having a lot of fun.  I don’t know about the look on Dannielle’s face as I am sure she would be letting Chris know not to drop her or else!!!!!

Again, I’ve used no stamps, although I am going to have to amend this, as I like my stamps to be involved in my scrapbooking.

Supplies –
Cardstock – Textured Baja Blue, Riding Hood Red
DSP – Timeless Portrait, Designer Series Paper Stacks – Neutrals Collection
Punches – Eyelet Border
Accessories – Snail Adhesive, Basic Pearls, Flowers
Non-SU – Flowers

Remember, Scrapbooking is meant to be FUN!!!!!!

Sydney Trip….

I’ve decided that one my main goals this year is to scrap 150 pages…..  I know, it does sound like a heap of pages, but I think with a bit of determination & planning it is achieveable.  When you break it down it is about 2 a week, maybe 3 some weeks, so I should be able to reach it!!!!

Anyhow, on with Scrappy Saturday which is not happening on a Saturday…..  Will have to fix that this week! 

I took my layout for this sketch from a past mini-catalogue – see they are still good for lots of ideas once they promotion has finished.  I’ve also created a sketch for you to have a try.

I decided to pick up the little bit of red in the photo – you can just see it in the dress & the light above Bonnie’s head.  The rest of the layout, I kept it with the colours in the photo – black & white.

I printed the little bit of journalling onto Whisper White Cardstock, printed it out & run it through the Bigshot with the Embossing Folder – Framed Tulips.  Now this folder I was not too keen on before I used it, so it has sat in my box since my purchasing it.  I have completely changed my mind now & you will be seeing a lot more of this folder!!!!

 After printing my photo, I kept a small white border before matting it onto Real Red Textured Cardstock.  I stamped my image direct onto a piece of Whisper White Cardstock using Basic Black Ink.  This image was meant to be embossed, but completed forgot about it until I finished the layout.  Oh well, next time hey.

 I adhered both pieces of Whisper White – stamped image & the journalling piece onto the Real Red Cardstock, cut a small piece of DSP, tore the edges & adhered between the 2 pieces of Whisper White.

I adhered the Ribbon down the middle, tucked the ends under, tied a knot & adhered to Basic Black Textured Cardstock.

I stamped 5 small flowers using the Flower Punch from the Itty Bitty Shapes Punch Pack, 2 in Whisper White, 3 in DSP.  These were randomly adhered to the page & Pearls adhered to the middle, as well as to the stamped images.

Another easy layout for you to try.

Tip
Don’t be afraid to tear your DSP for cards or scrapbooking.  It gives such a lovely look to your creation
Use your retired DSP for your scrapbook pages

Supplies –
Stamp Set – Just Believe
Ink – Basic Black
Cardstock – Whisper White, Real Red Textured, Basic Black Textured
DSP – Retired
Embossing Folder – Framed Tulips
Ribbon – 3/8″ Taffeta – Basic Black
Punches – Itty Bitty Shapes
Accessories – 2-Way Glue, Snail Adhesive, Pearls
Non-SU – Black Pearls

Until next time, Enjoy!

Another Niece….

Are you sick of my scrapbooking yet????  As I previously stated, I am loving getting back into my photos…  so many that I had forgotten, so many that bring back memories – happy & sad!!!!!

For this layout, I went into my albums to find inspiration.  It is always a great source of inspiration to go looking at your old pages for ideas.  All you have to do is revamp with newer papers, cardstock & embellishments.  Believe me, you will think they are completely different layouts!

I do a lot of colour-blocking for my pages and for this one I used retired DSP, although it is from the same pack.  After SU retires its papers, you think that they could not possibly bring out nicer DSP, but how wrong you are.  Each year, the DSP is just as great or better than the previous year.

I wanted to keep with the greys, as in Bonnie’s cardigan while at the same time pick up the little bit of cream/yellow/lemon on the temple walls.  I think I succeeded without going over the top!  This is of Bon on her big school trip to Sydney!!!!!

With colour-blocking, you don’t have to use a lot of embellishments.  I kept this page to a minimum, only going with ribbon & the metal tag….

For what looks like a 5 minute page, it did actually take me about an hour….  I know, I like to play with this & that, try my papers this way & that until I feel that I have captured the photo.

Supplies –
Cardstock – Textured Riding Hood Red, Whisper White
DSP – Walk in the Park
Ribbon – 3/8″ Taffeta – Riding Hood Red
Accessories – Snail Adhesive, Sticky Strip, SU Marker – Basic Black
Non-SU – Metal Tag
Until next time, Enjoy!

Happy New Year…

I hope you all had a great new year & didn’t celebrate too much!!!!  I had a very quiet one & didn’t even see the new year in!

After some thinking, toing & froing, I have decided to start “Scrappy Saturday” once again.  I do realise I am a little late in posting this one.  I have been busy doing their wedding invitations.
It has been so long since I did this, that I thought it would be a great way for me to get into my scraping again & who knows may even give you some incentive to start your journey too……
Along with a sketch each Saturday & my take on it, I will be offering some tips, techniques, storage ideas both for albums, photos, etc along the way.  Hey, every little bit helps!!!!!!
Again I’ve used a photo of my niece & her finance….  I have so many lovely photos of their pre-engagement that it just seems a waste not to put them into a lovely album.  You will probably be sick of looking at them by the time I am through, but I will try & mix them up a little.
I used Crumb Cake Textured Cardstock for my base, layered a piece of DSP to the top half with a piece of Riding Hood Ribbon across the join.
I matted a piece of DSP onto a piece Garden Green Cardtsock, then to a piece of Riding Hood Red Cardstock before adhering to the Layout. 
I decided not to matt the photo, but left a small trim of the photo paper around to make a small  edge.  In real life, it looks like it has been matted onto Whisper White.  It gives a little bit of a different look & also introduces a little white into the layout as Dannii has her white dress.
I cut 2 long thin strips of DSP, adhered them to the layout.  
I stamped the images onto Watercolour Paper with Staz-On & using my Aqua Painter, coloured one with Pretty in Pink & Regal Rose, while the other is So Saffron.  I added a little Dazzling Diamonds with 2-Way Glue to both centres.  These images were cut out & adhered to the page with Stampin’ Dimensionals.
For the leaf, I again coloured with my Aqua Painter & Garden Green Ink, before cutting around the image & adhering to the layout with Multipurpose Glue.
The wording is from from stash before Stampin’ Up!
While cleaning up, I have come across albums of “Stuff” which I have not used in years, so this will be a great opportunity to use it.  You will also be seeing some retired DSP – I thought it a good way to use it up, as I don’t use it for classes or workshops.
Supplies –
Stamp Set – Growing Green
Ink – Staz-On, Garden Green, So Saffron, Regal Rose, Pretty in Pink
Cardstock – Textured Crumb Cake, Garden Green, Riding Hood Red, Watercolour Paper
DSP – Woodland Park (Retired)
Ribbon – 5/8″ Grosgrain Striped – Riding Hood Red (Retired)
Accessories – 2-Way Glue, Multipurpose Glue, Snail Adhesive,
Dazzling Diamonds, Aqua Painter, Stampin’ Dimensionals
Non-SU – Rub-On
This layout also fits the current challenge over at Sunny Challenges & Creations…. to create anything but a Christmas Theme.  Why not give it a try.  You have until Saturday arvo!
Until next time, Enjoy!