SC 065/12…

Can you believe t?  We actually had rain last night & boy it cool this morning, but hey who cares – Rain, we have Rain!!!!!!  A great day for stampin & catching up on all those little projects that we tend to lend for “Ron” – later on!  Rain!!!!  did, I mention we have Rain!!!!!!!!!

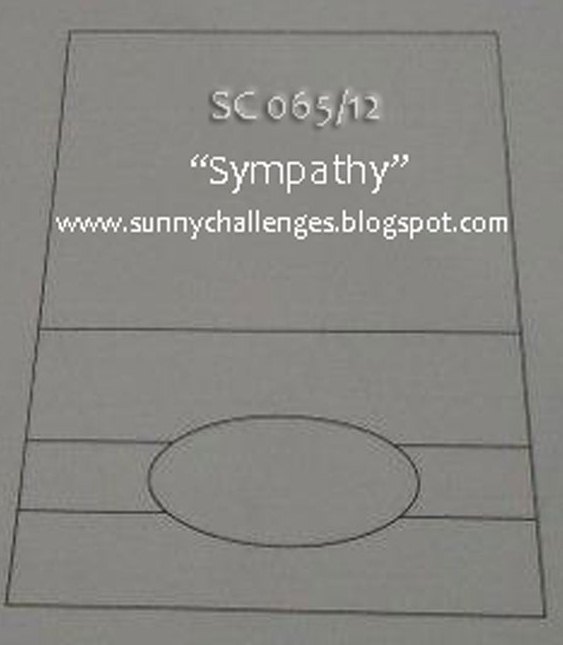
Our challenge this week over at Sunny Challenges & Creations is to create a “Sympathy” card along with the great sketch layout!  This is a type of card that we don’t like creating, but is always good to have in your stash.

Measurements –
Base Card – Bashful Blue – 8 1/4″ x 4 1/8″ or 21cm x 15cm
Layer 1 – Whisper White – 3 3/4″ x 2 1/2″ or 9.5cm x 6.5cm
Layer 3 – Whisper White – 3 1/2″ x 3 3/4: or 9cm x 9.5cm

Supplies –
Stamp Set – Just Believe, Petite Pairs
Ink – Nil
Cardstock – Whisper White, Bashful Blue
Embossing Folder – Perfect Polka Dots
Punches – Scallop Trim Border, Oval
Embosslits – Beautiful Wings
Ribbon – 5/8″ Organza – Whisper White
Accessories – Snail Adhesive, Pearls, Stampin’ Up! Markers – Rose Red & Wild Wasabi, Stampin’ Dimensionals, Mini Glue Dots, Bone Folder, Big Shot

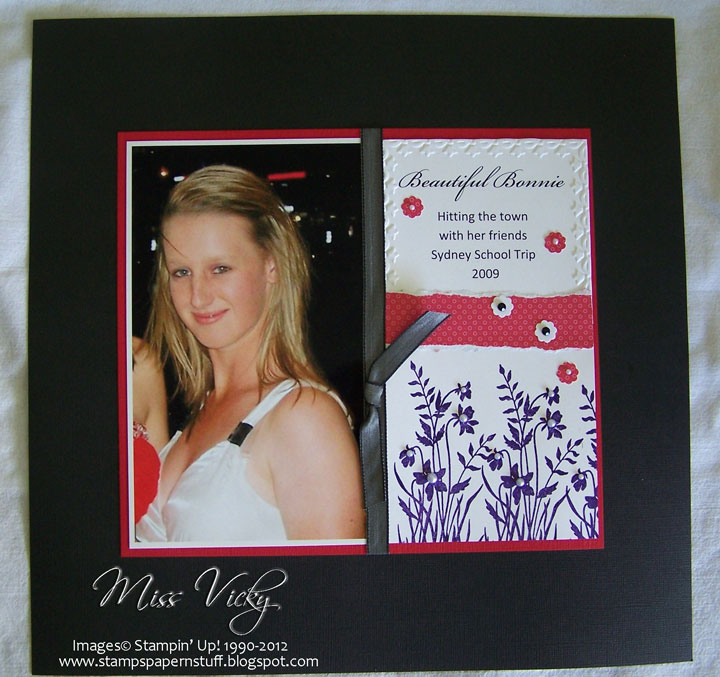
I wanted to use a colour I haven’t touched in a lot time, so it was basically a toss up between the new “In Colours” or Bashful Blue, which won in the end.

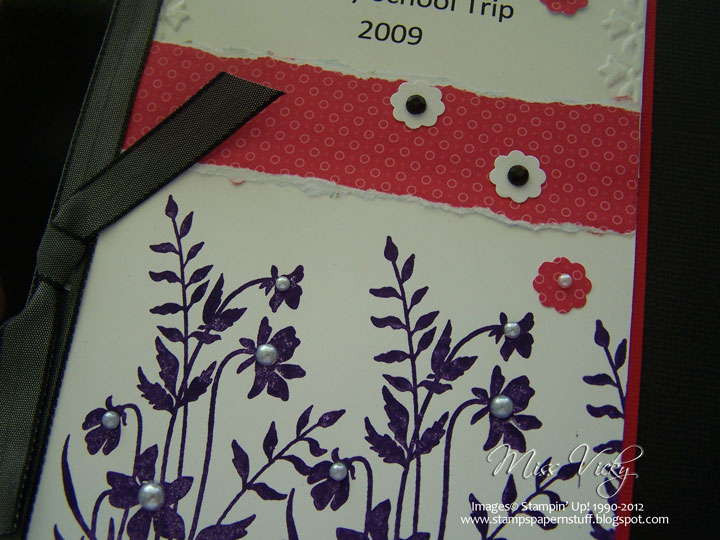
I inked my main image with Stampin’ Markers of Wild Wasabi & Rose Red & stamped directly onto the larger piece of Whisper White Cardstock. I did this twice, with the 2nd time stamping a little lower onto the Cardstock, the second time around.
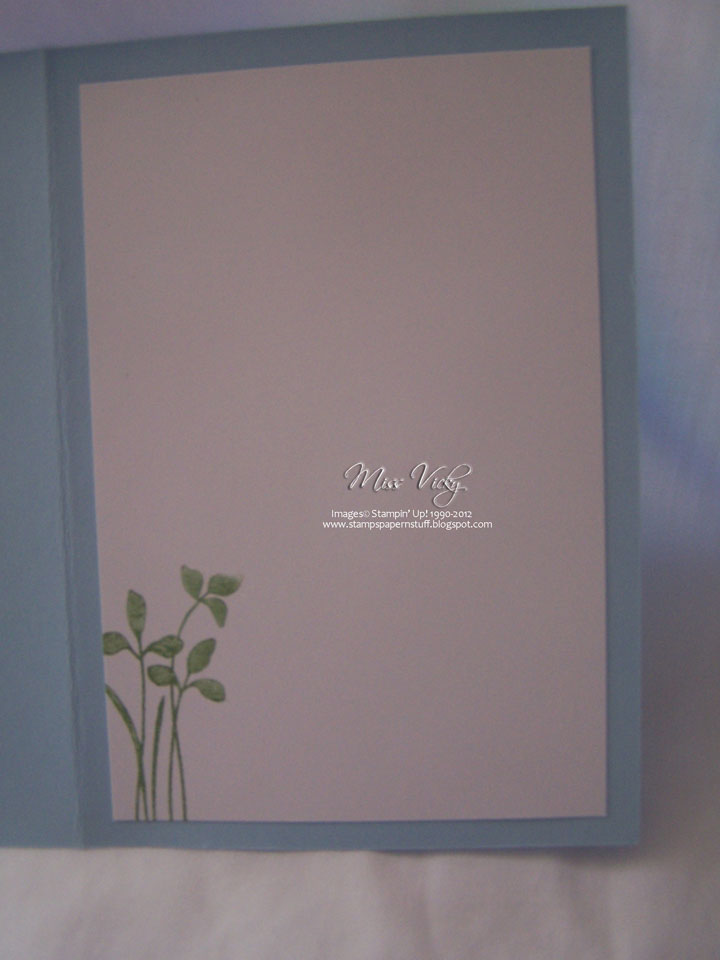
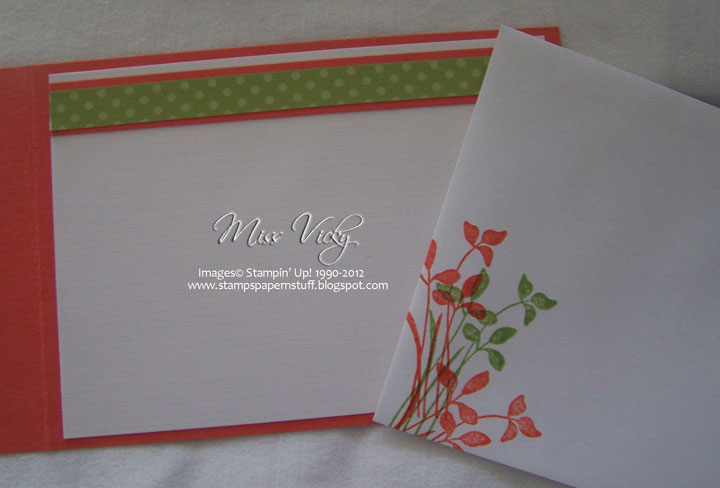
Inside….

The smaller piece of Whisper White was run through the Big Shot with the Embossing Folder – Perfect Polka Dots, punched along one of the edges with the Oval Punch & adhered to the bottom of the larger piece of Whisper White Cardstock with Snail Adhesive.
I adhered a piece of Ribbon towards the bottom of the embossed piece.  The whole piece was then adhered to theBase Card – Bashful Blue – with Snail Adhesive.  I stamped my sentiment with Rose Red & Wild Wasabi Markers, punched out the Oval Punch & adhered to the top of the Ribbon.  I tied a small bow & adhered to the bottom part of the punched oval with a Mini Glue Dot.

A scap piece of Whisper White Cardstock was run through the Big Shot with the Beautufil Wings Embosslits Folder, wings curled a little with my Bone Folder & attached ramdomly to the card with Tombow Multipurpose Glue.

??To finish the card, I applied small Pearls to the flowers & also to the centre of the butterflies.

All in all a very simple & easy card, but one I am happy with.

Don’t forget to pop on over to Sunny Challenges & Creationsto check out what Gwen, Kris & our Weekly Guest Designer Alison have created.  We would love for you to join us this week.
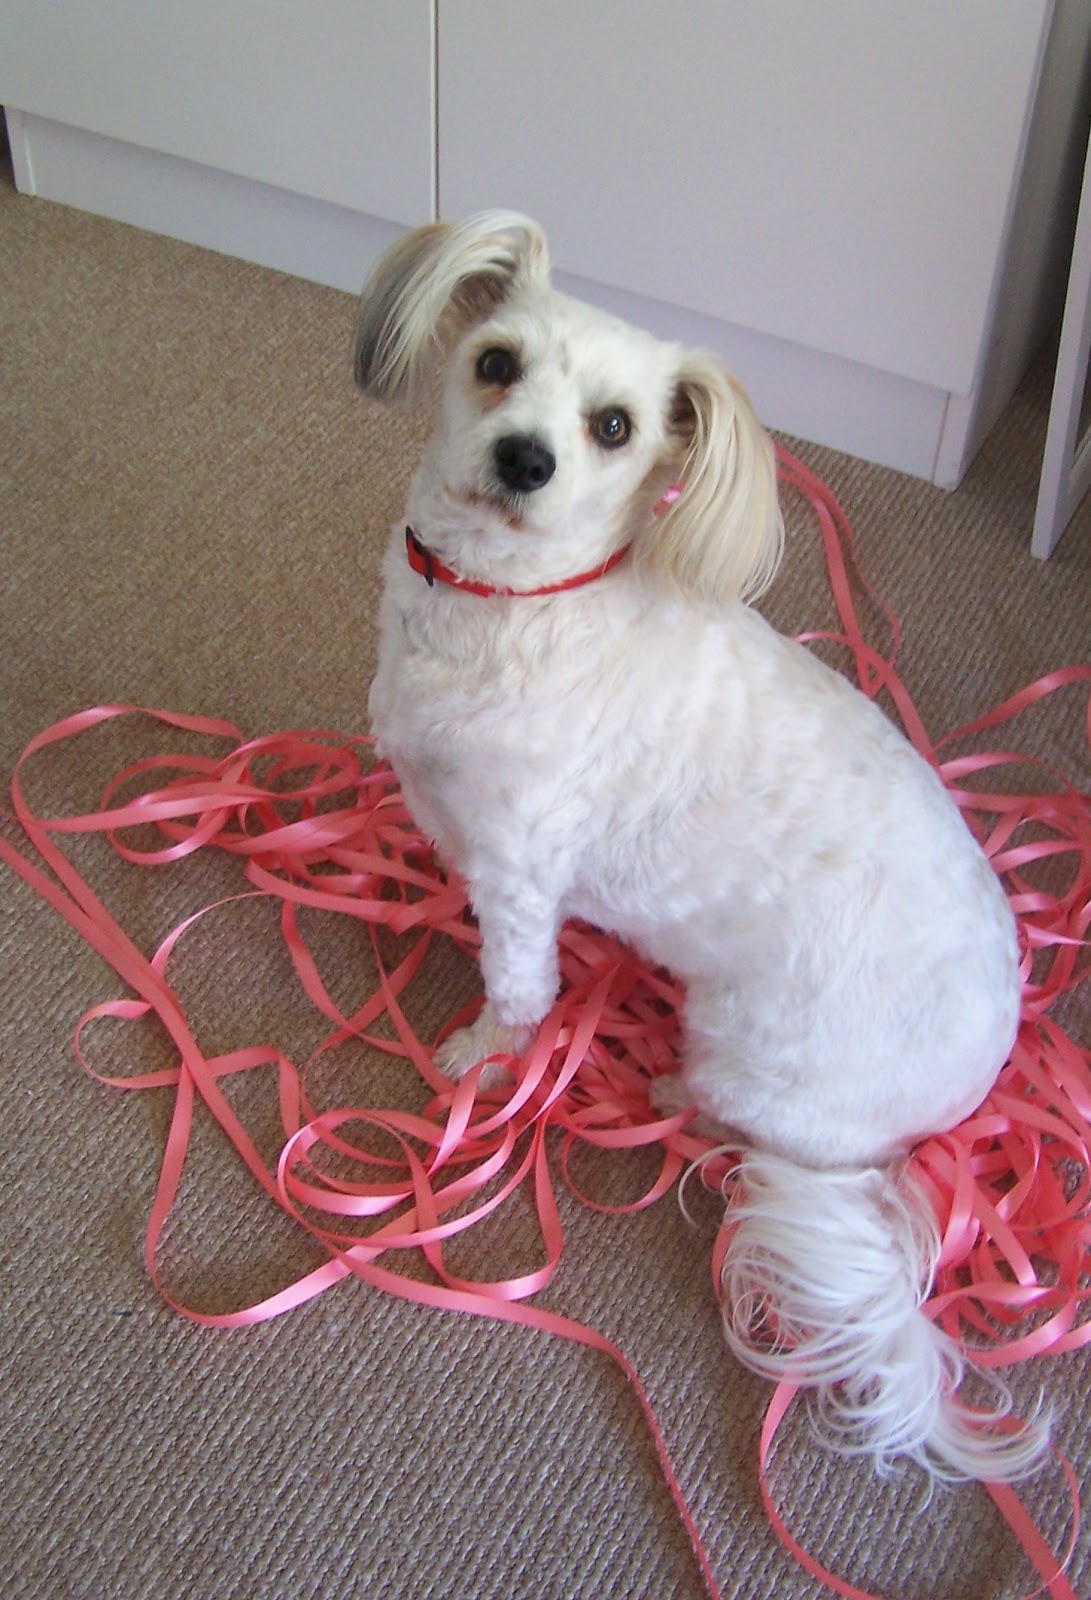
“Who Me………….”

In finishing, I thought I would share with you my little helper this past week.  I’ve had a big year with weddings & receptions, so all the help is very much appreciated, no matter what form it may be.  She usually gets into a little mischief when she thinks she has been neglected long enough. 

Until next time, Happy Stampin’


SC 03612…

Our sketch over at Sunny Challenges & Creations has been brought to us by Gwen – yep Gwen is back this week!  We only the the sketch to go by, although she has created something that I really had to think about & for the life of me nothing would come so I basically winged this & did it as I went!

Measurements –
Base Card – Early Expresso – 8 1/4″ x 4 18/” or 21.5cm x 15cm – Scored in middle & folded in half
Layer 1 – Very Vanilla – 5 5/8″ x 4″ or 14cm x 10cm
Layer 2 – Early Expresso – 3 3/4″ x 2 1/4″ or 9.5cm x 5.5cm
Layer 3 – Very Vanilla – 3 5/8″ x 2 1/8″ or 9cm x 5cm
Layer 4 & 6 – Early Expresso – 2 3/4″ x 1 3/4″ or 7cm x 4.5cm
Layer 4 & 7 – Very Vanilla – 2 5/8″ x 1 5/8″ or 6.5cm x 4cm

I run the large piece of Very Vanilla Cardstock through the Bigshot using the Embossing Folder – Vintage Wallpaper.  I then rubbed the Tea Stain Ink Pad from the Distrissing Kit over the top & set aside.

Envelope & Inside Card…

I stamped the long piece of Very Vanilla Cardstock after inking my image in Crumb Cake & sponged a little bit of the Tea Stain Ink around the edges prior to adhering to the long piece of Early Expresso Cardstock with Snail Adhesive.  I adhered this whole piece to the LHS of the embossed piece of cardstock with Tombow Multipurpose Glue.

The 2 smaller pieces of Very Vanilla Cardstock were randomly stamped with Crumb Cake, sponged around the edges with Tea Stain Ink using SU Sponge & adhered to the 2 smaller pieces of Early Expresso Cardstock using Snail Adhesive.  Both pieces were adhered to the embossed piece with Tombow Multipurpose Glue.

The image in the middle was inked with Crumb Cake Ink, stamped onto a scrap of Very Vanilla.  The sentiment was inked with my SU! Marker – Early Expresso one by one & stamped into the stamped image one by one.  For this method, I inked one word at a time, once stamped, cleaned & repeated.  I cut the frame out & mounted with SU! Dimensionals.

The butterflies were cut using the Bigshot & Beatutiful Wings Embosslits Dies.  I usually have a heap of different colours in a small plastic container, but no Early Expresso.  I adhered the small Pearls to the middle of the butterflies prior to adhering randomly to the card with Tombow Multipurpose Glue

Pearls were adhere to the flowers prior to the whole piece being adhered to the Base Card with Tombow Multipurpose Glue.

I’ve just noticed I missed a couple of Pearls in the photo, but they have since been added…..

Supplies –
Stamp Set – Just Believe
Ink – Crumb Cake, Tea Stain
Cardstock – Early Expresso, Very Vanilla
Embosslits Die – Beautiful Wings
Embossing Folder – Vintage Wallpaper
Accessories – Snail Adhesive, Tombow Multipurpose Glue, SU! Markers – Early Expresso, Pearls

Don’t forget to pop over to see what the rest of the team have created.  We would love for you to join us!

Until next time, Happy Stampin’

Friday’s Case…

Our task today was to create a crad using the Technique – Faux Silk.  I love this technique that I thought we would try using tissue for our flowers too…..  I love the final look of the card.  I have cased the idea from Lori.

Measurements –

Base Card – Pear Pizzazz Cardstock – 11 3/4″ x 4 1/8″ or 30cm x 10.5cm – Scroed in middle & folded in half
Layer 1 – Whisper White Cardstock – 5 5/8″ x 4″ or 14.5cm x 10cm
Layer 2 – DSP – 5 1/2″ x 3 7/8″ or 14cm x 9.5cm
Layer 3 – Pear Pizzazz Cardstock – 3 3/8″ x 2 3/8″ or 8.5cm x 6cm
Layer 4 – Whisper White Cardstock – 3 1/4″ x 2 1/4″ or 8cm x 5.5cm

I adhered my DSP to Whisper White Cardstock, layered a piece of Ribbon towards the bottom half of the DSP, tucked the ends under & adhered to the Base Card – Pear Pizzazz.

I will do up a tutorial on how I did my Faux Silk & flowers so be sure to check back tomorrow…….

After adhering all my flowers together with a Brad & applying a Pearl to the centre using Crystal Effects, adhering to the Base Card, I stanped my sentiment onto Whisper White Cardstock, punched using the Large Oval & adhered to a piece of Pretty in Pink Cardstock which had been punched with the Scallop Oval Punch.

My butterflies were cut using my Bigshot & the Embossit Dies, adhered together & a Pearl applied to the centre before being adhered to the top of the card…..
Supplies –
Stamp Set – Just Believe, Short & Sweet
Ink – Pear Pizzazz, Pretty in Pink
Cardstock – Pear Pizzazz, Pretty in Pink, Whisper White
DSP – In Colours Designer Series Pattern Stack
Embosslits Dies – Beautiful Wings
Punches – Scallop Oval, Large Oval
Ribbon – 1/2″ Stitched-Poly – Pear Pizzazz
Accessories – Pearls, Snail Adhesive, Crystal Effects, Brads
Non-SU – Tissue Paper
Until next time, Enjoy!

Just Believe….

…is such a great stamp set & I find myself going to it constantly that I sometimes have to stop & grab another.

It is so long since I created a card for a challenge that I thought I would try the challenge over at Stampin’ Up! Only.  This site is where you have to use SU! products only on your creations.  This week the challenge is to use a Technique that you use infrequently.  I don’t do nearly enough techniques on my cards, so this is the perfect opportunity to try!

Knowing what I had to create on my card, I then went in search of a sketch.  What better place to start than Mary Jo’s.  This is the first of her sketches for the year.

For my card I choose the Technique – Faux Silk

Measurements –
Base Card – Calyspo Coral – 11 5/8″ x 4 1/8″ or 30cm x 10.5cm – Scored & Folded in the middle
Layer 1 – Whisper White – 5 5/8″ x 4″ or 14.5cm x 10cm
Layer 2 – DSP – 5 1/2″ x 3 7/8″ or 14cm x 9.5cm
Layer 3 x 2 – Calyspo Coral – 3 1/2″ x 2″ or 9cm x 5cm
Layer 4 x 2 – Whisper White – 3 3/8″ x 1 7/8″ or 8.5cm x 4.5cm
Layer 5 – Calyspo Coral – 5 3/4″ x 3/4″ or 14.5cm x 2cm
Layer 6 – Whisper White – 5 5/8″ x 5/8″ or 14cm x 1.5cm

I adhered the DSP to the piece of Whisper White Cardstock & then to the Base Card – Calyspo Coral using Snail Adhesive.

Envelope & Inside…
After stamping my image onto Tissue Paper using Pear Pizzazz Ink, let dry & scrunched the tissue,  adhered it to a piece of Whisper White Cardstock using Anywhere Glue.  I adhered this piece to the 2 pieces of Calyspo Coral Cardstock before adhering to the Base Card.

??

I stamped my sentiment onto the piece of Whisper White Cardstock using Pear Pizzazz Ink and adhered to the long piece of Calyspo Coral prior to adhering to the card. 

I punched 3 flowers in Calyspo Coral Cardstock using the Boho Punch & adhered to the card.  Pearls were applied to the centre as well as to some of the images.

I tied a bow & adhered to the card.

Supplies –
Stamp Set – Just Believe, A Word for You
Ink – Pear Pizzazz
Cardstock – Calyspo Coral, Pear Pizzazz, Whisper White
DSP – In Colours
Punches – Boho
Ribbon – 3/8″ Ruffled – Lucky Limeade
Accessories – Anywhere Glue, Snail Adhesive, Pearls
Non-SU – Tissue Paper
Until next time Enjoy!

Sydney Trip….

I’ve decided that one my main goals this year is to scrap 150 pages…..  I know, it does sound like a heap of pages, but I think with a bit of determination & planning it is achieveable.  When you break it down it is about 2 a week, maybe 3 some weeks, so I should be able to reach it!!!!

Anyhow, on with Scrappy Saturday which is not happening on a Saturday…..  Will have to fix that this week! 

I took my layout for this sketch from a past mini-catalogue – see they are still good for lots of ideas once they promotion has finished.  I’ve also created a sketch for you to have a try.

I decided to pick up the little bit of red in the photo – you can just see it in the dress & the light above Bonnie’s head.  The rest of the layout, I kept it with the colours in the photo – black & white.

I printed the little bit of journalling onto Whisper White Cardstock, printed it out & run it through the Bigshot with the Embossing Folder – Framed Tulips.  Now this folder I was not too keen on before I used it, so it has sat in my box since my purchasing it.  I have completely changed my mind now & you will be seeing a lot more of this folder!!!!

 After printing my photo, I kept a small white border before matting it onto Real Red Textured Cardstock.  I stamped my image direct onto a piece of Whisper White Cardstock using Basic Black Ink.  This image was meant to be embossed, but completed forgot about it until I finished the layout.  Oh well, next time hey.

 I adhered both pieces of Whisper White – stamped image & the journalling piece onto the Real Red Cardstock, cut a small piece of DSP, tore the edges & adhered between the 2 pieces of Whisper White.

I adhered the Ribbon down the middle, tucked the ends under, tied a knot & adhered to Basic Black Textured Cardstock.

I stamped 5 small flowers using the Flower Punch from the Itty Bitty Shapes Punch Pack, 2 in Whisper White, 3 in DSP.  These were randomly adhered to the page & Pearls adhered to the middle, as well as to the stamped images.

Another easy layout for you to try.

Tip
Don’t be afraid to tear your DSP for cards or scrapbooking.  It gives such a lovely look to your creation
Use your retired DSP for your scrapbook pages

Supplies –
Stamp Set – Just Believe
Ink – Basic Black
Cardstock – Whisper White, Real Red Textured, Basic Black Textured
DSP – Retired
Embossing Folder – Framed Tulips
Ribbon – 3/8″ Taffeta – Basic Black
Punches – Itty Bitty Shapes
Accessories – 2-Way Glue, Snail Adhesive, Pearls
Non-SU – Black Pearls

Until next time, Enjoy!