TSSC 173…

Today’s card is inspired using the Colour Inspiration from Stamping 411 which was taken from the colours of this lovely dress.  Isn’t it gorgeous!  The colours suit SU colours perfectly.

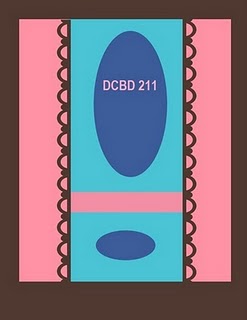
The sketch is taken from Mary-Jo’s Challenge found on this blog – Technostamper
Base Card – Tempting Turquoise – 5 7/8″ x 4 1/4″ or 15cm x 10.5cm
Layer 1 – Whisper White – 5″ x 3 1/4″ or 13cm x 8.5cm
Layer 2 – Pear Pizzazz – 4 7/8″ x 3 1/8″ or 12.5cm x 8cm
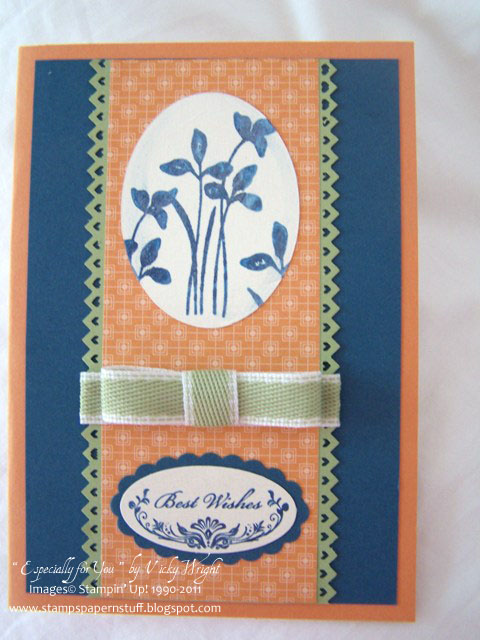
I run the Pear Pizzazz Cardstock through the Petals A Plenty Embossing Folder.  This was layered to Whisper White Cardstock.  I adhered Whisper White Taffeta Ribbon across the bottom, tied a bow & attached it to the base card – Tempting Turquoise.
For my circle, I punched a circle in Whisper White, sponged Tempting Turquoise & Pear Pizzazz Inks to the Whisper White using my SU Sponges.  I then stamped the image in Versamark & heat embossed using Black Embossing Powder.
I punched another circle using Whisper White, adhered it to the smaller circle & attached to the card.
All in all a very simple, but clean card. Again, no sentiment.
Supplies –
Stamp Set – Just Believe
Ink – Versamark, Tempting Turquoise, Pear Pizzazz
Punches – 1 3/4″ Circle, 1 3/8″ Circle
Ribbon – 3/8″ Taffeta Ribbon – Whisper White
Accessories – Multipurpose Glue, Snail Glue, Bigshot, Heat Tool, Embossing Powder – Black, SU Sponges
This is a Blog Hop, so be sure to check out the other cards you find below, by clicking directly onto the card.  You will be taken to their blog.

Until next time, Enjoy
 

Best Wishes…

I wanted to use a particular stamp set this morning, so I went searching for a sketch challenge & come across this one from Diva Coffee Break & thought “Why not”.  This is what I come up.

Base Card – Peach Parfait Cardstock – Cut, score & fold
Layer 1 – Not Quiet Navy Cardstock – 5 1/2″ x 3 3/4″ or 14cm x 9.5cm
Layer 2 – Pear Pizzazz Cardstock – 5 1/2″ x 2 1/2″ or 14cm x 6.5cm
Layer 3 – DSP – 5 1/2″ x 2 1/8″ or 5.5cm

Attach Layer 1 to card base
Using my Border Punch, I punched both sides of Pear Pizzazz & attached to card base.  Armed with my Bigshot, Oval Dies & Very Vanilla Cardstock, I cut out an oval and randomly rubbed Shimmer Paint over it.
Once the Shimmer Paint was about dried, I stamped a flower image onto the oval using Not Quiet Navy Ink.  I ran my finger around the edges of the oval to give it a bit more of a look.  By doing this I was able to pick up some of the Not Quiet Navy ink which had not completely dried.  Using Shimmer Paint, I was able to do this as it keeps your inks wet a little longer.  I adhered this to the top of the DSP.  I  adhered ribbon and tied a bow tie. 
I again randomly applied Shimmer Paint to a piece of Very Vanilla Cardstock, allowed to dry & then stamped a sentiment using Not Quiet Navy.  I punched the sentiment using my Large Oval.  I punched a piece of Not Quiet Navy Cardstock with the Scallop Oval & adhered it to the Very Vanilla Cardstock.  This was then adhered to the bottom of the DSP.
I adhered the DSP to the Pear Pizzazz.
Supplies –
Stamp Set – Just Believe
Inks – Not Quiet Navy
Cardstock – Very Vanilla, Pear Pizzazz, Peach Parfait, Not Quiet Navy
DSP – Peach Parfait
Punches – Large Oval, Scallop Oval
Bigshot Dies – Ovals
Accessories – Snail Adhesive, Shimmer Paint, Bigshot
Until next time, Enjoy!

Scrappy Saturday…

I’ve created this page for the challenge over at Scrap, Love, Create  This is Maria’s first Scrap Challenge, so thought I would give it ago.  I am hoping that it will force me to create more pages & finally get some scrapbooking completed.
For my page –
I used Not Quiet Navy Cardstock for the main page, cut a piece of DSP – Blueberry Crisp, punched a border & layered a piece of Sahara Sand along the bottom
I then cut a longer & wider pice of Sahara Sand Cardstock & adhered DSP – Blueberry Crisp over the top – as per the sketch
I mounted my photo onto Whisper White Cardstock & then Pacific Point Cardstock & adhered to the top of the DSP
I randomly stamped images onto a scrap of Whisper White Cardstock using Not Quiet Navy & Sahara Sand inks & punched the corners using my Photo Corner Extra Large Punch
Adhere these to the top right of the photo & bottom left of the photo
For the names, I printed them out using Not Quiet Navy font colour, cut it out & adhered to the middle of my plaque which I had stamped directly onto Whisper White Cardstock & cut out.
The plaque was then adhered underneath the photo
I printed the heading using my printer & Not Quiet Navy font colour, randomly stamped the image along the bottom & sides of the heading, adhered it to Not Quite Navy & Sahara Sand Cardstock
I adhered the heading to the main page
Using the same image & Not Quiet Navy ink, I randomly stamped along the bottom of the page – I think it finishes the page off a little more
For my flowers, I punch 9 Scallop Circle using photocopy paper, randomly stamped them in Not Quiet Navy & Sahara Sand, scrunched them, popped a bit of glue in between the layers, adhered Basic White Peal to the centre & scrunched them again.  I then opened & played with the flowers until such time as I was happy with the look
Adhere these flowers to the DSP on your page

Supplies –
Stamp Set – Just Believe
Ink – Not Quite Navy, Sahara Sand
Cardstock – Whisper White, Not Quite Navy, Pacific Point, Sahara Sand
DSP – Blueberry Crisp
Punches – Scallop Circle, Photo Corners Extra-Large, Scallop Trim Border
Accessories – Multipurpose Liquid Glue, Basic Pearls – White
Until next time, Enjoy!

Pocket Card…

The card today is one I made about 6 weeks ago & have been meaning to post, but things have gotten in the way.  I was really happy with the way it turned out.  I used a couple of Techniques on this card – Sponging, Stampin’ Pastels & Shimmer Paint.

Inside –
Stamp image using Early Expresso Ink
Sponge Early Expresso around the edges
Punch out tab using Designer Label Large & DSP Blushing Bride
Score, fold in half & apply halfway at top card – as per picture
Stamp sentiment using Early Expresso Ink directly onto card

Card –
Score & fold in half Early Expresso Cardstock
Using 1 1/4″ Punch, punch 1/2 circle at the halfway mark
Cut smaller piece of DSP – Blushing Bride, punch 1/2 circle at top
Adhere Grosgrain Ribbon – Early Expresso near bottom Adhere to Early Expresso card base
Cut smaller piece of Early Expresso Cardstock for the main picture
Cut piece of Very Vanilla Cardstock
Randomly apply Shimmer Paint – White to the Very Vanilla, allow to dry
Punch moon using 1 1/4″ punch & Post-It Note, adhere lightly to where you would like your moon to be
Using Stampin’ Pastels & Dauber, apply background – I used Certainly Celery, Pretty In Pink & Early Expresso
Stamp image over top of background using Early Expresso Ink
Using a small scrap of Very Vanilla, rub Stampin’ Pastels over the top of cardstock
Using Embosslit Dies – Beautiful Wings, cut out
Adhere Jewels – Basic Pearls to the middle of large butterfly & randomly adhere 3 images to the card
Insert Inside Card
Supplies –
Stamp Set – Just Believe, Well Scripted
Ink – Early Expresso
Cardstock – Very Vanilla, Early Expresso
DSP – Blushing Bride
Punches – Designer Label Large, 1 1/4″ Circle
Embosslit Dies – Beautiful Wings
Ribbon – 1/4″ Grosgrain -Early Expresso
Accessories – Snail Glue, Bigshot, Stampin’ Pastels, Jewels – Basic Pearls, Dauber
Non-SU – Post-It Notes
I hope you enjoyed today’s card share.  I know I thoroughly enjoyed creating it!
Until next time, Enjoy!

Just for You…

I hope you are enjoying looking at the cards I have been creating for these challenges as I’ve enjoyed making them.
Today’s card is for yet another Challenge – this time over at http://www.mojomonday.blogspot.com/  Looks pretty involved, but….
For my card, I used the gorgeous DSP Elegant Soiree.  Sometimes I don’t want to touch it as it is so lovely, then other times, I just want to create.
Using my Corner Punch, I rounded the opposite corners of the DSP & adhered onto my card base, Baja Breeze.  I repeated the process for the smaller piece of DSP & adhered onto Basic Grey Cardstock.  This I adhered to the card base.  I then cut a piece of Soft Suede Cardstock, cut a “V” & adhered over the top.
I cut another piece of DSP & adhered to Basic Grey again.  I adhered this to the base card.  Cutting a piece of Soft Suede Cardstock & a smaller piece of Very Vanilla, I rounded the edges of both piece of cardstock, & adhered the Very Vanilla to the Soft Suede.
Inking my image in Soft Suede, I stamped it onto the Very Vanilla.  I again inked my greeting in Soft Suede & stamped in the middle of the frame & adhered this to the Card.
With my Bigshot, Embosslit Die – Beautiful Wings & DSP, I cut the butterflies & adhered randomly to the card with the larger butterfly to the LHS, as per the sketch.  I wanted to keep the butterflies the Vanilla colour.  To highlight the butterflies, I applied Basic Jewels & also used them for my “o’s” in the words “for you”.
Supplies –
Stamp Set – Just Believe
Ink – Soft Suede
Cardstock – Soft Suede, Very Vanilla, Baja Breeze, Basic Grey
DSP – Elegant Soiree
Embosslet Dies – Beautiful Wings
Punches – Corner
Accessories – Mutlipurpose Liquid Glue, Jewels, Bigshot
Until next time, Enjoy!