SFF071511…

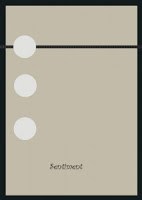
I found this sketch over at Sketch Frenzy Friday & immediatly thought of Fifth Avenue Floral & Great Friend.  This is one of my favourites, but then I think most of my sets are, including ones I don’t have – lol.
Base Card – Rich Razzleberry – 4 7/8″ x 4 1/4″ or 15cm x 10.5cm
Layer 1 – Old OLive – 4 3/4″ x 4″ or 14.5cm x 10cm
Layer 2 – Whisper White – 4 5/8″ x 9.5cm
Layer 3 – Old Olive – 4 5/8″ x 1″ or 9.5cm x 2.5cm
Using Inks of Rich Razzleberry & Old Olive, I randomly stamped 2 different images onto a piece of Whisper White Cardstock.  I then adhered the small piece of  Old Olive Cardstock down the LHS of the Whisper White, layered a piece of Pumpkin Pie Satin Ribbon down the middle, followerd by a piece of Rich Razzleberry Grosgrain Ribbon on top of that & tied a bow towards the top.
?
Inside Card

?

I stamped the sentiment using Rich Razzleberry & adhered to Old Olive Cardstock which had been punched using my Modern Label Extra Large Punch.  I adhered to the top RHS of the card using SU Dimensionals.
I punched a piece of Whisper White Cardstock using my 1 3/4″ Extra Large Circle Punch & with Old Olive Ink, stamped some leaf images.  I also stamped off while doing these too.  This was adhered to a piece of Pumpkin Pie Cardstock which had been punched using my Extra Large Scallop Circle Punch. For the white dots, I did these with my Gel Pen.
I stamped 2 butterfly images onto Whisper White Cardstock using Rich Razzleberry Ink, cut them out , applied a couple of Basic Rhinestones down the middle, curled them a little & adhered to the circle using SU Dimensionals.  I also added a couple of Rhinestones to the words in my sentiment.
These are colours I don’t usually go for, but I am trying to think outside the box a little.  Mind you, I don’t know how long it will last, but am quiet enjoying the different colours for the moment.
Supplies –
Stamp Set – 5th Avenue Floral, Great Friend
Ink – Old Olive, Rich Razzleberry
Cardstock – Whisper White, Rich Razzleberry, Old Olive, Pumpkin Pie
Ribbon – 5/8″ Satin – Pumpkin Pie, 1/4″ Grosgrain – Rich Razzleberry
Punches – 1 3/4 ” Extra Large Circle, Extra Large Scallop Circle, Modern Label Extra Large
Accessories – SU Dimensionals, Tombow Multipurpose Glue, Basic Rhinestones, Gel Pen
Until next time, Enjoy!

Red Robin…

A beautiful photo of a lovely little bird!

I’ve created this card for the challenge over at Our Creative Corner

Like most of my cards, I’ve tried to keep it for any occasion, ie Birthday, Sympathy, Thank You, etc  I find this works easiest for me, then I am not having to try & think of a card to make at the last moment.  I will also make a lot of cards with no sentiment/greeting so that when I do need a card in a hurry, I then stamp a sentiment/greeting, either directly onto the card or adhere one to the card.

For my card –
Cut base card using Chocolate Chip Cardstock
Cut smaller piece of Cardstock using Riding Hood Red & adhere to base card
Cut Cardstock using Chocolate Chip – 4″ x 2 1/2″
Cut piece of Garden Green Cardstock – 3 7/8″ x 2 3/8
Adhere Garden Green to Chocolate Chip
Cut piece of Watercolour Paper – 3 3/4″ x 2 1/4″
Stamp image using Chocolate Chip Ink

Using Aqua Painter, Chocolate Chip, Riding Hood Red & Garden Green Inks, colour image
Adhere Watercolour Paper to Garden Green piece of Cardstock
Attach Brad to middle piece of ribbon
Attach ribbon across bottom of image & tuck ends under
Attach whole section to the base card
Stamp sentiment/greeting using Chocolate Chip Cardstock & punch using Oval Punch
Punch piece of Riding Hood Red Cardstock using larger Oval Punch
Punch piece of Garden Green Cardstock using Scallop Oval Punch
Adhere all 3 pieces together
Adhere to RH bottom of card
Supplies –
Stamp Set – Every Moment, Great Friend
Inks – Chocolate Chip, Garden Green, Riding Hood Red
Cardstock – Watercolour Paper, Chocolate Chip, Riding Hood Red, Garden Green
Ribbon – Retired
Punches – Scallop Oval, Oval, Oval Large
Accessories – Snail Glue, Aqua Painter
Non-SU – Brad

This card could be used for male or female or for that matter any occasion!

Until next time, Enjoy!

Cheers to You…

G’Day Stampers,

I hope you all had a great Christmas, despite the floods in Qld & the snow in parts of USA & Europe.  To think that Perth has Bush Fires!

Today’s card is from the sketch over at Stamping 411 and as usual a great one to use in creating a card or project.

For my card, I used supplies from the current Summer Mini Catalogue.  I cut my Cardstock – So Saffron and adhered Regal Rose to the top of it.  I then cut a piece of DSP – Island Oasis – to adhere to the top of Regal Rose.

Using my Scallop Trim Punch, I punched both top & bottom of the Tempting Turquoise Cardstock and adhered a piece of So Saffron across the middle of it.

I then stamped the sentiment from “Cheers to You” in Chocolate Chip directly onto the So Saffron.  Inking the branch in Old Olive from the Stamp Set “Tropical Party”, I stamped a couple of random images directly onto the So Saffron.

I inked the coconut from the same Stamp Set, coloured the umbrella & straw using my Watercolour Pencils, cut around the image & adhered over the top of the branches using SU® Stampin’ Dimensionals.
Supplies –
Stamp Set – Cheers to You, Tropical Party*
Inks – Chocolate Chip, Old Olive
Cardstock – Whisper White, Tempting Turquoise, So Saffron, Rose Red
DSPIsland Oasis*
Punches – Scallop Trim
Accessories – Snail Adhesive, Watercolour Pencils, Stampin’ Dimensionals
*Summer Mini-Catalogue – 2011
Until next time, Enjoy!

Joy at christmas…

It’s Sketch Frenzy Friday again!
The card created especially for this challenge is very easy using the DSP from SU® –  Jolly Holliday.  The colours in this paper are so stunning, not your normal bright greens & reds.
To create my card, I layered DSP onto Old Olive Cardstock.  I cut a piece of Cherry Cobbler Cardstock & using my Scallop Edge Punch, punched along one side.  Cutting a piece of DSP, I adhered to the Cherry Cobbler Cardstock.  This piece was then adhered across the middle of the card.
Using Joy at Christmas image from Perfect Punches, I stamped it in Old Olive & punched out using the Scallop Circle.  I adhered this over the top of the DSP placed in the middle.
I finished off with Jewles – Basic Pearls.

Supplies –
Stamp Set – Perfect Punches
Ink – Old Olive
Cardstock – Old Olive, Cherry Cobbler, Very Vanilla
DSP – Jolly Holiday
Punches – Scallop Circle, Scallop Edge
Accessories – Multipurpose Liquid Glue, Jewels – Basic Pearls
Tip – Did you know Perfect Punches Stamp Set fits Scallop Circle, Wide Oval, Scallop Oval, Modern Label, Round Tab and Curly Label Punches?
Until next time, Enjoy!

Happy Birthday…

I’ve created this card for the challenge over at Creative Sketches  I’ve never attempted a challenge over there, but this one looked quiet good & immediately thought Male, along with the DSP- Woodland Walk from SU®  The jury is still out on this one, but think maybe it is starting to grow on me.
I’ve used both Very Vanilla & Chocolate Chip Grosgrain Ribbons on this card.  I wanted to highlight the Very Vanilla in the DSP, while at the same time break up the joining of the DSP using Chocolate Chip.
I punched 3 stars using the small Star Punch & adhered to the DSP.  Using my 1/16″ Handheld Circle Punch, I punched 3 dots using Chocolate Chip Cardstock  – a little fiddley, but it is what I had in my mind, so I had to fiddle for a little.  I then adhered these to the middle of the stars & applied Crystal Effects over the top to give a little more dimension.
For the sentiment, I used the stamp from Perfect Punches, stamped it in Chocolate Chip & punched out using Extra-Large Oval Punch.  I then adhered this directly to the DSP.
All in all, a very simple & clean male card!
Supplies –
Stamp Set – Perfect Punches
Ink – Chocolate Chip
Cardstock – Garden Green, Very Vanilla, Chocolate Chip
DSP – Woodland Walk
Punches – Extra-Large Oval, Small Star, 1/16″ Handheld Punch
Accessories – Multipurpose Liquid Glue, Grosgrain Ribbon – Very Vanilla & Chocolate Chip, Crystal Effects
In the meantime, why not have a go at the sketch yourself – I would love to see the results or better still post them directy to Creative Sketches.
Until next time, Enjoy!