Global Design Project 096

I have a clean & simple card for you today which has been inspired by the Global Design GDP096Project #GDP076 – Case the Designer Challenge.  Hasn’t Tanja Kolar created a gorgeous card?

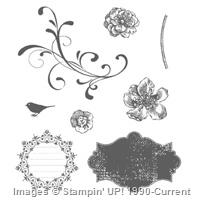
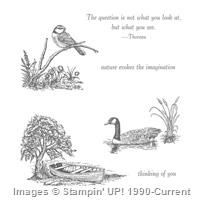
I had been thinking about creating something with the “Butterfly Basics” Stamp Set for a couple of days now & this was just the perfect way to showcase this lovely set.  I am also low on my Sympathy Cards (have a Expo coming up) so it worked in well.

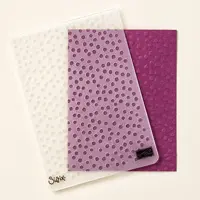
The Very Vanilla Card has been embossed with the Fluttering EF & then adhered to the Base Card – Elegant Eggplant.

Butterfly-Basics---Close-UP
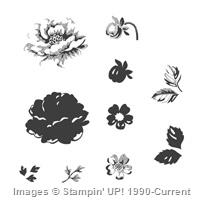
The large flower was inked using my Regals Stampin’ Write Markers – Always Artichoke & Elegant Eggplant, while the middle of the flower is Crushed Curry.

The butterfly was stamped onto Very Vanilla in Rose Red before die cutting with the matching Butterflies Thinlits & adhered to the card with Mini Stampin’ Dimensionals under the wings.  This is so that the wings would stay popped a little.

The sentiment was stamped onto scrap Very Vanilla in Elegant Eggplant before being punched with the Classic Label Punch & adhered to the Card Front with Mini Stampin’ Dimensionals.

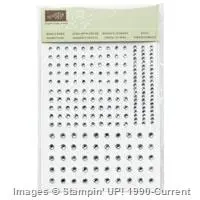
I completed the card by adding Rhinestone Basic Jewels to the centre of the butterfly &Butterfly-Basics---Inside randomly scattering a couple around the square.

Thank you Global Design Team for a great challenge.  Be sure to go & check out the amazing creations everyone has created.

Don’t forget to click on the link below to download your Free Tutorial.

Until next time, Happy Stampin’

Signature---Vicky-Wright---

256. With Sympathy – Butterfly Basics

Butterfly-Basics

With Sympathy

About a month ago at our Technique Class we had a bit of a play with the Decorative Masks007wma-blog by SU!.

To continue with the theme of these Masks, I decided to have a bit of a play & create my own Stencil by using the Butterfly from the Bold Butterfly Framelits & the Window Sheets.  Just another way to get another use from your Dies/Framelits.

Don’t forget to click on the link above the photo to grab your free tutorial.

Until next time, Happy Stampin’

Vicky

129. With Sympathy – Everything Eleanor

006wma-blog

Stippled Blossoms

… meets Everything Eleanor.

This was going to be a card for Crafty Creations but as I am no longer doing it – a friend has taken over – & I am having a bit of a break from everything. I thought I would share it anyway.  It has a bit of Double Embossing, Fussy Cutting & Sponging.

I also decided to play with Monochrome Colours & went for Mint Macaron & Lost Lagoon.  I am really liking these colours & may even use them more often.

The Butterfly is one I found in a drawer, screaming out to be used.

Click on the link above the photo to download your free tutorial.

Until next time, Happy Stampin’

Vicky

105. Sympathy & Prayers – Stippled Blossoms

004wm-blog

Products used to create this card –

With Sympathy

Today’s share is one I saw while surfing the web, but for the life of me can’t find the original when you want it.  I have changed the stamps & colours.  Thank you so much for your inspiration.

To create your own card, please click on the link above the photo.

Until next time, Happy Stampin’

Vicky

 119. With Sympathy – Rose Wonder

 001wmaa-blog1

Having a bit of a Play

I was playing around the other day when I was supposed to be preparing for my Volunteer Class.  The supplies were all sort of sitting on the desk waiting to be put away in their proper places when an idea jumped into my head.

When I look at it, it is a quick 5 minute card.  If only it took me 5 minutes to create.

I don’t have a tutorial for this card, but will go through how I created it.

To create the mask, I cut the centre from a piece of scrap paper using the small frame from the Project Life Cards & Labels Framelits.  I applied 2-Way Glue to the back of it, allowed to dry & adhered it to a piece of 5 1/2″ x 3 3/4″ or 14cm x 10cm Very Vanilla CS.  Once dry, 2-Way Glue adheres temporary, so this is perfect for creating masks.

I sponged Crumb Cake Ink all over that I wouldn’t have any sponge marks on my card.  I then went around the edges a little darker using Crumb Cake.

I then spritzed a little water onto my fingers & randomly flicked it over the sponged area.  This created the water marks on my card & add a little bit of interest to the background.

I stamped the image from Moon Lake (Retired) & the sentiment from Petite Pairs in Early Espresso Ink prior to adhering to a piece of Early Espresso Card & finally to the Base Card – Very Vanilla.

Until next time, Happy Stampin’

Vicky

006aa-wm-blogSupplies used –