Having a bit of a Play

I was playing around the other day when I was supposed to be preparing for my Volunteer Class.  The supplies were all sort of sitting on the desk waiting to be put away in their proper places when an idea jumped into my head.

When I look at it, it is a quick 5 minute card.  If only it took me 5 minutes to create.

I don’t have a tutorial for this card, but will go through how I created it.

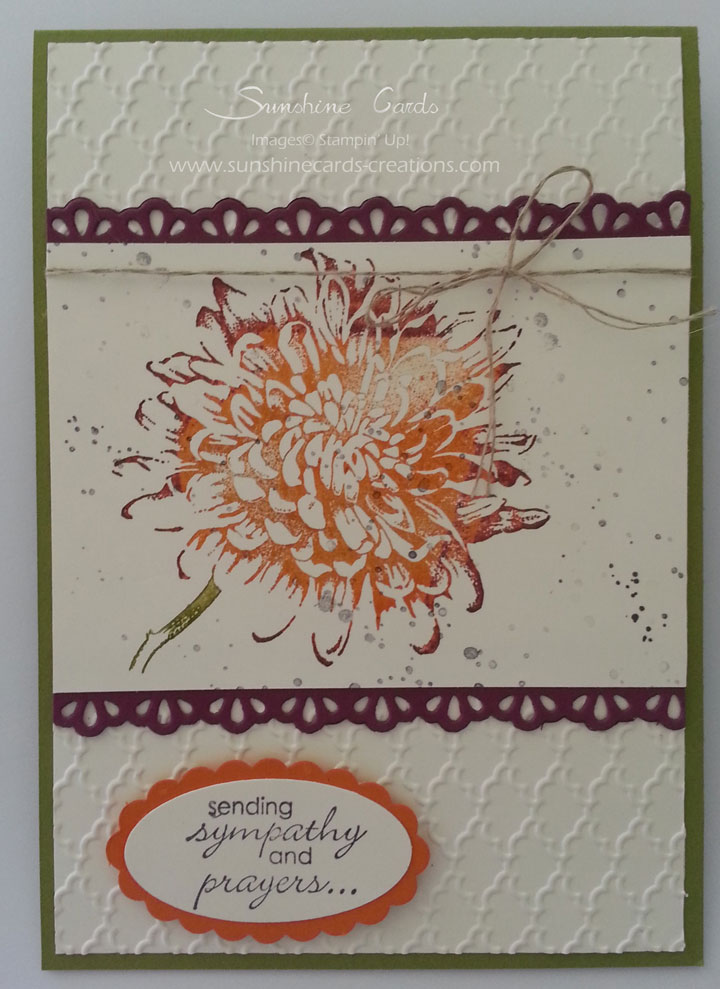
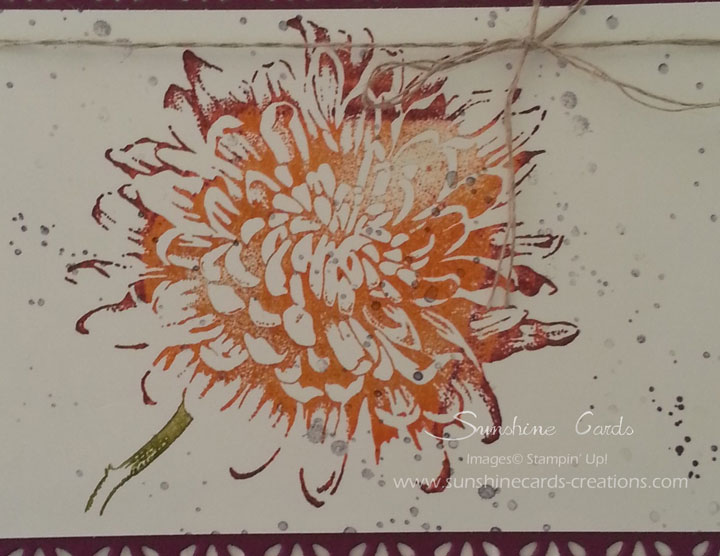
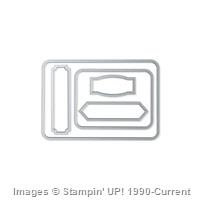
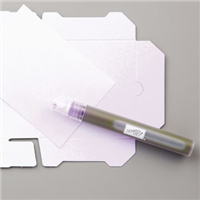
To create the mask, I cut the centre from a piece of scrap paper using the small frame from the Project Life Cards & Labels Framelits.  I applied 2-Way Glue to the back of it, allowed to dry & adhered it to a piece of 5 1/2″ x 3 3/4″ or 14cm x 10cm Very Vanilla CS.  Once dry, 2-Way Glue adheres temporary, so this is perfect for creating masks.

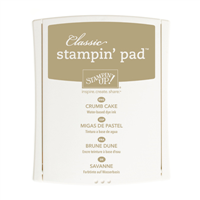
I sponged Crumb Cake Ink all over that I wouldn’t have any sponge marks on my card.  I then went around the edges a little darker using Crumb Cake.

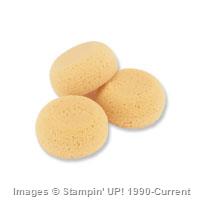
I then spritzed a little water onto my fingers & randomly flicked it over the sponged area.  This created the water marks on my card & add a little bit of interest to the background.

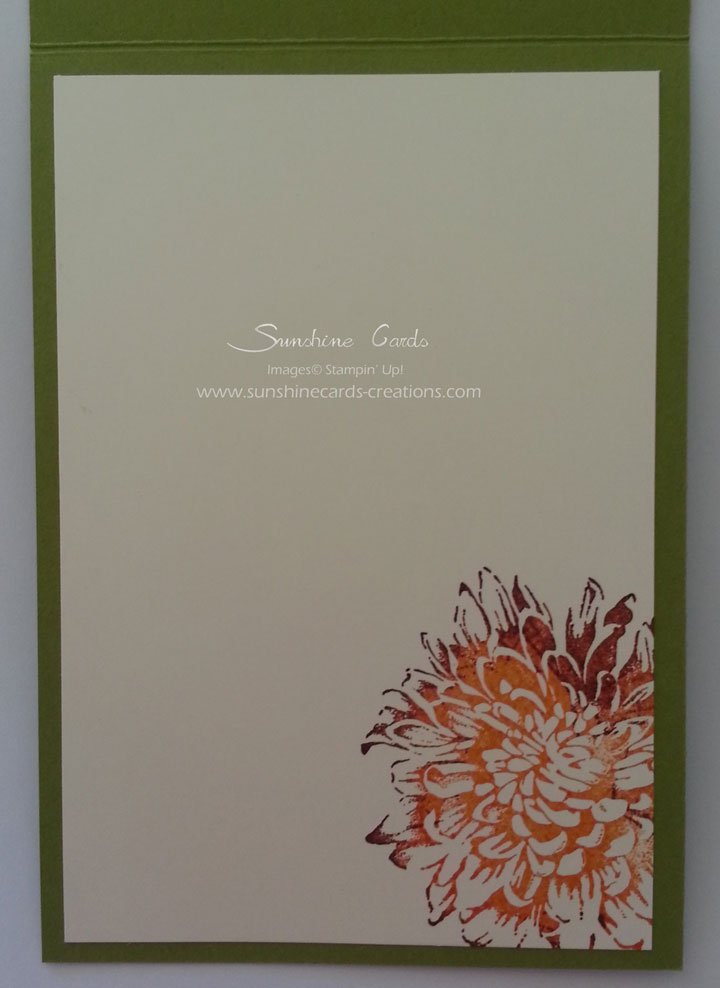
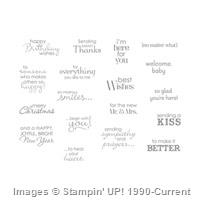
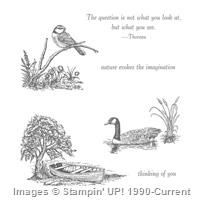
I stamped the image from Moon Lake (Retired) & the sentiment from Petite Pairs in Early Espresso Ink prior to adhering to a piece of Early Espresso Card & finally to the Base Card – Very Vanilla.

Until next time, Happy Stampin’

Vicky

006aa-wm-blogSupplies used –

Card #2

My card today is one created for our challenge for the month of March.

I’m not sure if you are aware, but I’ve started giving a challenge to all my customers & classes each month to get their creative3 March 2015 juices flowing.  I think it is a great way to “think outside the box”.  Not all the ladies have Stampin’ Up! supplies which doesn’t bother me in the least, as long as they are happy enough to sit & create with what they have.

For my 2nd card I decided to use the Free DSP “Irresistibly Yours” from the current SAB Catalogue.  This paper is to die for!  The biggest decision when using this paper is trying to decide what design & colour/r you are going to use.

022-wm-blogI decided to step outside my comfort zone & go with colours from left field for me – Coastal Cabana & Blackberry Bliss.  I wasn’t too sure where I was going with the card or where it would lead me, but I am more than happy with the final result.  I must admit I love these colours together.

If you check out my last card, you will agree that it is totally different & no comparison in any way, but hey that is what challenges are all about.

I actually embossed my Butterflies with Clear Embossing Powder.  I don’t know why, but I love my cut out Butterfly embossed, it just seems to pop when I do it!

You can create your own card by clinking on the link below.

Until next time, Happy Stampin!

Vicky

50. Butterfly Basics – With Deepest Sympathy

021wm-blog

Blooming with Happiness

I love this Stamp Set. You can use it for any occasion, including Sympathy which is how I’ve used the set on my card today.014a

The card is one we created in our Technique Class yesterday using the good old “Rock n Roll” technique.

After pulling out a sheet of Old Olive CS, I wanted to use colours that you wouldn’t see together very often, especially for a Sympathy card, but I like how they all came together.  I even managed to toss in “Basic Gray“.  Mind you, I didn’t have a Sympathy card in mind to do, but after doing a market last Sunday, I am a little low on them, so this is a great way to getting them back up in numbers.

Ok, I will let you in on a little secret – I did consult my fantastic & never failing “Colour Coach“.  If you don’t have one of these little tools, do yourself a favour & purchase one, you won’t regret it.  It must be one of the most used items I’ve ever purchased!

014---Close-UpaInstead of just stamping the image direct onto the Very Vanilla CS, I randomly added small dots from the “Gorgeous Grunge” Stamp Set using Basic Gray by “stamping off” first.  The flower image was then stamped over the top.

I love mixing up my stamp sets to create cards.  This way you get to use them twice as much.  I think it gives the card a little more depth.

Mind you, it was up to the individual class members if they wanted to do the same.  A couple of the ladies did, while a couple of them choice not to.

For the inside of my card, I repeated the Technique by applying Pumpkin Pie Ink to the 012aimage first, then “Rocking & Rolling” Rich Razzleberry Ink around the edges prior to stamping onto Very Vanilla CS & adhering to the inside of the card.

If you would like to learn this great little technique, I am only too happy to come along & show you.  I will be repeating this technique again next month in one of my Technique Classes, so be sure to check out the Workshop/Class Dates at the top of the page.

Until next time, Happy Stampin’

Vicky

Supplies used to create my card –

Sending Sympathy….

Our card today is a Triple Layer Card we created in Crafty Creations at the Caloundra Community Centre this afternoon.   The ladies loved it, although we did have a few accidents – ink accidents, ie….

Not only could your imagination go wild thinking of different placements for the front, but they are an easy card to create as well as having a every effective card at the end.

I don’t usually create bright cards, but tend to use the Neutral & Subtle Colour Families.  When doing classes I like to think “outside the square“, so to speak which means I tend to take into account what each person likes including colours & styles. It would be a very boring world if we liked all the same, wouldn’t it?

Supplies used to create this card –
Stamp Set  –  Stippled Blossoms (C) – 126747, Petite Pairs(C) – 122497
Ink  –  Pink Pirouette – 126956, Primrose Petals – 126858, Old Olive – 126953, Wild Wasabi – 126959
Cardstock  –  Whisper White – 106549, Old Olive – 106576
Punches  –  Large Oval – 119855
Ribbon  –  3/8″ Stitched – Primrose Petals – 126844
Accessories  –  Big Shot – 113439, Snail Adhesive – 104332, Stampin’ Dimensionals – 104430, Glue Dots – 103683
 
 
Don’t forget to click on the link below so that you can print & save the instructions to create your own Triple Layer Card


  •   To order Stampin’ Up! products online, please Shop Here
  • Want to join my family, and be a part of a group that loves to stamp together, Join Here
  • To check out available classes or to attend any of the classes, please Click Here, click on the “Classes/Workshop” Page or email me vickiawright@bigpond.com
Until next time, Happy Stampin’
 
Vicky

Sending Sympathy….

I needed a Sympathy Card to post out this week, so I dug up one of the rare cards that I saved.  I’ve cased (copied & shared everything) from Sarah Willis  I’m not even sure where I come across it or when I come across it.  It is quiet an old card as it uses a stamp set from last year’s SAB.

Thanks so much Sarah for the inspiration!

The Framed Tulips EF is not one that I have used a lot, so thought it gave me the perfect opportunity to dig it out of the box & dust it down.  I quite like the result of the EF but believe me it was hard not to use my favourite Perfect Polka Dots.  In saying that, if you look closely, I managed to get it on here anyhow.

 
Supplies –
Stamp Set              Petite Pairs – 122497, Fresh Vintage – SAB 2012
Ink                           Soft Suede – 126978
Cardstock              Very Vanilla – 106550, Soft Suede – 119982
EmbossingFolder Framed Tulips – 121809, Perfect Polka Dots – 117335
Punches                 1 3/8” Circle – 119860
Framelits                Labels Collections – 125598
Markers                  Subtles – 119700
Accessories           Big Shot – 113439, Snail Adhesive – 104332, Stampin’ Dimensionals – 104430, Pearls – 119247
Shop Online Here to purchase your own supplies to create your card
 
Click on the link below to print the instructions to save


Until next time, Happy Stampin’
 
Vicky