SC 050/12….

Can you believe it – # 050…….  Sunny Challenges & Creations celebrate 12 months on this sketch.  Who would have ever thought that we would still be going?

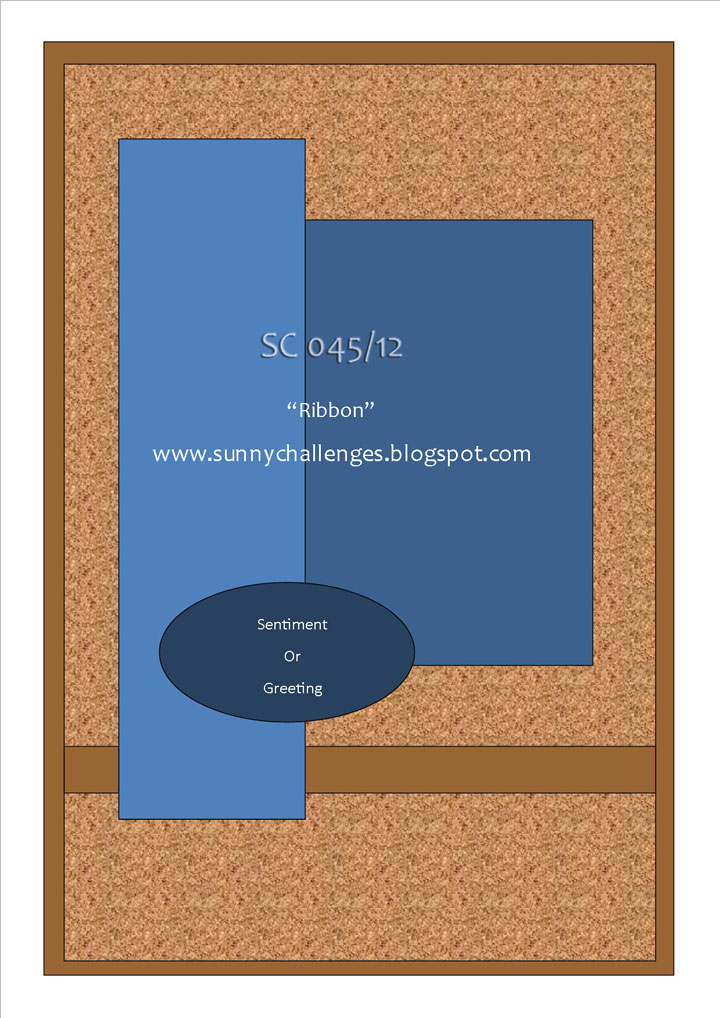
Anyhow, Kris has set our challenge this week & we have a Technique to go with the sketch.  This week we had to do the Reflection or Mirror Image Technique.  If you haven’t had a go at this fun technique, then pop on over to Sunny Challenges for a tutorial on how to do it.

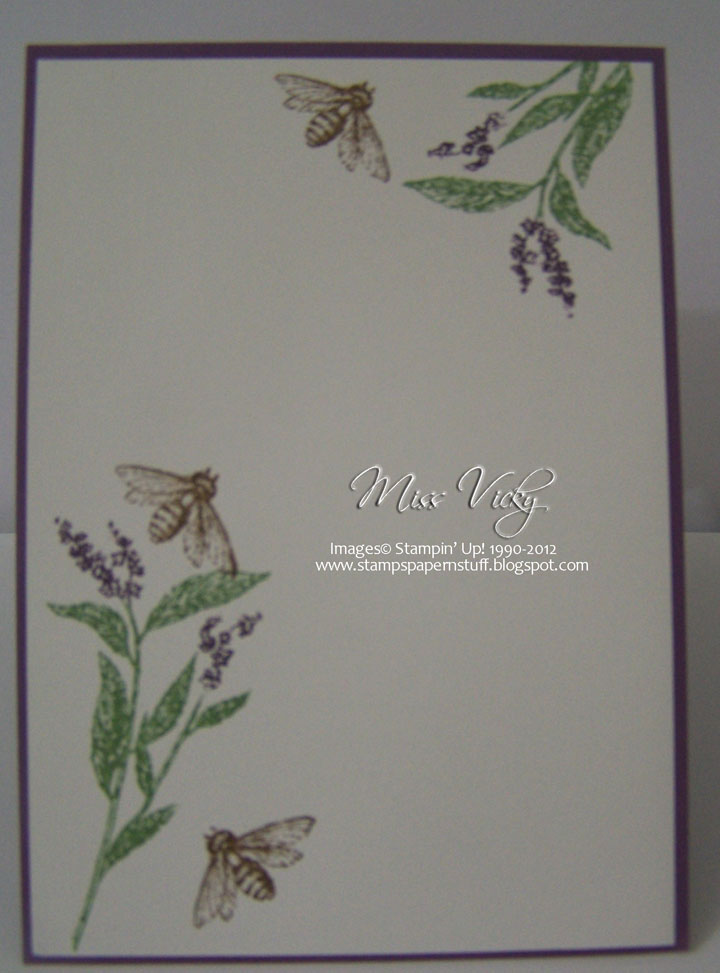
For my card, I sort of started from the inside out.  I had an idea forming in my head, but couldn’t work it out to start the card, so thought it best to play & think while doing the inside first.  Do you do your cards that way?  I often do & always amazes me how it sort of comes together in the end.

I do have another card which I was going to post instead of this one, but will post it later on in the week, so be sure to pop back to check it out!

Measurements –
Base Card – Perfect Plum – 11 3/4″ x 4 1/8″ or 29.5cm x 10.5cm – Score in middle & folded in half
Layer 1 – Bashful Blue – 4″ x 5 3/4″ or 14cm x 10cm
Layer 3 – Wild Wasabi – 3 7/8″ x 3 1/4″ or 9.5cm x 8.5cm
Layer 4 – Perfect Plum – 4 1/2″ x 3 5/8″ or 11.5cm x 9cm
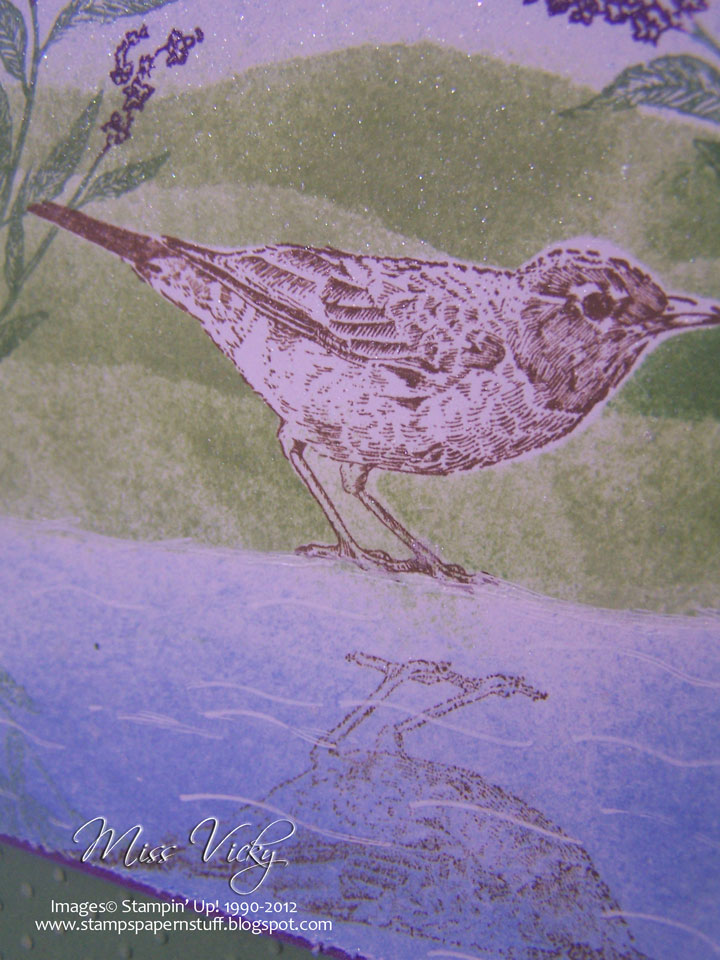
Layer 5 – Whisper White – 4 3/8″ x 3 1/2″ or 11cm x 8.5cm

Supplies –
Stamp Set – Nature Walk
Ink – Certainly Celery, Bashful Blue, Soft Suede
Cardstock – Whisper White, Bashful Blue, Wild Wasabi, Perfect Plum
Embossing Folder – Perfect Polka Dots
Accessories – Snail Adhesive, Stampin’ Dimensionals, Sponge, Stampin’ Up! Markers – Perfect Plum, Wild Wasabi, Distressing Tool, White Gel Pen, Acetate, Vanilla Shimmer

My image was stamped onto the piece of Whisper White Cardstock in Soft Suede Ink.  I created a mask for my bird & adhered it to the top of my stamped image.

Using my Sponge, the hills were sponged in Certainly Celery Ink, while the sky was sponged lightly with Bashful Blue.  The same went for the water, except as I got towards the bottom of the water I sponged it a bit darker so that it washed some of the bird’s reflection.  Once I was happy with the sponging, the mask was taken off the bird.

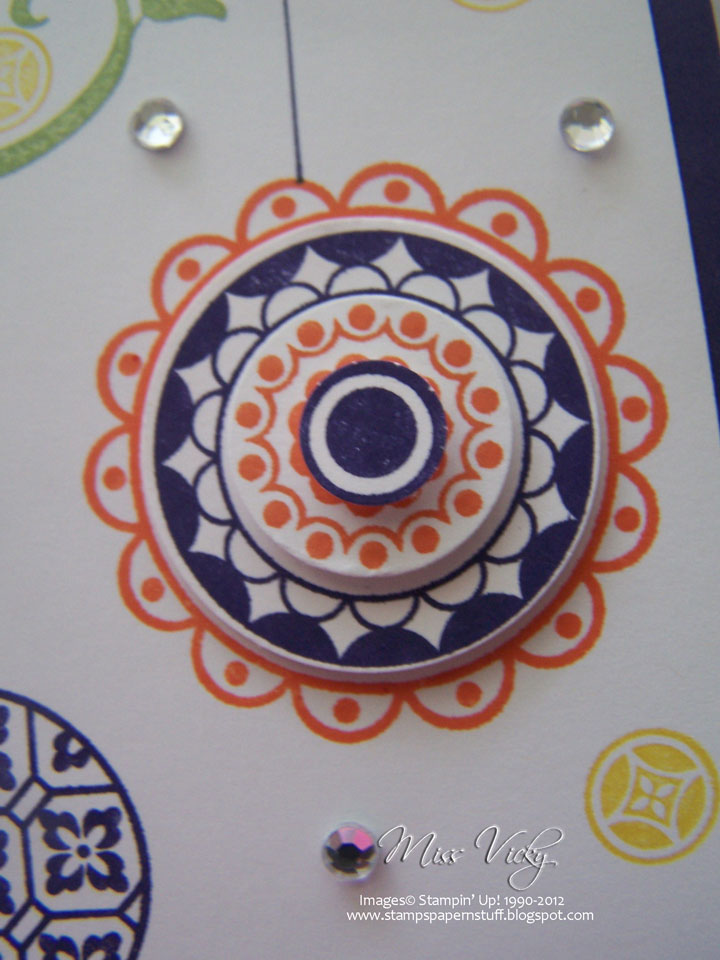
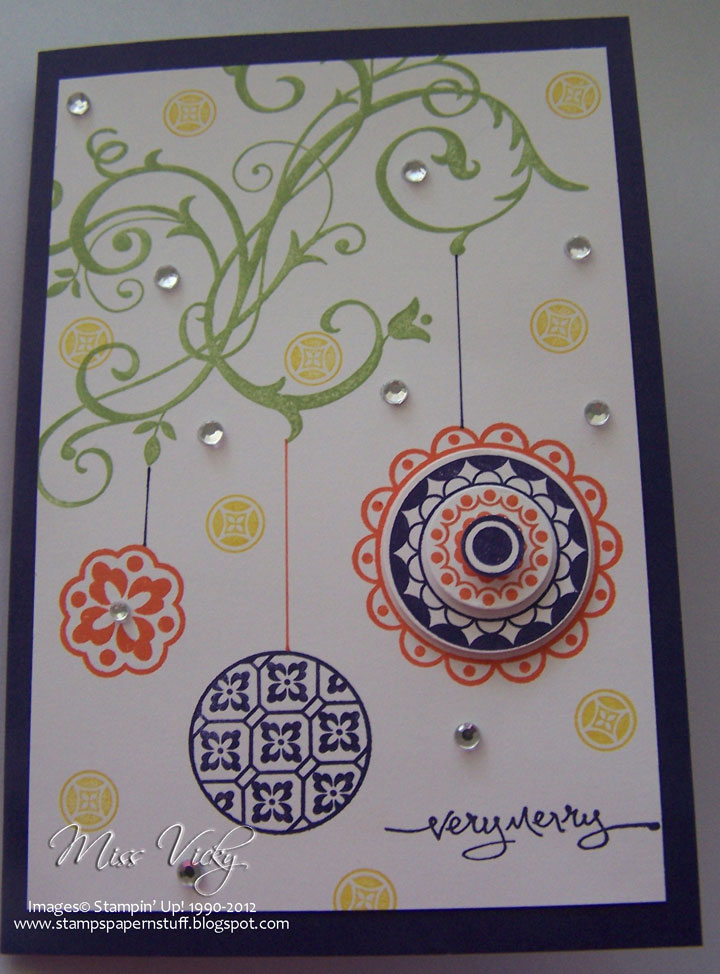
The images around the edges were inked with my Stampin’ Up! Markers -Wild Wasabi & Perfect Plum prior to randomly stamping around the card. 

To add a bit of dimension to the water, I drew a few randomly lines with my White Gel Pen.  This sort of looks like it is the ripples in the water.  I did the same along the water’s edge.

I went around the edge with my Distressing Tool & finally sprayed the lot with Vanilla Shimmer.  It did start out with just the water so that it would give it a bit of a gleam, but ended up going over the whole card, but that it ok.
The Wild Wasabi piece went through the Bigshot using Perfect Polka Dots Embossing Folder & adhered to the piece of Bashful Blue Cardstock with Snail Adhesive & then finally to the Base Card – Perfect Plum.

The sponged piece was adhered to the card with Stampin’ Dimensionals.

I have gone back to the softer colours of late.

Don’t forget to pop on over to Sunny Challenges & Creations & check out what both Gwen & Kris have created.  We would love for you to join us & help celebrate our BIG 50!!!!!

Until next time, Happy Stampin’

SC 049/12….

…. and non-traditional Christmas Colours.

Our challenge over at Sunny Challenges & Creations has been given to us by Gwen.  What a great challenge this week – the possibilities are endless.  We have to use Circles on our project this week.  Why not pop over & check out what Kris & Gwen have created & then join us.  We would really love for you to link your project with Mr Linky!

Measurements –
Base Card – Concord Crush – 8 1/4″ x 4 1/8″ or 21cm x 15cm – Scored in middle & folded in half
Layer 1 – Whisper White – 5 1/2″ x 3 3/4″ or 14cm x 9 1/2″

Supplies –
Stamp Set – Baroque Motifs, Circle Circus, Short & Sweet
Ink – Daffodil Delight, Tangerine Tango, Pear Pizzazz, Whisper White, Concord Crush
Cardstock – Whisper White, Concord Crush
Punches – Itty Bitty Shapes, 3/4″ Circle, 1 1/4″ Circle
Accessories – Rhinestones, Stampin’ Up! Markers – Tangerine Tango, Concord Crush, Snail Adhesive, Stampin’ Dimensionals

 I stamped the large image from Barquoe Motifs in Pear Pizzazz straight onto the piece of Whisper White Cardstock.

3 images from Circles Circus were stamped direct onto the piece of Whisper White Cardstock – 2 with Tangerine Tango & 1 in Concord Crush.  3 of the larger image was also stamped onto a piece of scrap Whisper White Cardstock – 2 in Concord Crush & the other in Tangerine Tango.

I punched one of the stamped Concord Crush images using the 1 1/4″ Circle Punch, while the 2nd image was punched with the small Circle Punch from the Itty Bitty Shapes set.  The Tangerine Tango image was punched using the 3/4″ Circle Punch.

The punched images were then adhered to the main image on the card & built using Stamping’ Dimensionals

The lines were drawn with a Ruler & Stampin’ Up! Markers – Tangerine Tango & Concord Crush.

Prior to stamping the smallest image from the Circle Circus Stamp Set in Daffodil Delight ink, I stamped the sentiment in Concord Crush straight onto the Whisper White Card.

I had all intensions of just adding the Rhinestone to the middle of one of the images, but to add more depth to the card, I scattered the Rhinestones around the card.  I think it adds a little bit of a sparkle & finishes it off a little.

As always, this isn’t how I pictured my card to be, but I am quiet happy with the final result. What do you think?

Until next time, Have a great day!

SC 048/12…

It seems so long since my last post that I actually had to check out the last card I did….

The challenge this week is to use Old Olive, Chocolate Chip & 1 Netural Colour, as well as the sketch.  It was my turn to create the challenge.

I did create a card for the challenge a couple of days ago, but when I went to post it, suddenly realised all the colours were wrong!  Wouldn’t you think I would check the 2nd part of the challenge first?????  Never mind, I will post that one in a few days.

Measurements –
Base Card – Very Vanilla – 8 1/4″ x 5 7/8″ or 21cm x 15cm – Scored in middle & folded in half
Layer 1 – Old Olive – 4″ x 5 5/8″ or 10cm x 14.5cm
Layer 2 – Very Vanilla – 5 1/2″ x 1 5/8″ or 4cm x 14cm
Layer 3 – Very Vanilla – 5 1/2″ x 2 1/8″ or 4cm x 5.5cm
Layer 3 – Old Olive – 3 1/4″ x 2 7/8″ or 8.5cm x 7.5cm
Layer 4 – Chocolate Chip – 3 1/8″ x 2 3/4″ or 8cm x 7cm
Layer 5 – Very Vanilla – 3″ x 2 5/8″ or 7.5cm x 6.5cm

Close up of Embossing & Distressing…

Supplies –
Stamp Set – Artistic Etchings
Ink – Chocolate Chip, Old Olive
Cardstock – Old Olive, Very Vanilla, Chocolate Chip
Ribbon – Crochet Trim – Victoria
Embossing Folder – Final Press
Accessories – Bigshot, Snail Adhesive, Multipurpose Glue, Sponge, Spong Dauber,  Designer Sanding Block, Cutter Tool, Stampin’ Up! Dimensionals, Smooch Spritz – Vanilla Shimmer

??

?
Card Inside…

Using Choclate Chip Ink & Sponge, I covered the piece of Very Vanilla Cardstock ensuring it was really well covered.  I then run it through the Bigshot using Embossing Folder – Final Press.  When it comes out, you will notice that some of the raised embossing is showing bits of Vanilla Cardstock.  This is what you want!  Grabbing my Stampin’ Up! Sanding Block, I then rubbed it over the raised areas of the embossed piece.  I was pretty rough with this, as I wanted it to be torn & well worn!

Grabbing a Sponge Dauber, I inked it in Old Olive Ink & rubbed it over the raised areas so that small bits of Old Olive were showing through.  I then sprayed the whole piece with Vanilla Shimmer Smooch Spritz.  Not only did this give a shimmer to  the card, but it also made the Choclate Chip a little softer.  In fact, I had to look at the Ink to check if I had actually used Chocolate Chip, as I thought it was Soft Suede.

Once the piece was dry, I cut it according to the above measurements & went around all the edges with my Distressing Tool.  Again, I was fairly rough, as I wanted it to be torn in places & bits of the Very Vanilla to show around the edges.  This piece was adhered to the Old Olive Cardstock with Multipurpose Glue.

Stamped Images…

I adhered a piece of the Crochet Trim across the middle with Snail Adhesive & tied a knot to the Right Hand Side.

Grabbing the smaller piece of Very Vanilla Cardstock, Old Olive Ink & Sponge Dauber, I daubed ink all over the Cardstock, working in circular motions.  I did wipe the Dauber onto a piece of scrap paper prior to daubing onto the Cardstock, as I wanted it to be a little softer.

Images were randomly stamped in Old Olive & Chocolate Chip, stamping off once or twice prior to stamping some of the images in Old Olive.  I should have distressed the edges prior to adhering to the layers, but completely forgot until I had the card completed.  I sprayed Smooch Spritz over the top & let dry prior to adhering firstly to Chocolate Chip & then to Old Olive with Snail Adhesive.

I opted not to add the sentiment, so hope Kris & Gwen will forgive me!

Don’t forget to pop over to Sunny Challenges & Creations to check out what Kris, Gwen & our Guest Designers have created.  While you are there, why not play along?

Until next time, Happy Stampin’

SC 04612…

Do you ever have a hard time trying to create something?  You know what you want in your head but putting it down on paper can be something entirely different. I really had no idea where I was going with this card when I started, but kept plugging along, playing with colours, checking out stamp sets & working out what will look best with what….

I also decided to go back to the colours when I started out with Stampin’ Up!

This week’s challenge has been bought to us by Gwen.  It is to create a Centre Fold Card using the sketch provided.

Measurements –
Base Card – Certainly Celery – 8 1/4″ x 4 1/8″ or 21cm x 15cm – Scored at 2 1/8″ & 6 1/8″ & folded towards the middle on both sides
Layer 1 x 2 – Not Quite Navy – 2″ x 5 5/8″ or 5cm x 14.5cm
Layer 2 x 2 – Whisper White – 1 7/8″ x 5 1/2″ or 4.5cm x 14cm
Layer 3 – Bashful Blue – 3 1/8″ x 2 1/2″ or 8cm x 6.5cm
Layer 4 – So Saffron – 3″ x 2 3/8″ or 7.5cm x 6cm
Layer 5 – Whisper White – 2 7/8″ x 2 1/4″ or 7cm x 5.5cm

Supplies –
Stamp Set – Pocket Silhouettes, Short & Sweet
Ink – Bashful Blue, So Saffron, Not Quite Navy, Certainly Celery
Cardstock – Whisper White, Bashful Blue, So Saffron, Certainly Celery, Not Quite Navy
Embossing Folder – Square Lattice
Punches – Scallop Edge Border
Accessories – Snail Adhesive, Multipurpose Glue, Bigshot

Prior to running the pieces of Whisper White Cardstock through the Bigshot, I randomly inked the Embossing Folder – Square Lattice with So Saffron, Bashful Blue & Certainly Celery Inks & sprayed water over the ink.  When doing this, ensure you have the card facing down onto the embossed side of the folder.  Let dry.

I randomly stamped my images onto the smaller piece of Whisper White Cardstock using Certainly Celery, So Saffron & Bashful Blue Inks.  The sentiment was stamped in Not Quite Navy Ink.

This piece was adhered to the piece of So Saffron Cardstock & then Bashful Blue Cardstock with Snail Adhesive.  I punched a scrap piece of Certainly Celery Cardstock with the Scallop Edge Border Punch before adhering to the bottom of the stamped Whisper White Cardstock with Snail Adhesive.

The 2 pieces of embossed Whisper White Cardstock were adhered to the pieces of Not Quite Navy using Multipurpose Glue & then to either side of the Certainly Celery Base Card with Snail Adhesive.

The small stamped images were adhered to the LHS of the card with Multipurpose Glue. 

Don’t forget to head over to Sunny Challenges & Creations to see what Gwen, Kris, as well as our Weekly Guest Designer who has been very busy & created 2 gorgeous cards.

 Until next time, have a great weekend

SC 045/12…

The new weekly challenges begins today over at Sunny Challenges & Creations & it was my turn to create the challenge.  This time round, along with the sketch, it is to use Ribbon on your layout.  How easy can it get?

My card has been created for a friend of mine who is celebrating her birthday today.  As she lives on acreage, I decided to go with colours that best represent the bush in Australia – Green, Gold & Brown.  I’ve never used these colours together & really like the effect they have created.

On the spur of the moment, I decided to try & use a Stampin’ Up! Wheel somehow in the design.

Measurements –
Base Card – Daffodil Delight – 8 1/4″ x 4 1/8″ or 21cm x 15cm – scored in the middle & folded in half
Layer 1 – DSP – 5 1/2″ x 3 3/4″ or 14cm x 9.5cm
Layer 2 – Old Olive – 4 1/2″ x 1 5/8″ or 11.5cm x 4cm
Layer 3 – Whisper White – 4 3/8″ x 1 1/2″ or 11cm x 3.5cm
Layer 4 – Old Olive – 3 1/8″ x 2″ or 8cm x 5cm
Layer 5 – Whisper White – 3″ x 1 7/8″ or 7.5cm  4.5cm

Supplies –
Stamp Sets – Field Flowers, Vintage Vogue, Sincere Salutations

Ink – Daffodil Delight, Old Olive, Soft Suede

Cardstock – Daffodil Delight, Whisper White, Old Olive, Soft Suede
DSP – Neutrals
Wheel – Very Vintage
Punches – Scallop Oval, Large Oval
Embossing Folder – Perfect Polka Dots
Ribbon – 5/8″ Satin – Old Olive
Accessories – Snail Adhesive, Multipurpose Glue, Stampin’ Dimensionals, SU! Markers – Old Olive, Daffodil Delight, Blender Pen, Bigshot, Pearls

Inking my Wheel, I ran it over the long piece of Whisper White Cardstock, ensuring that the image was up the correct way, which meant that I had to run the wheel across the Card 3/4 times, ensuring coverage was all over.

Grabbing my Blender Pen & a Stampin’ Up! Marker – Daffodil Delight, I coloured the flower from the wheel.  As I didn’t want this part of the card to be the main focal point, I left it as is.  This piece was then adhered to the longer piece of Old Olive Cadstock with Snail Adhesive.

Inking up the stem image with SU! Marker – Old Olive, I stamped it direct to the smaller piece of Whisper White Cardstock, run it through the Bigshot using the Embossing Folder – Perfect Polka Dots, adhered it to the piece of Old Olive Cardstock using Snail Adhesive & finally to the piece of DSP ensuring I followed the sketch before adhering DSP with Multipurpose Glue.

I stamped 3 large flower images with Daffodil Delight onto Whisper White Cardstock & 3 using Soft Suede.  These were cut out prior to attaching to the card with Snail Adhesive for the front flower & Stampin’ Up! Dimensionals for the back 2 flowers.  All 3 smaller flower images were adhered to the middle of the larger flowers with Snail Adhesive.

I run a piece of Satin Ribbon across the bottom part of the DSP, tucked ends under, tied a knot & adhered the whole lot to the Base Card – Daffodil Delight with Snail Adhesive.

The sentiment was stamped onto a scrap piece of Whisper White Cardstock in Old Olive Ink, punched using the Large Oval Punch, adhered to a piece of Daffodil Delight piece which had been punch with the Scallop Oval Punch & finally to the card with Snail Adhesive.

I popped 3 Pearls into the centre of each small flower to finish

I hope you will join us this week.  Don’t forget to pop over to Sunny Challenges & Creations & check out what Kris, Gwen & our Guest Designer for the week – Sarah – have created.

 Have a great day!