Merry Christmas

My poor blog feels like it has been neglected as I haven’t posted anything for a little while, but I have been creating including Christmas Cards, Technique Classes & Wedding Invitations, all of which I will share with you over the next couple weeks.003.1blog

Today’s card is one we created in Crafty Creations – my volunteer class at Caloundra Community Centre – & one which 1 of the ladies requested some time ago.  The ladies loved creating this card.

It does use retired DSP, which you have probably guessed by now I still have heaps of.  The DSP could be changed out to current colours if you wanted, making it a completely different card.

Supplies –

  • Stamp Set – Nil
  • Ink – Nil
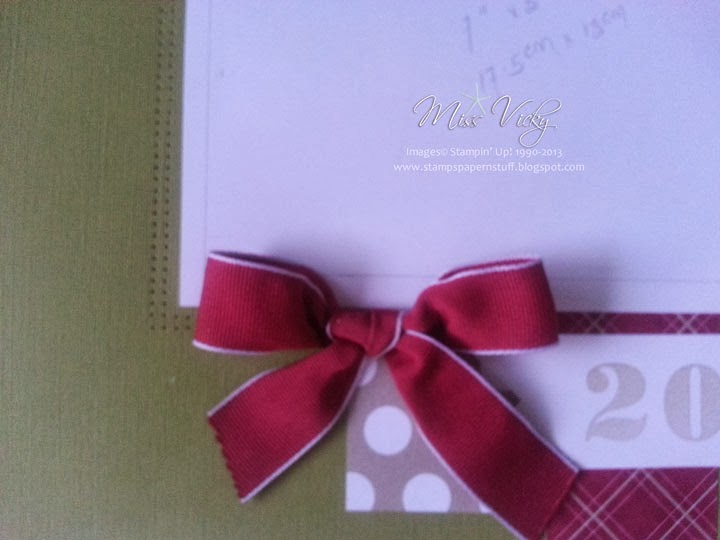
  • Cardstock – Whisper White, Cherry Cobbler, Old Olive, Chocolate Chip
  • DSP – Season of Style (Retired)
  • Embossing Folder – Lucky Stars, Perfect Polka Dots
  • Framelits –Circles Collection
  • Punches – 2 3/8” Scallop Circle, Dotted Scallop Ribbon Border, Itty Bitty Accents Punch Pack
  • Accessories – Stampin’ Dimensionals, Rhinestones

Merry Christmas Tutorial

001blog

Until next time, Happy Stampin’

Vicky

Merry Christmas Elaina….

Today’s card is one I was asked to create for my niece – Elaina.  In fact it is her 1st Christmas, so she may not understand what all the hype is all about.

I wanted to do a simple little card for her but keeping in with the traditional colours of Christmas.  I have loved this gorgeous little set “Wishing You” since I first saw it in the Seasonal Catalogue.  In fact, I had not intended to use it for Christmas, but for kids birthdays during the year.  Boy, was I wrong!  I’ve used it heaps for Christmas & none for birthdays, but that will come in the year.

I liked this card so much that I created 6 of them to give out to friends for Christmas.

I’ve also decided to enter it into the current challenge over at LateNightStampers where we have to create a card, etc using 3 layers, 2 embellishments & be able to create it in 15min or less!

Supplies –
Stamp Set            Wishing You – 131751
Ink                           Old Olive – 126953, Crumb Cake – 126975, Cherry Cobbler – 126966
Cardstock             Whisper White – 106549, Old Olive – 106576
DSP                          Season of Style – 132340
Punches                  2 ½” Circle – 120906
Accessories           Snail Adhesive – 104332, Stampin’ Dimensionals – 104430, Rhinestone Basic Jewels – 119246

 
Tutorial for you to Print & File
 
 
Until next time, Happy Stampin’
 
Vicky

Paper Angel…

My share today is one that we finished the year off with in our Technique ClassChristmas Paper Angel.  Create a heap of them in all different sizes & colours & hang from your Christmas Tree.  The list is endless in how you could adjust this little angel to create something unique.

I will admit it is not my idea, I actually found it on Pinterest, but when I went back to find it, check to see if there was a tutorial & link it back, no luck.  Please let me know if you recognize this angel as I would love to give you credit for it.  Thank you so much for your inspiration!

As I didn’t save the picture & had no instructions, I sort of started out blind.  I played for sometime until I got it just right or to how I remembered it looking.  I actually used DSP for my angel, whereas the one I saw was Pool Party, I think!

I have used a retired punch for the heart, but it is easy to replace with any current shape, including the Fashionable Hearts Embosslits.

The tutorial will be on my FREE TUTORIAL Page if you want to re-create it!

Supplies –           
Cardstock – Glimmer Paper – Silver – 124005, Vellum – 106584
DSP – Winter Frost Speciality – 132341
Punches – Scallop Edge Border – 119882, Heart – Retired
Accessories – Simply Scoring Tool – 122334, Trimmer – 129722, Dazzling Details – Silver Sparkle – 127845, Bone Folder – 102300
Non-SU! – Ribbon/Wire/Cord, Beads, Hot Glue Gun

 
The rest of the class
  •  To order Stampin’ Up! products online, please Shop Here
  • Want to join my family, and be a part of a group that loves to stamp together, Join Here
  • To check out available classes or to attend any of the classes, please Click Here, click on the “Classes/Workshop” Page or email me vickiawright@bigpond.com
Until next time, Happy Stampin’
 
Vicky

Out with a Bang…

Belle – My little helper for the day!

It is a lovely overcast day here which means I have a helper sitting on my desk.  Actually, I often move her little bed to the desk where she likes to have her morning sleep before getting up & going outside for a couple of hours.

It was our last class for the year with Crafty Creations & we decided to go “out with a bang” – so to speak!

As well as having a small Christmas break up, we also created this great Christmas Cracker which can filled with lots of little goodies.  Mine has been created especially for one of my niece – Ash which I will fill with chocolates as she is mad on the stuff,  must take after me!

It is light enough that I will be able to hang it from the tree.  I now to have to create another for Sarah.

I found a great little tutorial from Sara.  I did change it a little as I made it a little longer on the edges as I wanted to punch them to give it a little bit more of a different look. 

As I am waiting on my order & knowing the image would be too big anyhow, I decided to use the Santa image from “Santa’s List” using MDS.  This way, I could still colour him the exact colours I wanted AND also reduce him to the exact size I wanted.  Gotta love that!

This project also fits our current challenge over at Sunny Challenges where we have to create something for the Christmas Season.

 Supplies –
Stamp Set – Santa’s List – MDS
Cardstock – Old Olive, Crumb Cake, Whisper White, Cherry Cobbler
Punches – 1 1/4″ Circle, 1 3/8″Circle, Scallop Circle, Pinking Hearts Border – Retired
DSP – Season of Style
Accessories – Gel Pen – White, Sticky Strip, Simply Scoring Too, Envelope Punch Board
Ribbon – Non-SU!

  •  To order Stampin’ Up! products online, please Shop Here
  • Want to join my family, and be a part of a group that loves to stamp together, Join Here
  • To check out available classes or to attend any of the classes, please Click Here, click on the “Classes/Workshop” Page or email me vickiawright@bigpond.com
Until next time, Happy Stampin’
 
Vicky

SC 094/13…


Our new challenge is up & running over at Sunny Challenges & Creations

 
All you have to do is share something that you have created for the Christmas Season.  Maybe you have created your own decorations, table settings, boxes, banner, scrapbook page, etc. 
 
For my first sample, I decided to do a couple of scrapbook pages ready in time for Christmas Day. I am really happy with how they turned out.  Today is Page 1 of the pages which will fit a 5″ x 7″ photo with a small white border.
 
Supplies –
Stamp Set – Morning Post Numbers
Ink – Crumb Cake
Cardstock – Whisper White, Textured Old Olive
DSP – Season of Style
Ribbon – 1″ Stitched Edge Grosgrain – Cherry Cobbler
Washi Tape – Season of Style
Accessories – Snail Adhesive, Paper Piercing Mat & Tool
 
I cut 2 strips of DSP into 2″ wide x 11″ while the 3rd strip was 2″ x 12″ & adhered them to the RHS of the Old Olive Textured CS.  I just love Textured CS for scrapbooking!
 
A 5 1/4″ x 7 1/4″ piece of Whisper White CS was adhered over the strips of DSP.  I stamped “2013” onto a piece of Whisper White CS 1 1/2″ x 5 1/2″ using Crumb Cake Ink.  Prior to adhering to the page, a “V” was cut from one end.
 
With my Paper Piercing Mat & Tool I pierced a double layer around the Whisper White Mat.  A bow was tied from the Cherry Cobbler Ribbon & the adhered to the RHS of the year.
 
I then adhered a couple of strips of Washi Tape to the top LHS of the page.  I also placed a piece of Whisper White, cut into a banner for a little bit of journaling.
 
All in all a very simple page, but one that represents Christmas!
 

We know everyone is busy at this time of the year, so we have extended this challenge out to the new year, which means you have lots of extra time to play along.  We would love for you to link your creation or creations with us.  All you have to do is post it on line & then link back to Mr Linky.
 
Until next time, Happy Stampin’!
 
Vicky