Birthday Blossoms

Birthday-Blooms-1---Close-U

Today’s card is one of the many we created over a month in our class when we played with the Retifom Techniquewhich you can find the tutorial here.

The class was split into pairs which mean we worked on 4 lots of cards at once.  I thought it would be utter chaos but much to my surprise it worked our perfectly & we seemed to fly through the classes in record time.Birthday-Blooms-1---Inside

We used a few of the retiring In Colours to create our card – Emerald Envy & Peekaboo Peach Inks & Cardstock.

This technique is a little addictive as each time you play you will end up with a different look which is what happened in our classes.

By clicking on the link below, you are able to download a free tutorial to create your own card

Until next time, Happy Stampin’

Signature---Vicky-Wright---


375 Have a Beautiful Birthday – Birthday Blossoms

Birthday Blossoms, 2016-2018 In Colours, Retiform Techniques, Free Tutorial, Stampin' Up!, #birthdayblossoms #birthdays #makeacardsendacard #stampinup #vickywright

Birthday Blossoms

Birthday-Blooms---Close-UP

Today I am sharing with you one of the cards we created using the Birthday Blossoms Stamp Set along with the Naturally Eclectic DSP.  The ladies absolutely loved the card, especially the flowers for some reason.  I think it may be the colours which I picked up from the DSP.Birthday-Blooms-1---Inside

I’ve stamped Emerald Envy Ink direct onto Emerald Envy CS, fussy cut before adhering to the card.  The DSP was layered onto a piece of Peekaboo Peach CS & then to a Fresh Fig Base.

If you click on the link below, you will be able to download a free tutorial to create your own card.  It includes a list of products, measurements (metric & imperial) plus the instructions.

Until next time, Happy Stampin’

Signature---Vicky-Wright---


376.  have a Beautiful Birthday – Birthday Blossoms

Birthday-Blooms-1

Beautiful Peacock

Beautiful-Peacock-1---Close

With Sale-A-Bration drawing to a close in the next week – 31 March, I thought I had better start sharing with you some of the cards we’ve been creating in our classes.

Today is such a card using the Beautiful Peacock Stamp Set.  It is a gorgeous set, especially as we have a family of them wandering around the streets where I live paying visits toBeautiful-Peacock-1---Insid different people.  They will sometimes come up to my door if I’m not out the front wanting to say hello & show off their babies.

I started off with a case of the sample in the Catalogue, but as usual it sort of took a turn & went off on it’s own.  But hey that is good, isn’t it?

The colours I’ve used are Emerald Envy & Night of Navy.  Teamed with Whisper White, Even with layers I think it is fresh & clean card.

Grab your free tutorial by clicking on the link below.  It includes a list of products, measurements (metric & imperial) plus the instructions.

This lovely set could be yours for free when you spend $90.00 but only while Sale-A-Bration is going.

Until next time, Happy Stampin’

Signature---Vicky-Wright---


327. Today is all about YOU! – Beautiful Peacock

Beautiful-Peacock-1

All the Best

Heya Stampers,

Today I am sharing with you a card we created in our “Cards @ Toogoom” class last week.  I wanted to try & see if I could use the Embossing Paste a different way.  Seaside-Shore---close-up

When I started, I wasn’t too sure how it was going to turn out but after some trial & error I think I  am finally happy with the outcome.  I love it when I can get multiple uses from my craft supplies.  I call this “Painting with Embossing Paste” – is that such a thing?

I have used a couple of retired In ColoursLost Lagoon & Mint Macaron but you could easily create the same card using current colours.

My sentiment is from the “Better Together” Stamp Set which I masked off the bottom part with Sticky Tape, inked the top with Calypso Coral Ink, removed the mask & then stamped directly onto Whisper White Card.

The “frame” has been created by die cutting 2 different circles using the Layering Circles Framelits & running through the Big Shot.

Why not have ago at “painting” with your Embossing Paste.  I would love to see what you come up with.

Until next time, Happy Stampin’

Signature---Vicky-Wright---

257. All the Best – Seaside Shore

Seaside-Shore

Kylie’s International Blog Highlights

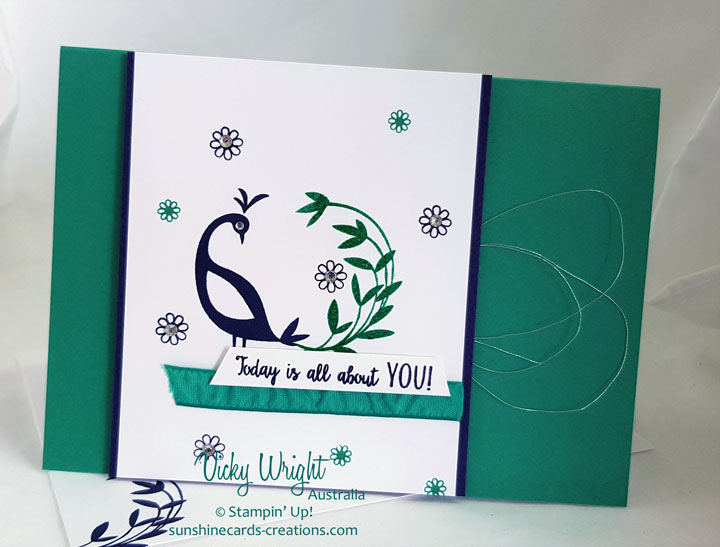
It is that time again where I am once again playing along with Kylie’s International Blog Highlights which is so much fun.  This month our theme is Gratitude inspired by Thailand!

What is Kylie’s International Highlights?   It is where Demonstrators from all around the world take part in a monthly Blog Highlight.  It’s a great way to get to know other Demonstrators & see projects using current Stampin’ Up!® product.  Each month Kylie has a different theme so we get to play with different product.

Vote for Me HereWhat is so different about this Blog Highlight?  YOU get to vote for your top 5 favourites.  The top ten will then get to take part in an international blog hop with Kylie & other talented successful demonstrators.

What do I do?  All you have to do is click on the “Vote for Me” photo at the side or head on over to Kylie’s Blog, click on the heart in the top right hand side of the picture.

Can I leave comments?  Sure you can.  Once you have voted, click on any picture & comment on those that you really love.  You know how bloggers love to read your comments.

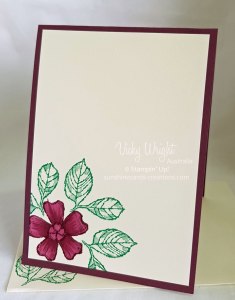
My card was one I had started playing with a couple of weeks ago & has been sitting on my desk in bits & pieces for a couple of weeks now.  Instead of starting from scratch I challenged myself to use what I had started so I sat down & then bang, it hit me.  The Wood-Words---close-upflowers from the “Wood Words” Stamp Set were perfect as they remind me of Thailand.  The colours I didn’t have to change at all as I had gone with Berry Burst & Lemon Lime Twist Inks & Card & I think they are the perfect colours……

I do hope all the Demonstrators who have earned the Thailand Incentive Trip are enjoying themselves as it is such a lovely country.

There is a free tutorial on how I created my card by clicking on the link below.  It gives you all the product used plus the measurements (metric & imperial).

Don’t forget to head on over to Kylie’s Blog to check out all the lovely cards that have been created & to vote for your favourites.  I’m #17 (just in case you are looking).

Until next time, Happy Stampin’

Vicky

250. Hello Friend – Wood Words

Wood-Words---100717

Crafting Forever

Heya Stampers,

My card today is one we created last week in our class “Cards @ Toogoom“.  The ladies loved it & thought it was a perfect way to use up those bits of DSP hanging around, not 20170612_102411blog-insidedoing anything but sitting just in case…..

For me it was the perfect time to showcase the gorgeous “Crafting Forever” Stamp Set, Page 181 of the new Catalogue.  It has a couple of lovely images great for the male, female & kids.

I’ve used the “Playful Palette” DSP Stack (retired) but the perfect excuse to use most of the remaining pages.  You could easily change out the DSP, replace it with current DSP to achieve an entirely different look.

To highlight the DSP even further & for the colours to pop even more,  I allowed a small amount of Basic Black to show between each piece.

I didn’t colour the image as I thought the DSP was busy enough & didn’t want to take away from the DSP.  I did, however, “Paper Pieced” the vase with the same DSP.

To create your own card, just click on the link below to download the tutorial which includes all the product used & measurements (metric & imperial).  SU! Demonstrators are quiet welcome to use the tutorial for any of their classes.

Until next time, Happy Stampin’

Vicky

242. Crafting Forever

20170612_102356blog

Feather Together…

…meets Stampin’ Up! Embossing Paste.

Yes, you have read correctly, Stampin’ Up! now have the lovely & fun Embossing Paste.  I, 20170613_111258blog-insiefor 1, have been waiting a long time for this to happen.  Thank you so much Stampin’ Up!

Today’s card is one that we did at our Training Weekend.  We got to play with the Paste & also the gorgeous “Feather Together” Stamp Set.  Our card is straight from Page 176.  I will be honest & say I forgot to order the Decorative Masks, so had to go along with one that has retired, but it still gave us the result we were after.  You could also create your own Mask by using a Framelit or Thinlit.

We placed a small amount of Embossing Paste onto a plastic sleeve, added a couple of drops of the Lemon Lime Twist Ink Refill & mixed it with a Palette Knife.  You can add as much as you like to the Paste to give you more depth or go as light as you like for just a small tint.

To create your own card, click on the link below for the free tutorial.

Until next time, Happy Stampin’

Vicky

243. Thank You – Feather Together

20170613_111614blog


Stampin’ Up! Colours 2017-2018

Today’s post is a little different in that I had organized a document for myself to keep all Stampin-Up-Retired-In-Coloumy colour codes in one place.  I don’t know about you but I had them everywhere & was sick of trying to find them when required.  I must say a big thank you to those lovely people who do the codes each year & share, share & share.  They are so very helpful.  Your work never goes unappreciative.

I then expanded the form to include a box to tick off when you have purchased Card, Ink Pads, Refills & Markers.  Again, a huge thank you to the lovely people for giving us the Codes.  I didn’t use any one particular code as I sort of selected the ones that I thought were closest to the Stampin’ Up! colours.

After playing with the form & tweaking it heaps, I have finally emailed it off to my team & customers – they love it!!!!

To download your own copy, please click on the links below.  The first one is the colours for 2017-2018 & the second one are the Retired In Colours from 2012-2017.

Until next time, Happy Stampin’

Vicky

Stampin Up Colours – 2017-2018

Stampin Up Retired In Colours – 2012-2017

Kylie’s International Blog Highlights

Once again, I am playing along with Kylie’s International Blog Highlights which is so much fun.  This month our theme is BABY!  I will be honest & say I haven’t created a baby’s card for so long.

What is Kylie’s International Highlights?   It is where Demonstrators from all around the world take part in a monthly Blog Highlight.  It’s a great way to get to know other Demonstrators & see projects using current Stampin’ Up!® product.  Each month Kylie has a different theme so we get to play with different product.

Vote for Me HereWhat is so different about this Blog Highlight?  YOU get to vote for your top 5 favourites.  The top ten will then get to take part in an international blog hop with Kylie & other talented successful demonstrators.

What do I do?  All you have to do is click on the “Vote for Me” photo at the side or head on over to Kylie’s Blog, click on the heart in the top right hand side of the picture.

Can I leave comments?  Sure you can.  Once you have voted, click on any picture & comment on those that you really love.  You know how bloggers love to read your comments.

For my card I ended up using the stamp set “Swirly Bird” which was still sitting on my 20170611_121427blog-insidedesk from when I created my cards for my “Creative Cards” class .  I teamed it up with the “Colour Theory” DSP Stack, yep sitting on my desk from my Memories & More Class.   Love, love, love this stack!!!!!!

There is a free tutorial on how I created my card by clicking on the link below.  It gives you all the product used plus the measurements (metric & imperial).

Don’t forget to head on over to Kylie’s Blog to check out all the lovely cards that have been created & to vote for your favourites.

Until next time, Happy Stampin’

Vicky

241. Hello Baby – Swirly Bird

110617d-blog

Happy Birthday Gorgeous

One of the perks of being a Stampin’ Up! Demonstrator is being able to pre-order items 20170530_143734blog-close-ufrom the new Catalogue which means my team was able to create swaps using new products.

Today I am sharing with you one of the lovely cards created by Naomi using the gorgeous “Happy Birthday” Bundle which includes the “Happy Birthday Gorgeous” Stamp Set & the matching “Happy Birthday” Thinlits Die.  Don’t you just love it?

The card also features the lovely new “Colour Theory” DSP Stack.  I can see this stack being very popular with everyone.

It’s Your Day” has been Heat Embossed using the Whisper White Emboss Powder.

Be sure to check below to see the list of supplies to create this card.

Until next time, Happy Stampin’

Vicky

20170530_143734blog

Supplies to create this card – 

Stamp Set 143662  Happy Birthday Gorgeous
Ink 102283  VersaMark

143662  Real Red

Cardstock 141419  Dapper Denim

141422  Peekaboo Peach

106549  Whisper White

DSP 144193  Color Theory
Punches 140609  Balloon Bouquet
Framelits/Thinlits 143700  Happy Birthday

145372  Stitched Shapes

Baker’s Twine 124262  Solid – Whisper White
Accessories 143263  Big Shot

110755  Multipurpose Liquid Glue

103683  Mini Glue Dots

104430  stampin’ Dimensionals

129056  Heat Tool

103083  Embossing Buddy

109132  Stampin’ Emboss Powder – Whisper White

141897  Wink of Stella – Clear