Happy Easter…

Envelope & Inside of Card…

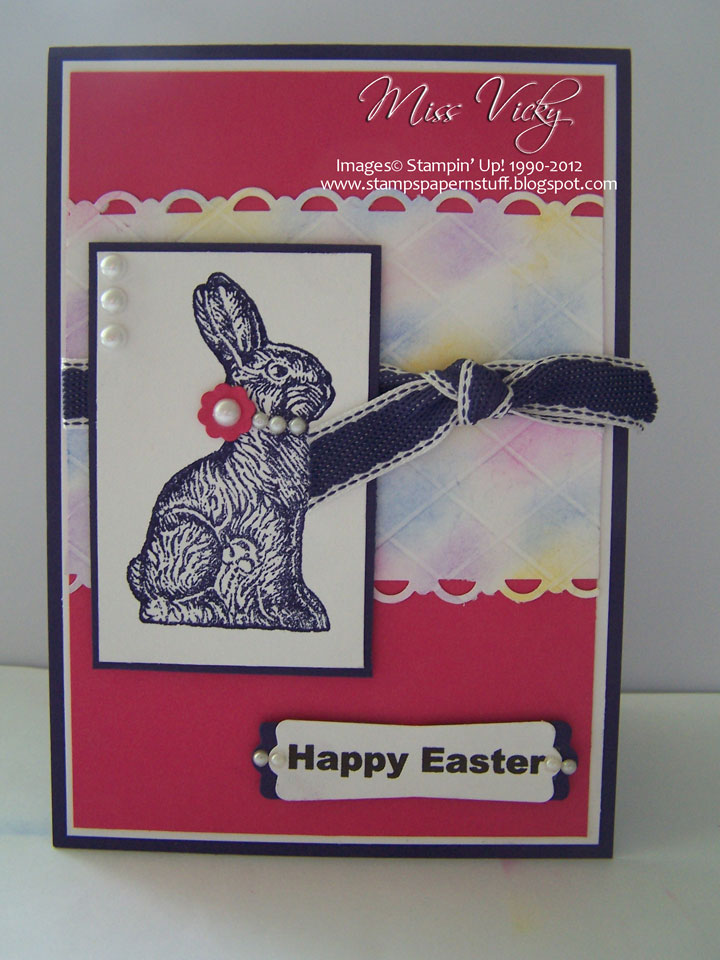
We created an Easter Card today at the Caloundra Community Centre.  Always a relief to hear that the ladies loved it!  Along with the card, we included the Techniques of Scoring & Chalking, plus a little bit of punching & we have a really lovely Easter card!  Will be the first to admit it is not your normal traditional card, but I love the Cabuary’s Purple & I built the card around that colour!!!!!

Measurements –
Base Card – Concord Crush – 11 3/4″ x 4 1/8″ or 29.5cm x 10.5cm – Scored in middle & folded in half
Layer 1 – Whisper White – 5 3/4″ x 3 7/8″ or 14cm x 10cm
Layer 2 – Melon Mambo – 5 5/8″ x 3 3/4″ or 13.5cm x 9.5cm
Layer 3 – Whisper White – 3 3/4″ x 3″ or 9.5cm x 8cm
Layer 4 – Concord Crush – 3″ x 2″ or 8cm x 5cm
Layer 5 – Whisper White – 2 7/8″ x 1 7/8″ or 7.5cm x 4.5cm

I layered the piece of Melon Mambo to Whisper White & then to the Base Card using Snail Adhesive.

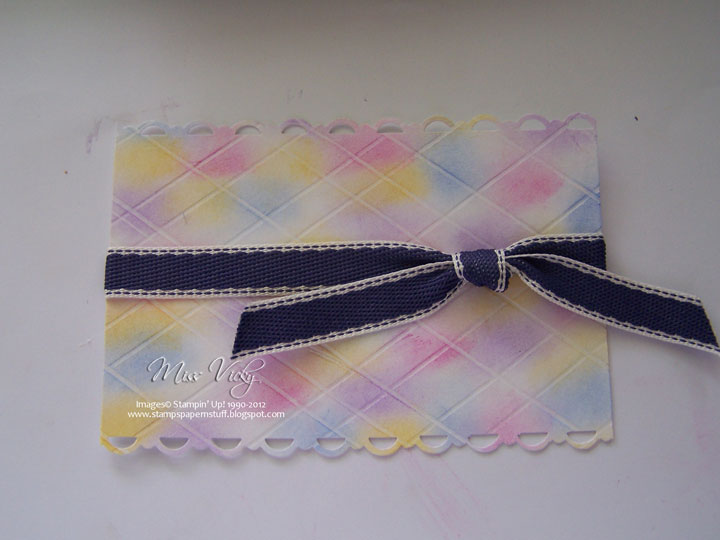
With the medium piece of Whisper White, I scored at /1/2″ intervals diagonally & then diagonally the other using the Simply Scored Scoring Tool – out in the new Mini 1st April.  I then grabed a couple of SU! Sponges, my Stampin’ Pastels & randomly chalked the whole area using 3 or 4 colours.  I added a little bit of Daffodil Delight to lift it a little & to bring the colours out.  I didn’t really bother to fill all the white spaces, as I have left some here & there to give a little bit more of an effect!

I punched a border along both sides of the chalked piece with my Scallop Trim Border Punch.
I adhered a piece of Ribbon along the middle, tucked ends under, tied a knot & adhered to the Base Card with Snail Adhesive.

I stamped the Bunny image onto the smallest piece of Whisper White using Poppy Parade Ink & adhered to the piece of Concord Crush Cardstock.  This piece was adhered to the top of the card using Stampin’ Dimensionals.

I typed the greeting onto a piece of Whisper White Cardstock, punched out with my Modern Label Punch.  I punched a 2nd piece in Concord Crush Cardstock & cut in 2.  I adhered this 2nd piece to the Whisper White so that just the ends of the Concord Crush were showing. 4 Pearls, 2 each end were adhered to the greeting.

I adhered 3 Pearls to the top LH corner of the image, 3 small Pearls along the bunny’s neck while another was adhered tot the centre of the flower & adhered to her neck.  I punched this small flower using the Flower Punch from the Itty Bitty Punch Set in Melon Mambo Cardstock.

Supplies –
Stamp Set – Chocolate Bunny
Ink – Poppy Parade
Cardstock – Whisper White, Concord Crush, Melon Mambo
Ribbon – 1/2″ Stitched-Poly – Concord Crush
Punches – Modern Label, Scallop Trim Border
Accessories – Snail Adhesive, Stampin’ Dimensionals,
Bone Folder, Pearls, Stampin’ Pastels, SU! Sponges
I will be posting another card made using the same supplies, etc in a couple of days, except it is a different shape & it was created prior to this one.
Until next time, Enjoy!

Easter…

With Easter being just around the corner, I thought it would be a great way to make a couple of cards for some special people.  They will know who they are when they receive them!

Base Card – Perfect Plum, So Saffron, Bashful Blue – 5 7/8″ x 4 1/8″ or 15cm x 10.5cm – cut, score & fold in half

Layer 1 – Pretty in Pink – 5 3/4″ x 4″ or 14.5cm x 10cm
Layer 2 – Whisper White – 5 5/8″ x 3 7/8″ or 14cm x 9.5cm

I layered Pretty in Pink Cardstock onto each of Perfect Plum, So Saffron & Bashful Blue.  I haven’t used any of these colours in so long, that it was great to get back to the Soft Colours.

I stamped the bunny using my Versamark & Chocolate Chip Inks, poured Clear Embossing Powder over the top & heat set it with my Heat Tool.  I repeated this step for the other 2 cards.  I then used the Masking Technique for my bunny, inked my image in Certainly Celery & stamped it over the bunny & Whisper White Cardstock.  Repeat twice for the other 2 cards.

Inking my flower image with Pretty in Pink Ink, I stamped it randomly among the reeds.  I repeated the same step again for the 2nd card.  For my third card, I used a butterly image & Bashful Blue Ink

For my sentiment, stamped onto Whisper White Cardstock & heat embossed the ink using Bashful Blue, Pretty in Pink & Perfect Plum Inks.  I then punched them out using the Large Oval Punch.  After punching a piece of Perfect Plum, So Saffron & Bashful Blue Cardstock using the Scallop Oval Punch, I adhered this to the sentiment & then to the cards.  I adhered the Whisper White Cardstock to the base cards.

I coloured the Rhinestones using my Bashful Blue, Pretty in Pink & More Mustard Markers.  I applied a little Crystal Effects over the top of each so that the colour would set, adhered some around the necks of the bunnys & to the centres of the flowers & butterfly images.

Supplies –
Stamp Set – Chocolate Bunny, Well Scripted, Priceless, So Happy For You
Inks – Bashful Blue, Pretty in Pink, So Saffron, Versamark
Cardstock – Perfect Plum, Whisper White, So Saffron, Pretty in Pink
Punches – Large Oval, Scallop Oval
Accessories – Multipurpose Glue, Clear Embossing Powder, SU Markers, Basic Rhinestones, Crystal Effects

Check back tomorrow & I will have a tutorial on the Masking Technique

Until then, Enjoy!

Chocolate Bunnies….

G’Day Stampers,
Another couple of Chocolate Bunnies for you – same layout, different colours.
With the Green Bunny, I have cut him out & using Glue Dots, placed him above a stamped image on the Whisper White Cardstock.  I hope you can see that!
I haven’t added a greeting on these cards, as sometimes I like to leave them blank. 
You can always add one later on.

Pink Bunny
Supplies –
Stamp Set – Chocolate Bunny
Ink – Versa-Mark
Cardstock – Mellon Membo, Whisper White, Soft Suede
DSP – Pink Pirouette
Accessories – Grosgrain Ribbon – Pretty in Pink, Embossing Buddy,
Embossing Powder – Clear,Snail Adhesive Glue, Powder Pal, Heat Gun

Green Bunny
Supplies –

Stamp Set – Chocolate Bunny
Ink – Versa-Mark
Cardstock – Garden Green, Whisper White, Soft Suede
DSP – Kiwi Kiss
Accessories – Grosgrain Ribbon – Always Artichoke, Embossing Buddy,
Embossing Powder – Clear,Snail Adhesive Glue, Powder Pal, Heat Gun, Glue Dots
Until next time
Enjoy

Chocolate Bunny…

G’Day Stampers,

I have finally gotten round to making an Easter Card using the Stamp from the current Stampin’ Up!® Mini-Catalogue.  This mini finishes Wednesday 31st March. 

Not only does it fnish on Wednesday, but a brand new mini-catalogue from Stampin’ Up!® begins Thursday 1st April & the cardstock & inks I have used are from that.  This is one of the advantages of being a Demo….we get to order the new products in advance.

Wait until you see this mini – it is filled with a lot of yummy stuff. 
If anyone would like a FREE mini, please do not hesitate to contact me
Supplies –
Stamp Set – Chocolsate Bunny
Cardstock – Mellon Mambo, Soft Suede, Rich Razzleberry, Very Vanilla
Inks – Mellon Mambo, Soft Suede, Rich Razzleberry
Punches – 1 3/8″ Circle, Scallop Round, Scallop Oval, Large Oval, Small Oval
Accessories – Snail Adhesive, Mini-Glue Dots
Non-SU – Embossing Folder

Using the cirlce punch, I’ve punched 3 holes in the Mellon Mambo and adhere the Bunnies behind.
Using mini-glue dots, I placed the Scallop Circle punch over the top to
form 3 scallop frames over the bunnies

Enjoy!