
Measurements –
Base Card – Concord Crush – 8 1/4″ x 5 7/8″ or 21cm x 15cm – Scored down the middle & folded in half
Layer 1 – Poppy Parade – 5 3/4″ x 4″ or 14.5cm x 10cm
Layer 2 – Whisper White – 5 5/8″ x 3 7/8″ or 14cm x 9.5cm
?Layer 4 – Blushing Bride – 3 7/8″ x 2″ or 9.5cm x 5cm
Layer 5 – DSP – 3 3/4″ x 1 1/2″ x 9.5cm x 4cm
Supplies –
 |
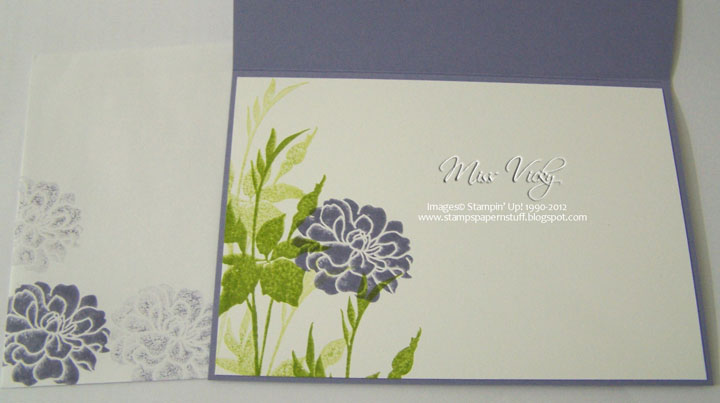
| Inside Card… |
Stamp Set – Fabuloues Florets, Heard from the Heart
Ink – Concord Crush, Blushing Bride, Pear Pizzazz
Cardstock – Whisper White, Concord Crush, Blushing Bride, Poppy Parade
Punches – Scallop Trim Border
Ribbon – 1/2″ Polly- Stitched – Blushing Bride
Accessories – Stampin’ Dimensionals, Snail Adhesive
Technique – Rock & Roll
1 Ink your image with a light coloured ink
2 Ink the edges of this image with a darker coloured ink by rolling edges of the image onto the ink pad
3 Stamp your image onto your Cardstock
4 You are able to repeat the above step using yet another darker coloured ink if you wish
5 For more images of the same stamp, repeat as many times as you like
I punched along both sides of the Blushing Bride Cardstock using the Scallop Trim Border Punch. Ensure that you punch along the long sides of this piece. I adhered the piece of DSP to the top of the punched piece of Cardstock with Snail Adhesive, adhered the piece of ribbon along the middle, tucked ends under, tied a knot on the LHS & set aside.
 The stem image was stamped direct onto the piece of Whisper White Cardstock with Pear Pizzazz Ink. The sentiment was inked in Concord Crush Ink & stamped on the side of the Whisper White Cardstock. This piece was adhered to the piece of Poppy Parade Cardstock & then to the Base Card – Concord Crush with Snail Adhesive. I then adhered the punched piece of Cardstock to the top of the card, ensuring the piece went down along the bottom.
I applied the Rock & Roll Technique to my flower image, cut around it & applied to the card using Stampin’ Dimensionals.
I will admit that I meant to do a background on the piece of Whisper White Cardstock prior to doing my stamping, but forgot all about it until I had put the card together……
Until next time, Happy Stampin’


