Congratulations…

?

Cloes Up…

? I have a wedding tomorrow & along with delivering the reception stationery, I like to give the Bride & Groom a card similar to or close to their colours & their own copy of the stationery.

This is a very easy card & took me all of about 3 minutes, but I am liking it all the same.  The longest part was the stamping & cutting out of the mask.

Card Base – 5 7/8″ x 4 1/4″ once scored & folded in half

I used the Technique “Masking” on this card, although it was the Basic Masking – Tutorial may be found Here…

Using Tempting Turquoise Ink, I stamped my first image off to the LHS a little.  I wanted image not to be whole.  I then placed my mask on top of this image & stamped over it using the same ink colour.

I drew a line right around the card using my SU Markers – Tempting Turquoise.  These are such handy little items & don’t use mine nearly as much as I should.

I stamped the sentiment using Early Expresso Ink & added a Basic Rhinestone to each corner of the card.

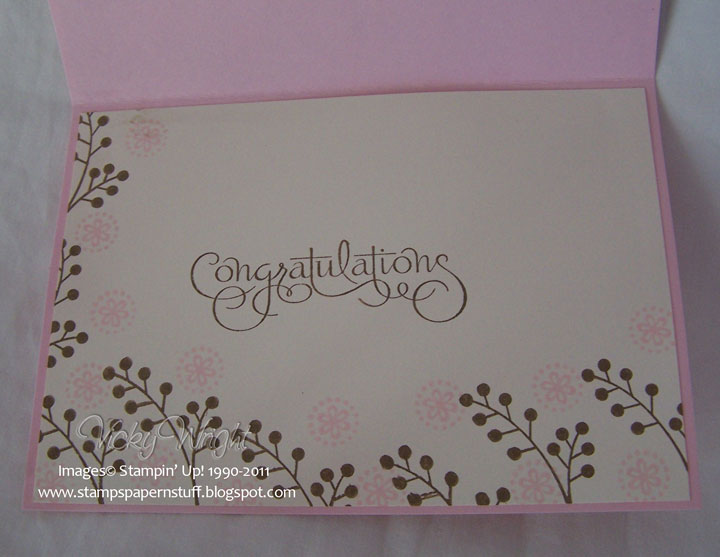
I repeated the masking for the inside & envelope.  I’ve just realised that I didn’t even using any adhesives on this card – how great is that!  It also proves you don’t have to have a lot of supplies to make a lovely card!

Supplies –
Stamp Set – Always (Retired), Well Scripted
Ink – Temption Turquoise, Early Expresso
Accessories – SU Marker – Tempting Turquoise, Basic Rhinestones
NON-SU – Cardstock

Until next time, Enjoy! 

Engagment…

???????

This card has been created for a lovely couple who come every Friday to Crafty Creations.  They have been engaged for a couple of weeks now, but have only managed to make a card.  Mind you, I have a box of cards, but no, none of those would do.
?

Inside Card

? Base Card – Pink Pirouette – 5 7/8″ x 4 1/4/” or 15cm x 10.5cm

Layer 1 – DSP – 5 3/4″ x 4″ or 14.5cm x 10cm
Layer 2 – Pink Pirouette – 3 3/4″ x 2 3/4″ or 9cm x 7cm
Layer 3 – Very Vanilla – 3 5/8″ x 2 5/8″ or 8.5cm x 6.5cm
?? I layered a piece of Lace Ribbon across the DSP just off-centre, tied a bow & adhered to base card. 
Using Pink Pirouette Ink, I stamped random images along the bottom of Very Vanilla Cardstock & LHS of Cardstock.  I stamped the bird image in Soft Suede Ink.  Applied Basic Pearls to the top RH corner & eye.  This piece was adhered to the card using SU Dimensionals.
For the inside, I reversed the colours with the images, stamped the sentiment with Soft Suede & adhered to the inside of card.
A very easy card, but one that is quiet effective without being over the top.  I only hope they like it!
Supplies –
Stamp Set – Always, Well Scripted
Ink – Pink Pirouette, Soft Suede
Cardstock – Very Vanilla, Pink Pirouette
DSP – Elegant Soiree
Ribbon – Chantilly Lace
Accessories – Snail Glue, SU Dimonsionals. Basic Pearls
Contratulations Bronwyn & Allen!!!!!!!!!!!
?

Red Robin…

With all the house work etc completed, what else is a girl to do, but make cards!

This one has been created for the Colour Challenge over at Stamping 411 

So I ‘ve pulled out my wheel, which I have not used in quiet some time.  I already had my stamp out to use for another card, but that one went by the wayside when these colours come screaming at me!

Cut base card from Wild Wasabi Cardstock lengthways & score in half
Cut Whisper White Cardstock
Inking up SU®  Wheel in Wild Wasabi, roll across the strip of Whisper White
Using your Eyelet Border Punch, punch the edge of the Whisper White
Apply So Saffron Grosgran 5/8″ Ribbon about 3/4″ up from the bottom of Whisper White & tie knot
Adhere to Wild Wasabi card
With a scrap of Whisper White Cardstock, Rose Red Ink & Versamark, stamp bird image onto Whisper White, Heat Emboss & cut out – instructions may be found Here
Adhere bird to ribbon using Stamin’ Dimensionals
Using Stampin’ Write Journaler, colour bird’s eye black & apply Crystal Effects
Inking sentiment in Versamark & Basic Black, stamp sentiment directly onto the card & Heat Emboss, as per instructions above for Heat Embossing

My Card –
Supplies –
Stamp Set – Always, Heard from the Heart
Ink – Wild Wasabi, Basic Black, Versamark, Rose Red
Cardstock – Wild Wasabi, Whisper White
Punches – Eyelet Border
Accessories – Snail Adhesive, Embossing Buddy, Heat Tool, Embossing Powder – Clear,
Stampin’ Writer Journaler – Basic Black, Crystal Effects
Until next time, Enjoy!

Baby Kate…

G’day Stampers,
An early post & a little different….  Scrap Book page using Stampin’ Up!® products.  A very easy & clean page, but then I scrap the same way as my cards – clean and easy!
I headed over to http://www.scrapbookfantasies.com.au/blog and found this challenge –
Weekly Challenge #16/2010
Create a single page layout using pink and one other colour only.
Due midnight Sunday 2 May 2010
They have some wonderful inspiration there, so why not go & check it out!
Supplies –
Stamp Set – Butterfly Prints, Always
Ink – Pretty in Pink, Pixie Pink
Cardstock – Whisper White, Pretty in Pink, Pixie Pink
DSP – Walk in the Park
Accessories – Snail Adhesive, Mini Glue Dots, Stampin’ Write Journaler
Non-SU – Rhinestones
Kate’s story reads –
“Hello World!
My name is Kate …..
My Mummy & Daddy are Julie & Cyril…
My brothers are Jake & Luke…
Luke is my twin…
I was born 28 Juy 2008″
But then being a twin, I couldn’t just do one and not the other, so here is Luke’s page ……..
Supplies –
Stamp Set – Choo Choo
Ink – Basic Gray, Bashful Blue, Not Quiet Navy, Whisper White
Cardstock – Whisper White, Not Quiet Navy, Bashful Blue
DSP – Urban Garden
Accessories – Snail Adhesive
Luke’s story reads –
“Don’t forget Me!
I’m Luke ….
Julie & Cyril are OUR parents…
And WE have a big brother, Jake…
Oh yeah, then there is my twin sister
Kate….
WE were born 28 July 2008″
I wanted it to be a little bit of fun & like they were telling the stories….
Enjoy!

Always…

G’Day Stampers,

This is one of the cards we did in our Technique class today – “Rock n Roll” – Tutorial below….

The colours – YoYo Yellow – is way out of my comfort zone, but hey you have to try these colours & surprise, surprise, I quiet like the end result!

Again, I’ve not stampes a greeting.  This way, you can either include a greeting just prior to posting or leave blank.


Closed –
Open –

Supplies –
Stamp Set – Always
Ink – YoYo Yellow, Chocolate Chip
Cardstock – Whisper White, YoYo Yellow, Chocolate Chip
DSP – Chocolate Chip
Punches – Eyelet Border
Accessories – Snail Adhesive, Glue-Dots
Non-SU – Rhinestones

Instructions –


1. Stamp image onto light-coloured ink pad

2. Press edges of stamp in a rolling motion onto darker ink pad, being careful not to ink the centre of the stamp


Tip –
Always use the lightest coloured ink first to avoid getting dark ink on your light ink pad

Until next time, Enjoy!

Wedding Card….

Hi Stampers,

As I’ve just completed an Invitation Package & as part of my “Thank You” to my Customers, I design a Congratulations card.  I usually make the cards in the colours of their invitations and very similar to their designs, etc. 
I knew I wanted to use Stampin’ Up!’s “Always” Stamp Set, and am very happy with the outcome.
View # 1 –
Close Up –
Supplies –
Stamp Set – Always
Ink – Chocolate Chip, Versamark
Card Stock – Chocolate Chip
Punches – 1 1/4″ Circle
Accessories – Anywhere Glue, Heat Gun, Embossing Powder – Clear, 
Taffetta Ribbon – Very Vanilla, SU Dimensionals
Non-SU – Cardstock – Pearl

To emboss this card –
1.    Rub Stampin’ Buddy over cardstock
2.    Stamp image with Versamark, then stamp image using Chocolate Chip
3.    Stamp image onto cardstock
4.    Using heat gun, heat image until colour changes
5.    Adhere to Card
6.    Embellish Card

Tip – There is no need to purchase a heap of embossing powders in all colours, Stampin’ Up’s Versamark & their great embossing powders of Gold, Silver, Black, White & Clear is all you will ever require! 
The results show & speak for themselves & are out of this world!

Why not have a go! 
If you have any queries, please do not hesitate to contact me as I am only too happy to help you out!
Enjoy
Vicky

Calendar Class 2010…

Hi All,

I did forget to mention that I am doing 2 extra classes in January for a Calendar 2010 – as per samples.  These have magnets on the back for putting on the fridge.

When booking your spot, could you please let me know which one you would prefer to do, so that I can ensure I have ordered enough stock.

Class
Calendar 2010
Venue
My Place
46 Sir Joseph Banks Drive
Golden Beach

Date 18 January 2010
Time 10.00am – 12.00pm
Or
Date  22 January 2010
Time 7.30 – 10pm
Cost $10.00

Colour Preference
# 14 “Circle Circus” Stamp Set
# 15a – “Great Friend” Stamp Set” – Mini-Catalgue – Retired
# 24d – “Always” Stamp Set

For those living out of town or unable to make it to either of the classes and would still like to make one.  This is available via email or post for $15.00 

Included in all Kits
Calendar
Full instruction with photos
Cardtsock
Brads
Rhinestone
Pearls

Does not include –
Stamp Sets
Ink
Dazzling Diamonds
Snail Adhesive
SU Dimensionals
Punches
2-Way Glue

If you do not have the stamp sets, please let me know or if you prefer to purchase, plese do not hesitate to contact me

Look forward to hearing from you!  This class will be heaps of fun!

Vicky
PS  A Tutorial will be posted on the blog for this calendar but until the end of Frnruary!

Challenge – TSSC101

Hello Stampers,
I have finally manged to get home – for a couple of hours – chasing up stuff, etc & then on my way again!
I did this challenge late last night when it come through.  Not exacly what I had planed but still I am happy with it – maybe????
Card Sample
Supplies –
Stamp Set – Always
Cardstock – Whisper White, Pink Pirouette, Riding Hood Red
DSP – Walk in the Park – Retired
Ink – Pink Pirouette, Going Gray
Punches – 1 3/8″ Circle, 1 1/4″ Circle, 1/2″ Circle
Accessories – Snail Adhesive, Dimensionals, Pretties Kit

All in all this turned out to be a very easy 5 minute card, ie once I knew what colours I was going to use.  I have just realised that the DSP is not current, although it can always be replaced with one of the lovely current Designer Papers. 

To lift the card a little, I added the small gray flower inside the “Always”.
  It looked a little dull prior to that & I didn’t want to used Dazzling Diamonds.  I seem to be overloading on that stuff at the moment!

I have tried to vere away from the traditional colours of Valentine – to a certain extent I have! 
Until next time, Happy Stampin’
Vicky

Challenge #1

Good Morning All,
I have just completed my first Challenge – yahooooooooooo!.
I only hope I did it right, as usual I tend to confuse myself.  I  just like to grab a colour cardstock & then work on the other colours that will match, but I think it come up ok.  It could be my one & only, who knows!

I do know that I wanted to purposely stay away from the traditional colours of Red, Black & White!

Challenge # 1 – Colour Inspiration 411
http://www.stamping411.blogspot.com/
Challenge # 2 – Sketch Challenge
http://stamping411.blogspot.com/

Challenge # 3 – Hugs & Kisses
After combining all 3 together –
THE RESULT…
Supplies –
Cardstock – Not Quite Navy, Close to Cocoa, Bashful Blue
DSP – Bella Bleu
Ink – Not Quiet Navy, Close to Coca, Bashful Blue
Punches – 1 14″ Round, 1 3/8″ Circle
Accessories – Dazzling Diamonds, Dimensionals, Snail Adhesive
Let me know what you think?
Vicky

2nd Post…

Birthday Wishes…
I have made a bargin with myself that this week I am going to try & use stamps that I haven’t used in quiet sometime.  I am also going to try a couple of things out of my comfort zone!  So we will see how we go!  I just have a little problem – every stamp set  I use, becomes my favourite AND I HATE using the DSP, as I love it so much!
Supplies –
Stamp Set – Always, Sincere Saluations
Ink Pad – Going Gray
Card Stock – Bashful Blue – Textured
DSP – Urban Garden
Accessories – Dazzling Diamonds, 2-Way Glue, Snail Glue
Non-SU – Ribbon, Black Crystal for the eye

Until tmw

Have a great night & Enjoy

Gotta go & watch the last eposide of “All Saints” – Boo Hoo

Vicky