SC 045/12…

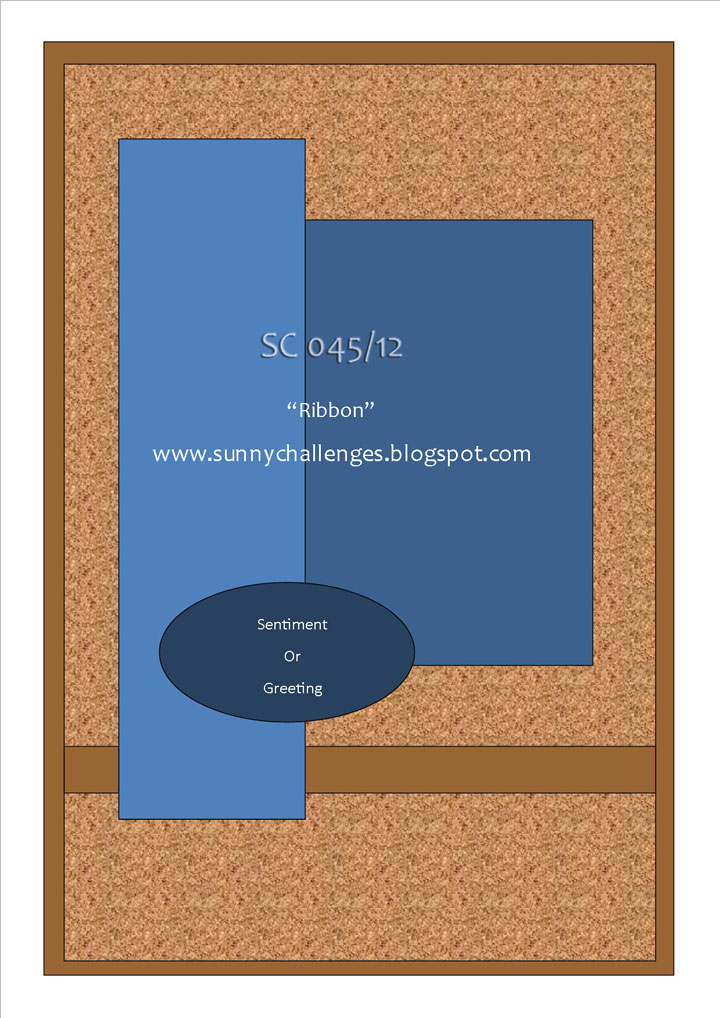
The new weekly challenges begins today over at Sunny Challenges & Creations & it was my turn to create the challenge.  This time round, along with the sketch, it is to use Ribbon on your layout.  How easy can it get?

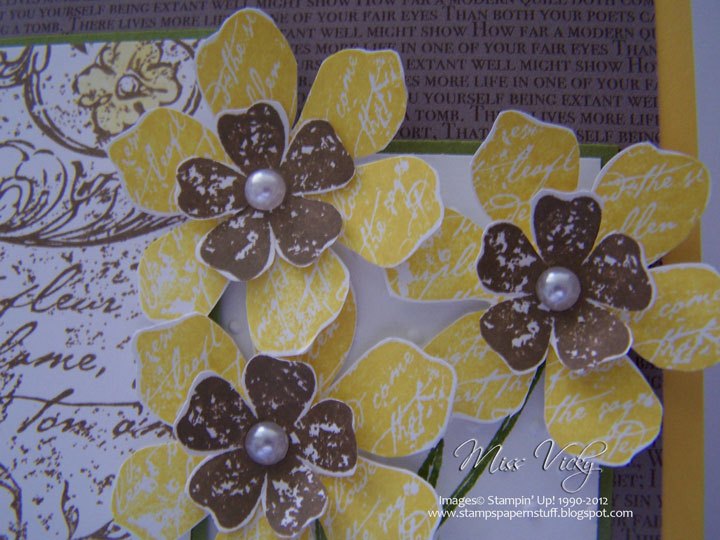
My card has been created for a friend of mine who is celebrating her birthday today.  As she lives on acreage, I decided to go with colours that best represent the bush in Australia – Green, Gold & Brown.  I’ve never used these colours together & really like the effect they have created.

On the spur of the moment, I decided to try & use a Stampin’ Up! Wheel somehow in the design.

Measurements –
Base Card – Daffodil Delight – 8 1/4″ x 4 1/8″ or 21cm x 15cm – scored in the middle & folded in half
Layer 1 – DSP – 5 1/2″ x 3 3/4″ or 14cm x 9.5cm
Layer 2 – Old Olive – 4 1/2″ x 1 5/8″ or 11.5cm x 4cm
Layer 3 – Whisper White – 4 3/8″ x 1 1/2″ or 11cm x 3.5cm
Layer 4 – Old Olive – 3 1/8″ x 2″ or 8cm x 5cm
Layer 5 – Whisper White – 3″ x 1 7/8″ or 7.5cm  4.5cm

Supplies –
Stamp Sets – Field Flowers, Vintage Vogue, Sincere Salutations

Ink – Daffodil Delight, Old Olive, Soft Suede

Cardstock – Daffodil Delight, Whisper White, Old Olive, Soft Suede
DSP – Neutrals
Wheel – Very Vintage
Punches – Scallop Oval, Large Oval
Embossing Folder – Perfect Polka Dots
Ribbon – 5/8″ Satin – Old Olive
Accessories – Snail Adhesive, Multipurpose Glue, Stampin’ Dimensionals, SU! Markers – Old Olive, Daffodil Delight, Blender Pen, Bigshot, Pearls

Inking my Wheel, I ran it over the long piece of Whisper White Cardstock, ensuring that the image was up the correct way, which meant that I had to run the wheel across the Card 3/4 times, ensuring coverage was all over.

Grabbing my Blender Pen & a Stampin’ Up! Marker – Daffodil Delight, I coloured the flower from the wheel.  As I didn’t want this part of the card to be the main focal point, I left it as is.  This piece was then adhered to the longer piece of Old Olive Cadstock with Snail Adhesive.

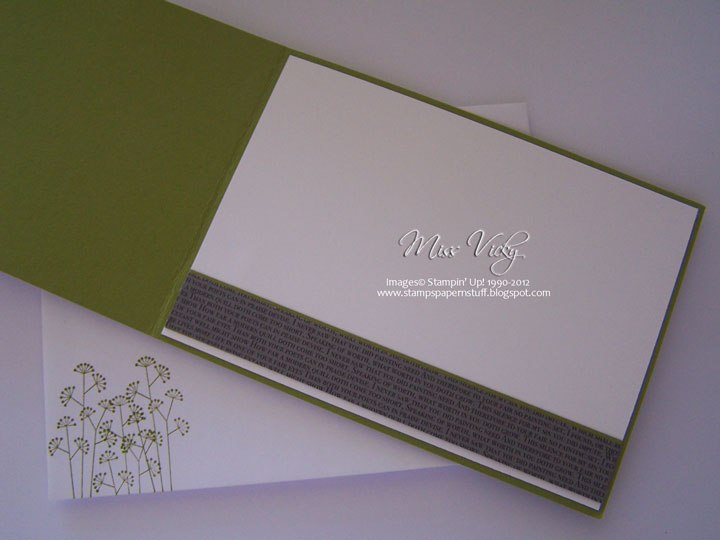
Inking up the stem image with SU! Marker – Old Olive, I stamped it direct to the smaller piece of Whisper White Cardstock, run it through the Bigshot using the Embossing Folder – Perfect Polka Dots, adhered it to the piece of Old Olive Cardstock using Snail Adhesive & finally to the piece of DSP ensuring I followed the sketch before adhering DSP with Multipurpose Glue.

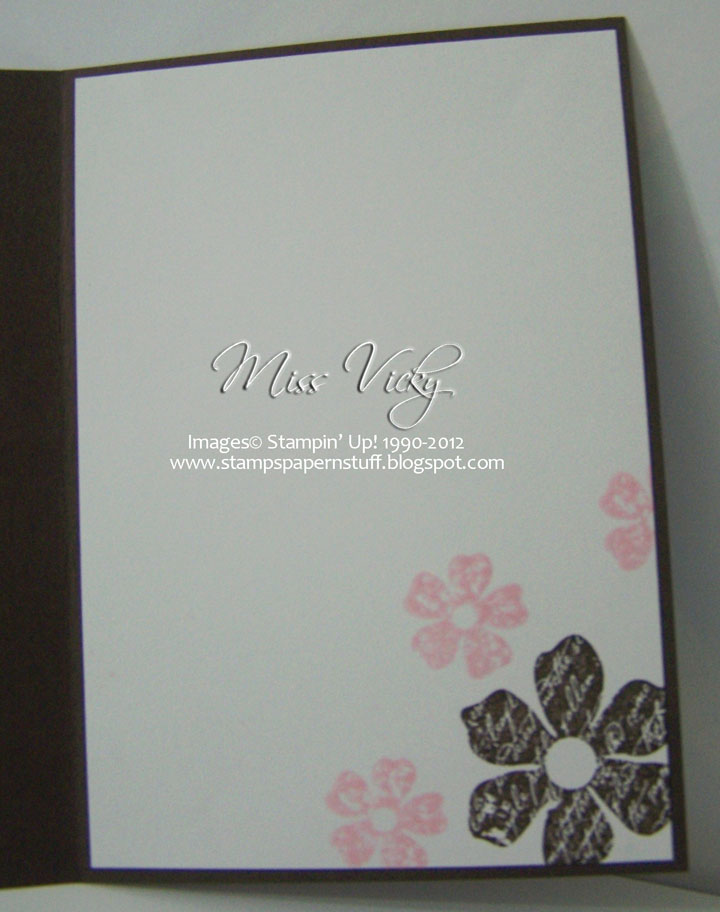
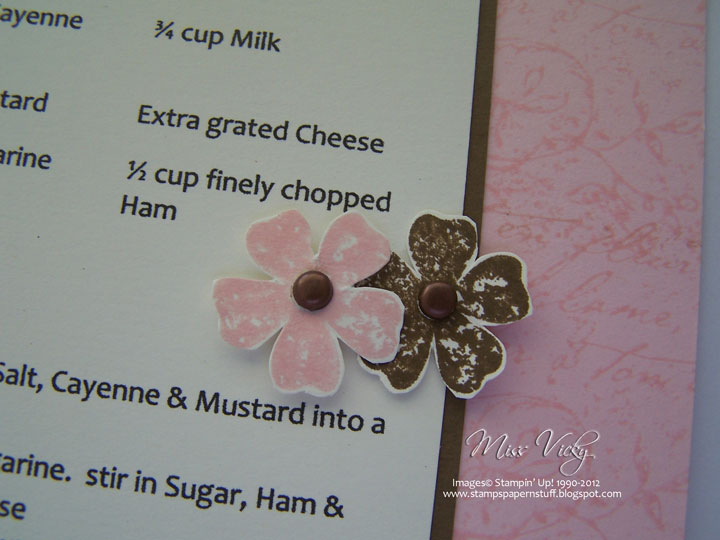
I stamped 3 large flower images with Daffodil Delight onto Whisper White Cardstock & 3 using Soft Suede.  These were cut out prior to attaching to the card with Snail Adhesive for the front flower & Stampin’ Up! Dimensionals for the back 2 flowers.  All 3 smaller flower images were adhered to the middle of the larger flowers with Snail Adhesive.

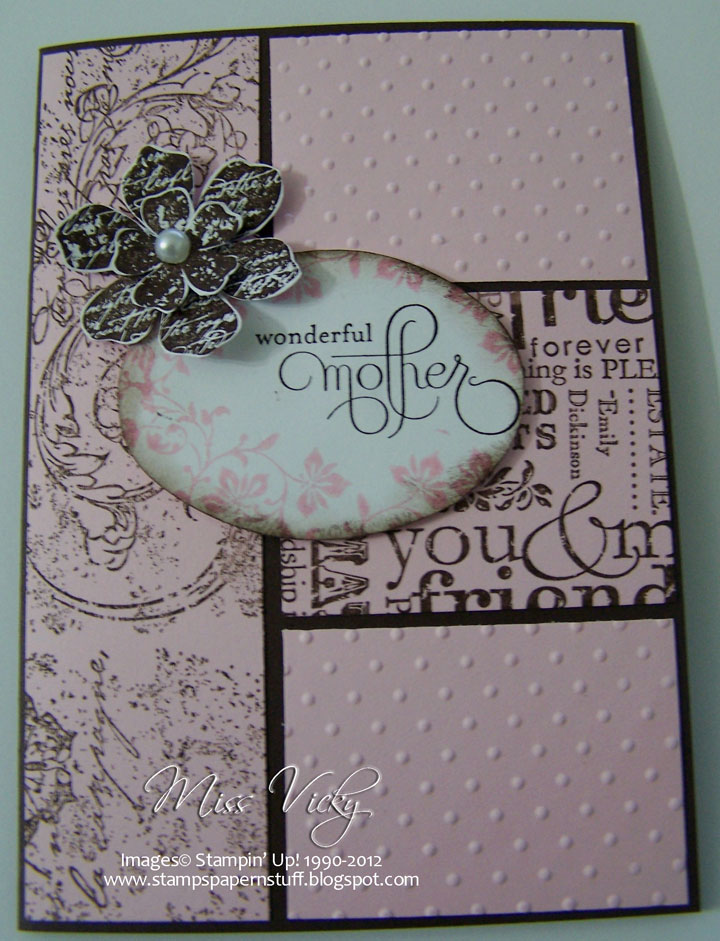
I run a piece of Satin Ribbon across the bottom part of the DSP, tucked ends under, tied a knot & adhered the whole lot to the Base Card – Daffodil Delight with Snail Adhesive.

The sentiment was stamped onto a scrap piece of Whisper White Cardstock in Old Olive Ink, punched using the Large Oval Punch, adhered to a piece of Daffodil Delight piece which had been punch with the Scallop Oval Punch & finally to the card with Snail Adhesive.

I popped 3 Pearls into the centre of each small flower to finish

I hope you will join us this week.  Don’t forget to pop over to Sunny Challenges & Creations & check out what Kris, Gwen & our Guest Designer for the week – Sarah – have created.

 Have a great day!

New Class….

G’Day Stampers,

At our Christmas Party last year, we got to talking about recipes & one of the ladies asked if it was possible if we could swap recipes at our Friday class…… I immediately said I didn’t have a problem with it & after some thinking & how to go about it, today starts a new class which will be held the last Friday of the month
 
I am really excited about this venture, as I want to create pages that resemble cards, not the traditional recipe pages, while at the same time, still doing different techniques, layouts, etc. We will be completing 2 pages per month & maybe some months a couple of extra pages.

Now, this is a big step for me as I will be the first to acknowledge I HATE cooking!!!!! Yep, I cannot understand how people can be so passionate about it, but when you love it, you LOVE it!!!! I suppose they would say the same about my craft! To me cooking is just a means of surviving, but I love all those cooking shows, especially “My Kitchen Rules” & the kitchen shops….. I would be quiet happy to have a home with NO kitchen & if I have to cook, the Barbie would be enough for me, as I LOVE barbies…..

Our first page is from Noreen’s Kitchen – Ham & Cheese Muffins.  These sound so yummy that maybe, just maybe, I could start baking…..  Miracles are known to happen!

Measurements –
Base Card – Pink Pirouette – 8 1/8″ x 5 5/8″ or 20.5cm x 14.5cm
Layer 1 – Soft Suede – 5 1/2″ x 3 1/2″ or 14cm x 9.5cm
Layer 2 – Very Vanilla – 5 3/8″ x 3 3/8″ or 13.5cm x 9cm

Supplies –
Stamp Set – Vintage Vogue
Ink – Pink Pirouette, Soft Suede
Cardstock – Very Vanilla, Soft Suede, Pink Pirouette
Ribbon – 3/8″ Taffeta – Pretty in Pink
Punches – Handheld 1/16″
Wheel – Vintage Vogue
Accessories – Jumbo Handle, Snail Adhesive, Brads – Soft Suede, Stampin’ Dimensionals

Using SU! Very Vintage WheelJumbo Handle & Pink Pirouette Ink, wheel across Pink Pirouette Cardstock until whole card is covered
Adhere Recipe onto piece of Soft Suede Cardstock & then to the Pink Pirouette Base
Adhere Ribbon across bottom section of car & tie bow off centre
Stamp 3 flower images onto scrap piece of Very Vanilla Cardstock, 1 in Pink Pirouette, 2 in Soft Suede
Cut around images, punch small holes in middle of each flower with Handheld Punch & insert Brad to the centres
Using Stampin’ Dimensionals, adhere all 3 flowers to the card

A very easy layout which can be used time & time again with different colours & products, but one which looks clean a& a little bit vintage.

I will post the 2nd recipe we completed in a couple of days, but for now – Enjoy!

SC 027/12…

The sketch over at Sunny Challenges & Creations this week brought to us by Kris.  Along with the sketch, we had to use the colours of Black, White plus 1 other colour.  I choose to go with Old Olive.  I wanted to do a colour that you don’t often seen with Black & White, but am still deciding if I like the card yet or not.
Measurements –
Base Card – Old Olive – 11 3/4″ x 4 1/8″ or 30cm x 10.5cm – scored in the middle & folded in half
Layer 1 – Whisper White – 4 5/8″ x 4″ or 11.5cm x 10cm
Layer 2 – DSP – 4 1/4″ x 3 7/8″ or 11cm x 9.5cm
Layer 3 x 2 – Basic Black – 2 5/8″ x 1 5/8″ or 6.5cm x 4cm
Layer 4 x 2 – Whisper White – 2 1/2″ x 1 1/2″ or 6cm x 3.5cm
Layer 5 – Old Olive – 3 1/2″ x 2 1/4″ or 9cm x 5.5cm
Layer 6 – Basic Black – 3 3/8″ x 2 1/8″ or 8.5cm x 5cm
Layer 7 – Whisper White – 3 1/4″ x 2″ or 8cm x 4.5cm
 ?
Envelope & Inside Card…

?

On both pieces of the smaller Whisper White Cardstock, I stamped random images using Old Olive & Basic Black Inks.  Both pieces were then adhered to the matching Basic Black pieces using Snail Adhesive.
I stamped the “F” image & the sentiment onto the larger piece of Whisper White Cardstock with Basic Black Ink.  I then stamped the vine image around the outside of the Whisper White with Old Olive Ink.  This piece was adhered to the piece of Basic Black & then to Old Olive using Snail Adhesive.
I adhered the DSP to the largest piece of Whisper White Cardstock with Snail Adhesive & then to the Base Card – Old Olive.  I adhered the randomly stamped images to the base card as per the sketch.  With the larger piece, I adhered this to the card with Stampin’ Dimensionals.
To finish the card & to tie it altogether, I applied 5 Rhinestones into each of the top & bottom corners.
Supplies –
Stamp Set – Pocket Silhouettes, Vintage Vogue
Ink – Basic Black, Old Olive
Cardstock – Old Olive, Basic Black, Whisper White
DSP – Neutrals Designers Series
Accessories – Rhinestones, Snail Adhesive, Stampin’ Dimensionals
Don’t forget to head over to Sunny Challenges & Creations & check out what both Kris & Shirley have created.  Better still, why not join us?  You have 1 week to create your project & link back to Mr linky.
Until next time, Happy Stampin’ 

SC 025/12…

Sunday morning brings the start of a new challenge over at Sunny Challenges & Creations, so we hope you will join us this week.

It was my turn to bring the challenge this week & boy, did I have a hard time creating my card….  Along with the sketch, we have to use the colours of Pink Pirouette & Early Expresso.

Measurements –
Base Card – Early Expresso – 8 1/4″ x 4 1/8″ or 21cm x 10.5cm – Scored in the middle & folded in half
Layer 1 – Pink Pirouette – 4″ x 1 1/2″ or 10cm x 3.5cm
Layer 2 3 4 – Pink Pirouette – 2 3/8″ x 1 7/8″ or 6cm x 4.8cm

I inked my wheel in Early Expresso Ink & run it down the long strip of Pink Pirouette before adhering to the Base Card – Early Expresso with Snail Adhesive.

I run 2 pieces of Pink Pirouette through the Bigshot using the Perfect Polka Dots Embossing Folder & adhered 1 piece to the bottom & 1 piece to the top of the Base Card.

For the middle piece, I inked another wheel in Early Expresso Ink & run it over the 3rd piece of Pink Pirouette & adhered to the Base Card with Snail Adhesive.

I stamped my stentiment onto Whisper White using Early Expresso Ink, run it through the Bigshot using the Ovals Die, sponged Early Expresso around the edge, stamped the flower image over the top before adhering to the Base Card with Stampin’ Dimensionals.  I am not sure if I like the effect of the oval edge, but I suppose it will grow on me!

I stamped 1 large flower & 1 small flower onto Whisper White with Early Expresso Ink, cut around both flowers, adhered the small to the large flower with Stampin Dimensionals & then to the Card, again with Stampin’ Dimensionals.

I appied a Basic Pearl to the centre of the flower

Supplies –
Stamp Set – Vintage Vogue, Well Scripted
Ink – Pink Pirouette, Early Expresso
Cardstock – Whisper White, Pink Pirouette, Early Expresso
Dies – Ovals
Embossing Folder – Perfect Polka Dots
Wheels – Very Vintage, Friendly Words
Accessories – Snail Adhesive, Stampin’ Dimensionals, Pearls, Bigshot
Don’t forget to visit Sunny Challenges & Creationsto check out the cards Kris & Shirley have created. 
Until next time, Enjoy!

2012…

We created calenders last Friday for next year.  These calendars are magnetic, so they are able to be hung on your fridge or if you wanted, punch a couple of holes in the top, add some ribbon & hang on your wall.  So many possibilies.
I created the calender on the computer, but wanted an A5 size so that I could easily use it to record everyday living – appointments, birthdays, workshops, etc.  I think it has worked out well.  Another thing you could do, is stamp all your birthdays in one stamp & colour, appointments in another, public holidays another & so on…… 
I have already given this calender to a cousin of mine, which will suit her kitchen perfectly!
I will post the second one I did tomorrow & will probably give it away too, which means I will have to create another for myself.  
I randomly stamped images onto the calender pages using Marina Mist & Soft Suede Inks.  I also stamped off on some of the images to give it a little of a different look.
Ensuring I had all pages squared away neatly, using my Handheld Punch, I punched 3 holes along the top of the calender, about 1.5cm in from both sides & 1 cm down from the top.  I added 3 Rhinestone Brads through the holes. 
I adhered a piece of Soft Suede Cardstock to a piece of cardboard from a pack of DSP Papers, which had been cut back to A4 size, using Sticky Strip.  This will give you a little more strength for your calender.  I then adhered the pages to the bottom of the board, only applying adhesive to the top part of the calender.  This way, come next year, all you have to do is tear off the last page, print out a new calender & adhere to the same board.
I embossed 2 pieces each of Very Vanilla & Marina Mist Cardstocks using my Bigshot & the Embossing Folder – Finial Press.  I was going to add pockets to the calender using these embossed pieces, but thought better of it as they would have either got stuck in the pockets or stay there permanently, so I created false pockets.
I matched the pattern of the 2 embossed pieces, added a thin piece of Marina Mist Cardstock, along with a gathered piece of Crochet Trim Ribbon to the Very Vanilla pieces & adhered them to a piece of Marina Mist Cardstock.
I then repeated the same step except with the piece of Marina Mist Cardstock & adhered it to a piece of Very Vanilla Cardstock.
Both pieces were then adhered to the top of the board using Sticky Strip.
I stamped 8 flowers onto Very Vanilla Cardstock, 4 using Marina Mist Ink, & 4 using Soft Suede Ink.  I cut around the images, adhered them to the embossed cardstock with SU Dimensionals & adhered Basic Pearls to the centre of the flowers.
If you wanted, you could easily add a photo to the piece of embossed Very Vanilla, as there is heaps of room to do so.  Better still, add a photo to the top of your calender & decorate.  As I stated previously, the possibilities for this type of calender is endless!
Supplies –
Stamp Set – Vintage Vogue
Ink – Soft Suede, Marina Mist
Cardstock – Very Vanilla, Marina Mist, Soft Suede, Cardstock from DSP Papers
Embossing Folder – Finial Press
Ribbon – Crochet Trim – Victoria
Accessories – Basic Pearls, SU Dimensionals, Sticky Strip, Rhinestone Brads – Light Blue, Bigshot
Until tomorrow when I post the 2nd calender, Enjoy!