SC 055/12…

Today is Sunday & the start of the new challenge for the week over at Sunny Challenges & Creations.  We hope you will join us this week.

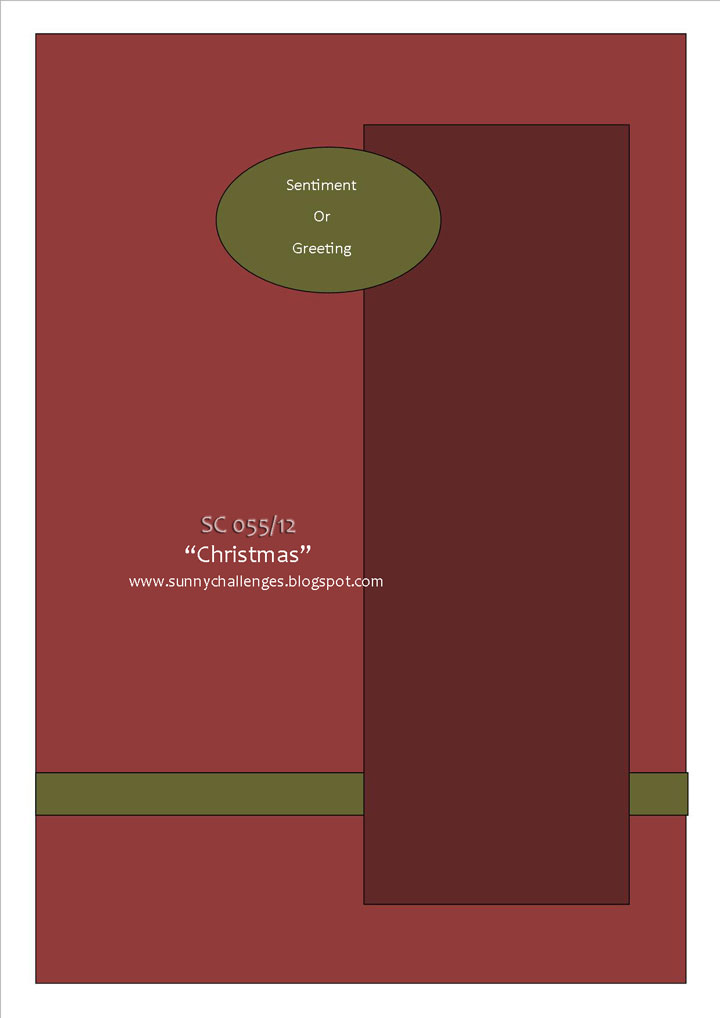
It was my turn to bring you the challenge & along with the sketch we have to use a Christmas Theme.  Seeing as though Christmas is just around the corner, this is the perfect time to make a start on your cards.

Measurements –
Base Card – Always Artichoke – 8 1/4″ x 4 1/8″ or 21cm x 10.5cm
Layer 1 – Cherry Cobbler – 4 7/8″ x 5 5/8″ or 14cm x 10cm
Layer 2 – Whisper White – 4 3/4″ x 5 1/2″ or 13.5cm x 9.5cm
Layer 3 – Cherry Cobbler – 1 1/2″ x 4 3/4″ or 3cm x 9.5cm
Layer 4 – Always Artichoke – 1 1/4″ x 4 3/4″ x 2cm x 9.5cm
Layer 5 – Cherry Cobbler – 5″ x 2″ or 5cm x 13cm
Layer 6 – Whisper White – 4 7/8″ x 1 7/8″ or 4.5cm x 12.5cm

Supplies –
Stamp Set – Tree Trimings, Short & Sweet
Ink – Cherry Cobbler
Cardstock – Cherry Cobbler, Always Artichoke, Whisper White
Punches – Word Window, Modern Label, Scallop Trim Border
Embossing Folders – Perfect Polka Dots, Elegant Lines
Accessories – Linen Thread, Stampin’ Dimensionals, Snail Adhesive

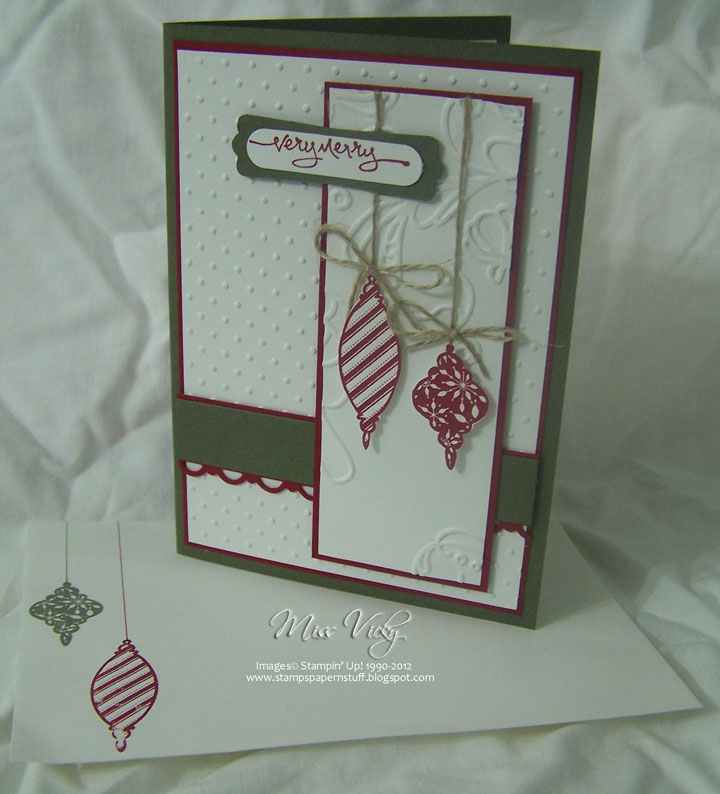
I embossed the large piece of Whisper White with the Perfect Polka Dots prior to adhering to the piece of Cherry Cobbler & then to the Base Card – Always Artichoke.

The smaller piece of Cherry Cobbler was punched along one long side with the Scallop Trim Border Punch, adhered to the embossed Whisper White with Snail Adhesive & the piece of Always Artichoke adhered to the top of the punched piece.

I embossed the longer piece of Whisper White Cardstock using Elegant Lines Embossing Folder (I must confess that this is not a folder I have used that much, but when I do, I can’t understand why), adhered 2 pieces of Linen Thread to the back prior to adhering to the long piece of Cherry Cobbler & finally to the Base Card with Stampin’ Dimensionals.

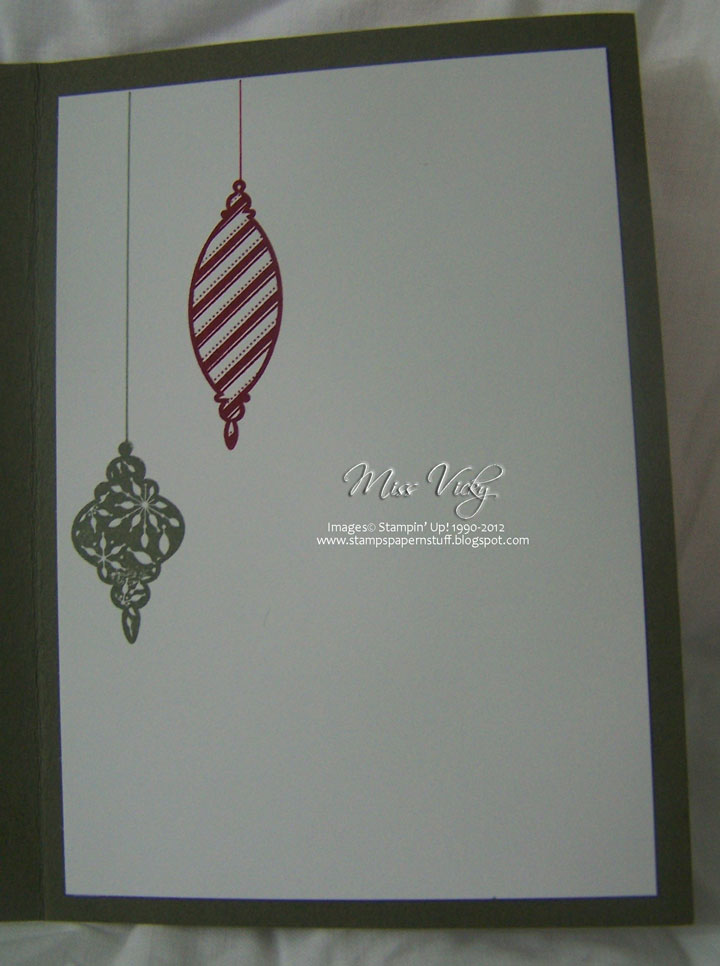
I stamped 2 of the images from Tree Trimmings with Cherry Cobbler onto a scrap of Whisper White, cut them out & adhered to the card with Stampin’ Dimensionals.  I tied 2 bows from the Linen Thread & adhered them to the tops of the images.

The sentiment was stamped onto a scrap of Whisper White Cardstock, punched with the Word Window Punch, & adhered to a piece of Always Artichoke which had been punch with the Modern Label Punch.  The whole lot was then adhered to the card with Snail Adhesive & Stampin’ Dimensionals.

I’m not usually one for the tradional Christmas Colours, but I picked colours that I don’t usually play with.  I also opted to go for Whisper White rather than Very Vanilla & I think it gives the whole card a very modern, yet old look about it.  I also think the Linen Thread helps the feel of the card too!

Don’t forget to pop on over to Sunny Challenges & Creations to check out what Kris, Gwen & Christine have created.  We hope you will be able to join us this week.

Until then, have a great week & Happy Stampin’

Class….

??????????Our card last Friday at Crafty Creations was to do the Technique – Basic Masking.  I choice to go with Chocolate Chip, Certainly Celery & Pink Pirouette– not colours I would normally put together, but I am really loving the final result.  Mind you, when I started the card, I had no idea where I was going, only knowing that I wanted to use the stamps I had sitting on my desk.

????
Inside Card….

I am also finding myself going back to the softer colours which I think are sadly being neglected – by me anyhow!
?
Measurements –
Base Card – Chocolate Chip – 8 1/4″ x 5 7/8″ or 21cm x 15cm
Layer 1 – Certainly Celery – 5 3/8″ x 3 5/8″ or 14cm x 9.5cm
Layer 2 – DSP – 5 1/8″ x 3 3/8″ or 13cm x 8.5cm
Layer 3 – Pink Pirouette – 3″ x 2″ or 8cm x 5cm
Layer 4 – Certainly Celery – 3″ x 2 3/8″ or 7.5cm x 6cm
Layer 5 – Whisper White – 2 7/8″ x 2 1/4″ or 7cm x 5.5cm

Supplies –
Stamp Set – Summer Solstice, En Francis, Short & Sweet
Ink – Chocolate Chip, Pink Pirouette, Certainly Celery
Cardstock – Whisper White, Chocoate Chip, Pink Pirouette, Certainly Celery, Glossy
DSP – Neutrals Designer Series Paper
Ribbon – 5/8″ Satin – Certainly Celery
Accessories – Snail Adhesive, 2-Way Glue Pen, Dazzling Diamonds, Stampin’ Dimensionals, Rhinestones, Sponge, Dotto, Mni-Glue Dots

I adhered a piece of Ribbon across the middle of the DSP, tucked ends under, adhered to the piece of Certainly Celery & finally to the Base Card – Chocolate Chip, all with Snail Adhesive.

The piece of Pink Pirouette Cardstock was torn along the bottom, sponged across the tear & around the edges & adheredd over the top of the Ribbon using Snail Adhesive.

I stamped my flower image onto the piece of Whisper White Cardstock with Pink Pirouette Ink, stamped again onto a scrap piece of paper, cut it out & used this one piece for my Mask.  While the stamp was inked in Pink Pirouette, I again stamped onto a scrap piece of Glossy Cardstock, cut out & set aside.  This was by accident as I didn’t realise it was glossy until I was cutting it out, but decided to leave it the way it was.

I stamped the leaf images around the flower & created 2 Masks for the leaves.

After applying Dotto to the back of my Masks, I adhered them over the matching images prior to inking my background stamp in Chocolate Chip, stamping off twice & then stamping onto the piece of Whisper White Cardstock & over the masked images.

This piece was adhered to the piece of Certainly Celery & finally to the Base Card.  I adhered the Glossy image to the top of the stamped image with Stampin’ Dimensionals, added some Dazzling Diamonds to the middle with my 2-Way Glue Pen & popped a Rhinestone in the middle.

I tied a bow with the Ribbon & adhered to the card with a Mini Glue Dot.  The sentiment was stamped onto the bottom of the piece of Pink Pirouette in Chocolate Chip Ink.

Until next time, have a great day!

SC 049/12….

…. and non-traditional Christmas Colours.

Our challenge over at Sunny Challenges & Creations has been given to us by Gwen.  What a great challenge this week – the possibilities are endless.  We have to use Circles on our project this week.  Why not pop over & check out what Kris & Gwen have created & then join us.  We would really love for you to link your project with Mr Linky!

Measurements –
Base Card – Concord Crush – 8 1/4″ x 4 1/8″ or 21cm x 15cm – Scored in middle & folded in half
Layer 1 – Whisper White – 5 1/2″ x 3 3/4″ or 14cm x 9 1/2″

Supplies –
Stamp Set – Baroque Motifs, Circle Circus, Short & Sweet
Ink – Daffodil Delight, Tangerine Tango, Pear Pizzazz, Whisper White, Concord Crush
Cardstock – Whisper White, Concord Crush
Punches – Itty Bitty Shapes, 3/4″ Circle, 1 1/4″ Circle
Accessories – Rhinestones, Stampin’ Up! Markers – Tangerine Tango, Concord Crush, Snail Adhesive, Stampin’ Dimensionals

 I stamped the large image from Barquoe Motifs in Pear Pizzazz straight onto the piece of Whisper White Cardstock.

3 images from Circles Circus were stamped direct onto the piece of Whisper White Cardstock – 2 with Tangerine Tango & 1 in Concord Crush.  3 of the larger image was also stamped onto a piece of scrap Whisper White Cardstock – 2 in Concord Crush & the other in Tangerine Tango.

I punched one of the stamped Concord Crush images using the 1 1/4″ Circle Punch, while the 2nd image was punched with the small Circle Punch from the Itty Bitty Shapes set.  The Tangerine Tango image was punched using the 3/4″ Circle Punch.

The punched images were then adhered to the main image on the card & built using Stamping’ Dimensionals

The lines were drawn with a Ruler & Stampin’ Up! Markers – Tangerine Tango & Concord Crush.

Prior to stamping the smallest image from the Circle Circus Stamp Set in Daffodil Delight ink, I stamped the sentiment in Concord Crush straight onto the Whisper White Card.

I had all intensions of just adding the Rhinestone to the middle of one of the images, but to add more depth to the card, I scattered the Rhinestones around the card.  I think it adds a little bit of a sparkle & finishes it off a little.

As always, this isn’t how I pictured my card to be, but I am quiet happy with the final result. What do you think?

Until next time, Have a great day!

SC 04612…

Do you ever have a hard time trying to create something?  You know what you want in your head but putting it down on paper can be something entirely different. I really had no idea where I was going with this card when I started, but kept plugging along, playing with colours, checking out stamp sets & working out what will look best with what….

I also decided to go back to the colours when I started out with Stampin’ Up!

This week’s challenge has been bought to us by Gwen.  It is to create a Centre Fold Card using the sketch provided.

Measurements –
Base Card – Certainly Celery – 8 1/4″ x 4 1/8″ or 21cm x 15cm – Scored at 2 1/8″ & 6 1/8″ & folded towards the middle on both sides
Layer 1 x 2 – Not Quite Navy – 2″ x 5 5/8″ or 5cm x 14.5cm
Layer 2 x 2 – Whisper White – 1 7/8″ x 5 1/2″ or 4.5cm x 14cm
Layer 3 – Bashful Blue – 3 1/8″ x 2 1/2″ or 8cm x 6.5cm
Layer 4 – So Saffron – 3″ x 2 3/8″ or 7.5cm x 6cm
Layer 5 – Whisper White – 2 7/8″ x 2 1/4″ or 7cm x 5.5cm

Supplies –
Stamp Set – Pocket Silhouettes, Short & Sweet
Ink – Bashful Blue, So Saffron, Not Quite Navy, Certainly Celery
Cardstock – Whisper White, Bashful Blue, So Saffron, Certainly Celery, Not Quite Navy
Embossing Folder – Square Lattice
Punches – Scallop Edge Border
Accessories – Snail Adhesive, Multipurpose Glue, Bigshot

Prior to running the pieces of Whisper White Cardstock through the Bigshot, I randomly inked the Embossing Folder – Square Lattice with So Saffron, Bashful Blue & Certainly Celery Inks & sprayed water over the ink.  When doing this, ensure you have the card facing down onto the embossed side of the folder.  Let dry.

I randomly stamped my images onto the smaller piece of Whisper White Cardstock using Certainly Celery, So Saffron & Bashful Blue Inks.  The sentiment was stamped in Not Quite Navy Ink.

This piece was adhered to the piece of So Saffron Cardstock & then Bashful Blue Cardstock with Snail Adhesive.  I punched a scrap piece of Certainly Celery Cardstock with the Scallop Edge Border Punch before adhering to the bottom of the stamped Whisper White Cardstock with Snail Adhesive.

The 2 pieces of embossed Whisper White Cardstock were adhered to the pieces of Not Quite Navy using Multipurpose Glue & then to either side of the Certainly Celery Base Card with Snail Adhesive.

The small stamped images were adhered to the LHS of the card with Multipurpose Glue. 

Don’t forget to head over to Sunny Challenges & Creations to see what Gwen, Kris, as well as our Weekly Guest Designer who has been very busy & created 2 gorgeous cards.

 Until next time, have a great weekend

Butterflies & Bows….

G’Day Bloggers,

Today’s card is one which we created at my Volunteer Class last Friday.  We had so much fun doing this card & seeing all our pretty butterflies come to life from a small piece of paper.

Thanks to Naomi who gave us the template to achieve our butterfly.  She got it from an old card of her mum’s & has kept it to play around with & as a lovely memory.  It was so kind of her to share it with us.

Measurements –
Base Card – Very Vanilla – 8 1/4″ x 4 1/8″ or 21cm x 15cm – Scored in the middle & folded in half
Layer 1 – Soft Suede – 5 1/4″ x 3 5/8″ or 13.5cm x 9.5cm
Layer 2 – DSP – 1 3/8″ x 5 1/8″ or 3.5cm x 9cm
Layer 3, 4 & 5 – DSP – 1 1/2″ x 2″ or 5cm x 4cm
Layer 6 – Soft Suede – 3 5/8″ x 3 5/8″ or 7cm x 7cm
Layer 7 – Very Vanilla – 3 1/2″ x 3 1/2″ or 6.5cm x 6.5cm

Supplies –
Stamp Set – Fresh Vintage, Short & Sweet
Ink – Soft Suede
Cardstock – Very Vanilla, Soft Suede
DSP – Everyday Enchantment
Ribbon – 3/8″ Ruffled – Calypso Coral
Embossing Folder – Elegant Lines
Accessories – Stampin’ Dimensionals, Snail Adhesive, Mini Glue Dots, Multipurpose Glue, Brad, Sponge
Non-SU – Gold Wire

Complete your Butterfly & set aside until your card has been completed.

Adhere all pieces of DSP to the piece of Soft Suede Cardstock ensuring you leave about 1/8″ edge around all pieces.  Don’t worry about where all pieces meet at the top, as this is covered by the piece of Ruffled Ribbon which is adhered using Snail Adhesive & ends tucked under.

Emboss the smaller piece of Very Vanilla Cardstock with the Embossing Folder – Elegant Lines & the Bigshot.  Adhere this piece to the piece of Soft Suede Cardstock with Multipurpose Glue, prior to adhering over the top of the DSP with Stampin’  Dimensionals.

Adhere the whole piece to the Base Card – Very Vanilla with Snail Adhesive.

Adhere your Butterfly to the Card, tie a bow with the Ruffle Ribbon, add a Brad to the centre & adhere both the bow & butterfly to the card using Mini Glue Dots.

Stamp your greeting onto a scrap of Very Vanilla Cardstock with Soft Suede Ink, cut into a Banner shape, sponge around the edges in Soft Suede & adhere to Card with Snail Adhesive.

This was a fun card to create & the ladies created some very lovely cards & butterflies.

Until next time, Happy Stampin’