SC 043/12…

This week sees our challenge set by Gwen.  At first it was just going to be the sketch as well as the stamp set “Ocean Commotion“, but with the new Stampin’ Up! Catalogue in the States & Canada just been released & our new catalogue coming up in a couple of months, we made a few changes, so we sure hope you will join us.

So you can look at it 3 ways –
Dig out that old set & ink it up one last time
Use a set that hasn’t seen ink for some time
Ink up the new set that you have just received in the post

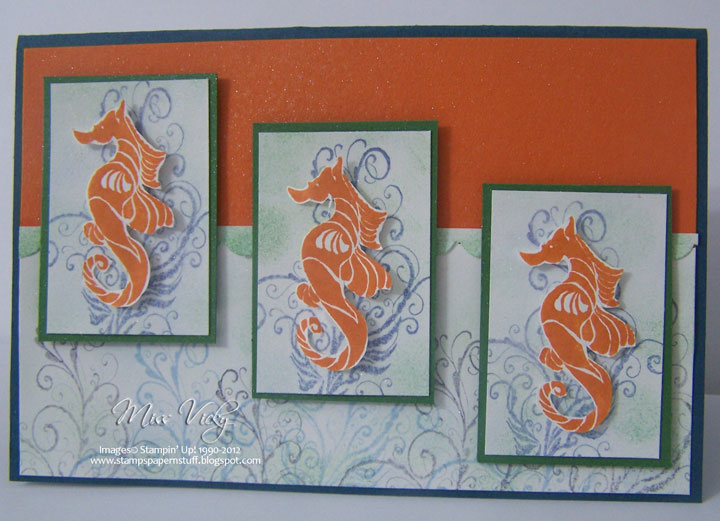
I wasn’t really fussed on my card to begin with, but it is slowly growing on me.  I have used the colours that reflect the reef here in Queensland & colours I remember seeing when I have gone scuba diving.

Measurements –
Base Card – Not Quiet Navy – 8 1/4″ x 5 7/8″ or 21cm x 15cm – Scored in the middle & folded in half
Layer 1 – Pumpkn Pie – 5 3/4″ x 4″ or 10cm x 14.5cm
Layer 2 – Whisper White – 5 3/4″ x 2″ or 10cm x 5cm
Layer 3 x 3 – Garden Green – 2 1/4″ x 1 1/2″ or 6cm x 3.5cm
Layer 4 x 3 – Whisper White – 2 1/8″ x 1 3/8″ or 5.5cm x 3cm

Supplies –
Stamp Set – Ocean Commotion
Ink – Garden Green, Bashful Blue, Not Quiet Navy
Cardstock – Not Quiet Navy, Whisper White, Pumpkin Pie
Punches – Scallop Edge Border
Accessories – Stampin’ Dimensionals, Sponge Daubers, Snail Adhesive, Shimmer Pain – Frost White
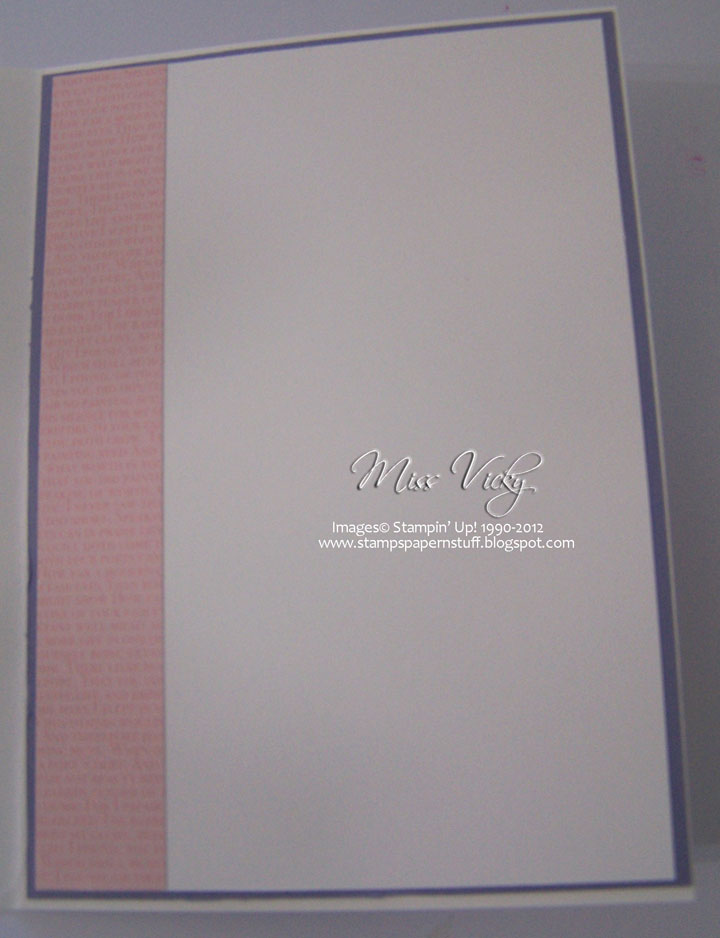
?
Inside Card…

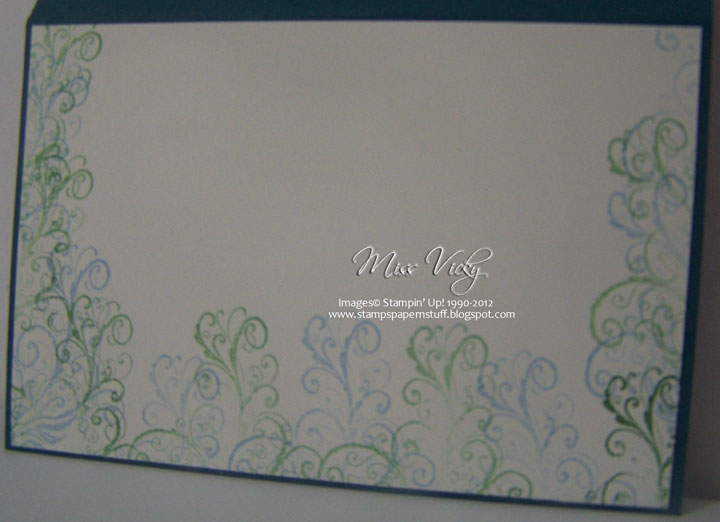
I stamped the seaweed image onto the piece of Whisper White Cardstock using Bashful Blue & Not Quite Navy Inks.  I stamped off once when using Not quite Navy prior to stamping onto the Whisper White, as I didn’t want it to be vibrant but a softer colour as it is down deep in the ocean.  I repeated the samped procedure for all 3 smaller pieces of Whisper White Cardstock.
I then sponged over all pieces of the stamped Cardstock with 2 Sponge Daubers, one for Bashful Blue & the other for Garden Green.  Prior to sponging with the Daubers, I daubed once onto a scrap piece of paper to make it appear more softer on the Whisper White

?
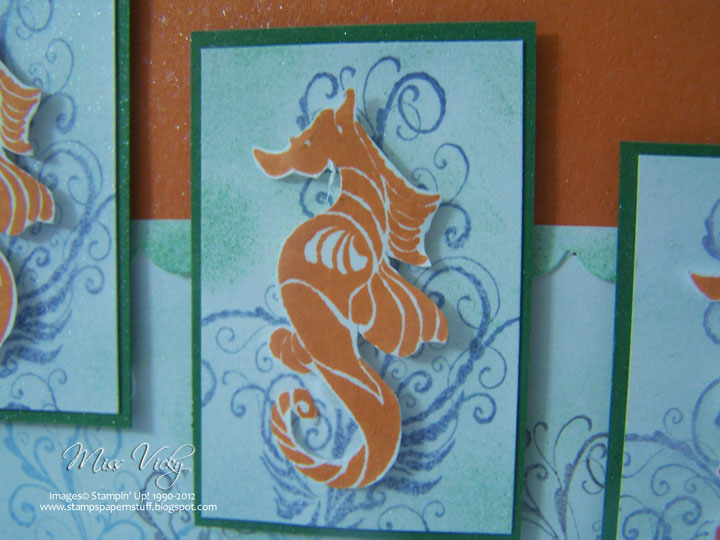
You can just see the Shimmer & the soft sponging….

The stamped piece of Whisper White Cardstock was adhered to the bottom half of Pumpkin Pie Cardstock with Snail Adhesive.  I punched a scrap piece of Whisper White Cardstock with the Scallop Edge Border Punch & cut it back to about 1/4″ in width, sponged it with a Sponge Dauber & Garden Green Ink before adhering it across the join of the 2 colours.

Prior to adhering the smaller pieces together & to the card, I grabbed some Shimmer Paint mixed in a small spray bottle & lightly sprayed the pieces as well as the Base Card, including the top half of Pumpkin Pie.  This gives the whole card a very shinny effect as if you are under the ocean.  I adhered the smaller stamped Whisper White Cardstock to the Garden Green pieces with Snail Adhesive & then to the Base Card with Stampin’ Dimensionals.

I stamped the Seahorse 3 times onto scrap Whisper White Cardstock with Pumpkin Pie Ink & cut all 3 out.  Don’t ask me why I picked the worse image to cut, but cut I did!!!!!  I won’t say how many times I cut his tail off.  These pieces were adhered to the centre of each Whisper White pieces again using Stampin’ Dimensionals.

Why not head over to Sunny Challenges & Creations to check out what Gwen, Kris & our Weekly Guest Designers have created. 
We would love for you to join us!
Happy Stampin’

SC 042/12…

It was my turn to create the challenge over at Sunny Challenges & Creations.  Along with the sketch, we had to use the Technique – Baby Wipe.

I started out with something completely different in mind & when I couldn’t get my mind onto paper, I sort of winged this one, but am more than happy with the end result.  As I love Pink & Black, I decided to create something a little softer with a lighter pink, but still teaming it with Black.  I also kept the card to a minimum as I wanted the technique to be the focal point.

Measurements –
Base Card – Whisper White – 8 1/4″ x 4 1/8″ or 21cm x 15cm – Scored in the middle & folded in half
Layer 1 – Basic Black – 5 1/8″ x 3 5/8″ or 13cm x 9.5cm
Layer 2 – Glossy Cardstock – 5″ x 5 1/2″ or 12.5cm x 9cm
 ?

Inside Card…

Supplies –
Stamp Set – Flower Fancy, Short & Sweet
Ink – Staz-On – Black
Cardstock  – Whisper White, Basic Black, Glossy, Pretty in Pink
Punches – Modern Label, Word Window, 1/16″ Circle Handheld
Ribbon – 1/8″ Taffeta – Pretty in Pink
Embossing Folder – Perfect Polka Dots
Accessories – Snail Adhesive, Tombow Multipurpose, Re-Inker – Pretty in Pink, Basic Pearl, Bigshot
Non-SU – Wet Ones

After I had applied my technique to my piece of Glossy Cardstock using Pretty in Pink Re-Inker & a Wet Ones, I stamped my image in the bottom LH corner of the cardstock with Black Staz-On.  I was going to colour it using the same Re-Inker, but thought I would leave it how it is & keep it very simple.  I then run the piece through the Bigshot using Embossing Folder – Prefect Polka Dots.  

I made a ink pad from the same Wet Ones I had previously used, using Pretty in Pink Re-Inker, inked my greeting & stamped direct onto a scrap piece of Glossy Cardstock.  This was punched out with the Word Window Punch & adhered to a piece of Basic Black Cardstock which had been punched with the Modern Label Punch.  I then punched a small hole in each end of the Basic Black Label with the 1/16″ Handheld Punch, threaded a piece of Pretty in Pink Taffeta Ribbon through, tucked the ends under & adhered to the piece of Basic Black Cardstock with Tombow Multipurpose Glue.

The whole piece was then adhered to the Base Card – Whisper White with Snail Adhesive.  I popped a Basic Pearl to the middle of the flower to finish the card.

I would really like to know what you think?  Is it too plain????
Don’t forget to pop on over to Sunny Challenges & Creations to check out what Kris, Tanya, Gwen & our Weekly Guest Designers have created.
Until next time, Happy Stampin!

SC 04112…

Our challenge over at Sunny Challenges & Creations proved a lot harder for me than I thought it would.  I had an idea in my mind from the first time I saw the sketch, but when it come to creating it, well that idea went out the window & I ended up just winging this one.

The challenge was brought to us by Kris in the way of the sketch & using current “In Colours

Measurements –
Base Card – Whisper White – 8 1/4″ x 4 1/8″ or 21cm x 15cm
Layer 1 – Wisteria Wonder – 5 3/4″ x 4″ or 14.5cm x 10cm
Layer 2 – Whisper White – 5 5/8″ x 1 7/8″ or 14.5cm x 5cm
Layer 3 – DSP – 5 5/8″ x 2 1/8″ or 14.5cm x 5.5cm

Supplies –
Stamp Set – Delicate Doilies, Short & Sweet
Ink – Wisteria Wonder, Blushing Bride
Cardstock – Whisper White, Wisteria Wonder
DSP – In Colours
Ribbon – 3/8″ Ruffled – Wisteria Wonder
Punches – Modern Label, 2 1/2″ Circle
Accessories –  Snail Adhesive, Basic Pearls, Stampin’ Dimensionals, Tombow Multipurpose Glue

Inside…

I randomly stamped an image from Delicate Doilies using both Wisteria Wonder & Blusing Bride Inks.

I adhered the piece of DSP to the RHS piece of Wisteria Wonder Cardstock & then the stamped piece of Whisper White Cardstock using Snail Adhesive.  This piece overlapped the piece of DSP a little so that I wouldn’t have a space down the middle.

Ribbon was adhered along the bottom part of the Cardstock using Snail Adhesive, tucked the ends under & tied a bow.

I stamped the sentiment onto a scrap piece of Whisper White Cardstock with Wisteria Wonder Ink, punched out with the Modern Label Punch, applied 2 small Basic Pearls, one each side, added a couple of Stampin’ Dimensionals & adhered to the bottom RHS side of the card.

The whole piece was adhered to the Base Card – Whisper White with Snail Adhesive.

For my centre piece, I stamped the image 3 times onto a scrap piece of Whisper White Cardstock, and once onto another piece.  The last piece was punched using the 2 1/2″ Circle Punch.  I realised that I don’t use this punch nearly enough!  This large punched piece was adhered to the card with Tombow Multipurpose Glue.

With the 3 stamped images, I cut around them at different areas of the stamp.  I did confuse myself a little here as I wasn’t too sure where I was going, but the idea had been in my head since seeing this stamp set & finally got to do it!

The 3 images were then layered on top of each other using Stamping Deimensionals.  I applied a Basic Pearl to the centre to finish it off.

I love the Ruffled Ribbon from Stampin’ Up!  Another item I don’t use enough of.

I’m really happy with the card & the soft look it has.  I think this stamp set calls for a soft delicate look.

Now it is your turn to pop over to Sunny Challenges & Creationsto check out what Gwen Kris & Tanya have created, as well as our weekly guest designers.  Create your project using the challenge & link back with Mr Linky.

Until next time, happy stampin’

SC 040/12…

Happy Mother’s Day to all the mums of the world!  Hope you all have a great day & get spoilt rotten!

Our new weekly challenge over at Sunny Challenges & Creations starts today.  This week we have only the sketch to go by.  Gwen has been very easy on us!

I started out with a completely different card in mind, had it all made up in my head & then blow me down if I couldn’t find the stamp set.  I then convenienced myself that I didn’t even have the set I wanted to use!  The final result turned into a very quick 5 minute card, but these are good to do.

In fact, this card is going in the mail today!

Measurements –
Base Card – Chocolate Chip – 8 1/4″ x 5 7/8″ or 21cm x 15cm – Scored in the middle & folded in half
Layer 1 – DSP – 5 1/2″ x 3 7/8″ or 14cm x 10cm
Layer 2 – Chocolate Chip – 2 1/2″ x 2″ or 6.5cm x 5.5cm
Layer 3 – DSP – 2 3/8″ x 1 7/8″ or 6cm x 5cm
Layer 4 – Chocolate Chip – 4 1/2″ x 1 7/8″ or 11.5cm x 5cm
Layer 5 – Whisper White – 4 3/8″ x 1 3/4″ or 11cm x 4.5cm

Supplies –
Stamp Set – Forever Young, A Word for You
Ink – Chocolate Chip, Pool Party
Cardstock – Chocolate Chip, Pool Party, Whisper White
DSP – In Colours DSP
Punches – Modern Label
Accessories – Snail Adhesive

I adhered the smaller piece of DSP to the small piece of Chocolate Chip Cardstock prior to adhering to the large piece of DSP & then to the Base Card – Chocolate Chip.

I stamped my greeting onto a scrap piece of Whisper White Cardstock in Chocolate Chip Ink, punched using the Modern Label Punch &adhered to the DSP with Snail Adhesive.  My image was stamped direct onto Whisper White Cardstock with Pool Party Ink & adhered to the long piece of Chocolate Chip Cardstock & then to the Base Card.

As I said a very easy 5 minute card!

I hope you can join us this week over at Sunny Challenges & Creations as we would love to see what you come up with using the sketch.

What some inspiration????  Then why not pop over & see what Gwen, Kris & Tanya have created as well as our very talented Weekly Guest Designers.  They are fantastic!!!!!!

Until next time, Happy Stampin’

SC 038/12…

Crikey these weeks come round fast.  It just seems like yesterday that I posted the card for the challenge, but of course a new week sees a new challenge over at Sunny Challenges & Creations.

Along with the sketch we had to use the current “In Colours“.  I chose to use a couple of colours that will be retiring come September.  I will admit I have not used these colours as much as I should have.

Measurements –
Base Card – Poppy Parade – 8 1/4″ x 5 7/8″ or 21cm x 15cm – Scored in the middle & folded in half
Layer 1 – Whisper White – 5 1/2″ x 3 7/8″ or 14cm x 10cm
Layer 2 – Poppy Parade – 2 1/8″ x 3 1/2″ or 9cm x 5,5cm
Layer 3 – DSP – 2″ x 3 3/8″ or 8.5cm x 5cm
Layer 4 – Poppy Parade – 3 7/8″ x 2 3/4″ or 10cm x 7cm
Layer 5 – Whisper White – 3 3/4″ x 2 5/8″ or 9.5cm x 6.5cm

Supplies –
Stamp Set – Growing Green
Ink – Pear Pizzazz, Peach Parfait, Poppy Parade
Cardstock – Whisper White, Poppy Parade
DSP – In Colours Designer Series Paper Patterns
Punches – Itty Bitty
Embossing Folders – Square Lattice
Ribbon – 1/2″ Stitched-Poly – Peach Parfait
Accessories – Tombow Multipurpose Glue, SU! Dimensionals, Rhinestones, Mini Glue Dots, Blender Pen

I inked my image with Pear Pizzazz Ink & stamped direct onto the small piece of Whisper White Cardstock.

Envelope & Inside Card…

Using my Blender Pen, I coloured my image with Peach Parfait, inking my Pen a little at a time.  Feeling that it needed a little bit of a lift, I then added dashes of Poppy Parade Ink & blended with my Blender Pen.  The piece was run through the Bigshot using the Square Lattice Embossing Folder & adhered to the piece of Poppy Parade Cardstock with Tombow Multipurpose Ink.

I punched 3 small flowers using flower punch from the Itty Bitty Punch Set, worked out where I wanted to place them, applied Tombow to the back of each & adhered to the larger piece of Whisper White Cardstock.  I adhered the piece of DSP to the piece of Poppy Parade Cardstock &then to the large piece of Whisper White Cardstock. The whole lot was then run through the Bigshot & Embossing Folder – Square Lattice.

I adhered the piece of Ribbon across the width of the embossed piece, adhered the stamped piece to the top of the card with SU! Dimensionals, tied a bow, adhered to the card with Mini Glue Dots, & adhered 3 Rhinestones to the DSP flowers

All in all a very easy card, once which I am really happy with.  When making it, I didn’t realise that it would be so clean & white!  My type of card!

Want to be our next Ray of Sunshine & become a Weekly Guest Designer?  Then hop on over to see what Gwen, Kris & our Weekly Guest Designers have created for you, create your project & link back using Mr Linky.  We love seeing your creations & leaving you all comments. 

Until, next time, Happy Stampin’