Card 1 –
Base Card – Chocolate Chip – 9 1/4″ x 4 1/4″ or 23.5cm x 10.5cm – scored & folded at 3 1/2″ or 9cm
Layer 1 – Bashful Blue – 5 5/8″ x 4″ or 14cm x 10cm
Layer 2 – Whisper White – 5 1/2″ x 3 7/8″ or 13.5cm x 9.5cm
Layer 3 – Bashful Blue – 3 3/8″ x 4″ or 8.5cm x 9cm
Layer 4 – Chocolate Chip – 2 3/4″ x 2″ or 7cm x 5cm
Layer 4 – Whisper White – 2 5/8″ x 1 7/8″ or 6.5cm x 4.5cm
?
 |
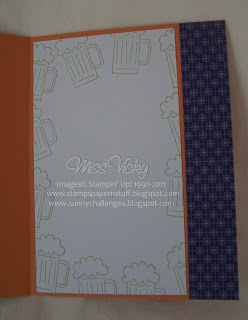
| Card 1 – Inside… |
?
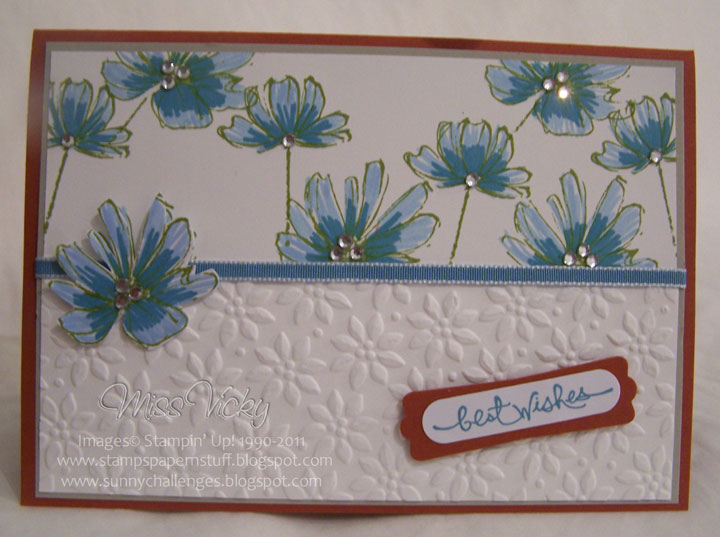
I stamped my image direct onto piece of Whisper White Cardstock using Chocolate Chip Ink, adhered this piece to the Chocolate Chip Cardstock & set aside.
With Embossing Folder – Elegant Lines, I run the piece of Bashful Blue through the Bigshot, tied a knot in the middle of the ribbon before adhering to the LHS of the embossed piece. This was adhered to the front of the card.
I then adhered the stamped piece to the top of the card, ensuring I placed adhesive on ONLY half of the piece to be adhered to the card. Basic Rhinestones were applied to the image.
Inside –
I stamped the image direct onto Whisper White using Chocolate Chip Ink, adhered to Bashful Blue & then to the Base Card – Chocolate Chip.

Card 2 –
Base Card – Chocolate Chip – 9 1/4″ x 4 1/4″ or 23.5cm x 10.5cm – scored & folded at 3 1/2″ or 9cm
Layer 1 – Bashful Blue – 5 5/8″ x 4″ or 14cm x 10cm
Layer 2 – Whisper White – 5 1/2″ x 3 7/8″ or 13.5cm x 9.5cm
Layer 3 – Bashful Blue – 3 3/8″ x 4″ or 8.5cm x 9cm
Layer 4 – Chocolate Chip – 3″ x 2 1/2″ or 7.5cm x 6.5cm
Layer 4 – Whisper White – 2 7/8″ x 2 3/8″ or 7cmx 6cm
Inside –
?

 Once my background had been created onto Whisper White, I stamped 2 images using Bashful Blue & Chocolate Chip Inks. I then randomly stamped the Snowflake images around the outside of the card using Bashful Blue Ink.