Fabulous Florets

Our card we created last week in Crafty Creations was one I found on Pinterest some time ago.   051

As you are probably aware, this is my volunteer class which meets every Friday at the Caloundra Community Centre.   It is also a great way for me to use some of my favourite retired stamp sets & DSP.  Love it when I get more use out of them.  Mind you, they are usually sold at the class which sometimes puts some of my future classes in a spin, but we get there in the end.  Selling them at the class just means they are going to homes that I know are going to use them as much as me.

For the inside, I stamped the large leaf image direct onto Very Vanilla Cardstock with Wild Wasabi Ink & adhered to the Base Card – Pumpkin Pie.

050To grab your own tutorial for the card, please click on the link to download & print.

Fabulous Florets – Grandmother

Until next time, have a great day!

Vicky


Denim….

…. for girls!
??

Please do not take notice of my awful cutting out…..

The card is not my original idea.  I found it sometime ago & had actually saved it to create for our Friday’s class for Crafty Creations at the Caloundra Community Centre.

I wanted to create a card for a girl’s birthday while at the same time using the Denim as the background.  The FREE Stamp Set – Reason to Smile was perfect for what I had in mind.

If anyone recognises it, please do let me know as I would love to give credit for this fantastic, easy card.  The ladies loved it!!!!!
??
No measurements today, as I loaned it to one of the ladies so that she could copy it when she created her card.  Some of the ladies hate to miss a Friday & if they are not able to attend, they usually get a friend to purchase a kit for them so that they are abe to create it at home.

Supplies –
Stamp Set – Reason to Smile, Sincere Salulations, Fabulous Florets
Card Stock – Whisper White, Not Quite Navy
Ink – Melon Mambo, Garden Green, Not Quite Navy
Punches – Large Oval
Accessories – Stampin’ Dimensionals, Snail Adhesive, Rhinestones, White Gel Pen

?

Inside Card…

To create the denim on the card & also the pocket, I randomly rubbed the Not Quite Navy Ink Pad over the Not Quite Navy Cardstock

I cut my smaller piece of Not Quite Navy to make it look like a pocket & went around the edge with my White Gel Pen & attached to the larger piece of Not Quite Navy with Stampin’ Dimensionals. 

The flowers were stamped onto scrap Whisper White Cardstock with Melbon Mambo while the leaves were stamped in Garden Green.  All images were cut out prior to adhering to the card, some adhered with Snail Adhesive, while others with Stampin’ Dimensionals.

The sentiment was stamped onto a scrap piece of Whisper White Cardstock in Melon Mambo & adhered to the card with Snail Adhesive down the right hand side only.

Lastly, Rhinestones were scattered around the pocket & card.

Thank you to the crafty person who created this card, as it just took my eye when I first saw it & have wanted to create it for such a long time.

Happy Stampin’

Friday’s Card…

For those who don’t want to do the Recipe Swap, I always have a kit ready.  It is made up of the same colours & usually along the line of the Recipe Page.

Measurements –
Base Card – Concord Crush – 8 1/4″ x 5 7/8″ or 21cm x 15cm – Scored down the middle & folded in half
Layer 1 – Poppy Parade – 5 3/4″ x 4″ or 14.5cm x 10cm
Layer 2 – Whisper White – 5 5/8″ x 3 7/8″ or 14cm x 9.5cm
?Layer 4 – Blushing Bride – 3 7/8″ x 2″ or 9.5cm x 5cm
Layer 5 – DSP – 3 3/4″ x 1 1/2″ x 9.5cm x 4cm

Supplies –

Inside Card…

Stamp Set – Fabuloues Florets, Heard from the Heart
Ink – Concord Crush, Blushing Bride, Pear Pizzazz
Cardstock – Whisper White, Concord Crush, Blushing Bride, Poppy Parade
Punches – Scallop Trim Border
Ribbon – 1/2″ Polly- Stitched – Blushing Bride
Accessories – Stampin’ Dimensionals, Snail Adhesive

Technique – Rock & Roll
Ink your image with a light coloured ink
Ink the edges of this image with a darker coloured ink by rolling edges of the image onto the ink pad
Stamp your image onto your Cardstock
You are able to repeat the above step using yet another darker coloured ink if you wish
For more images of the same stamp, repeat as many times as you like

I punched along both sides of the Blushing Bride Cardstock using the Scallop Trim Border Punch.  Ensure that you punch along the long sides of this piece.  I adhered the piece of DSP to the top of the punched piece of Cardstock with Snail Adhesive, adhered the piece of ribbon along the middle, tucked ends under, tied a knot on the LHS & set aside.

The stem image was stamped direct onto the piece of Whisper White Cardstock with Pear Pizzazz Ink.  The sentiment was inked in Concord Crush Ink & stamped on the side of the Whisper White Cardstock.  This piece was adhered to the piece of Poppy Parade Cardstock & then to the Base Card – Concord Crush with Snail Adhesive.  I then adhered the punched piece of Cardstock to the top of the card, ensuring the piece went down along the bottom.

I applied the Rock & Roll Technique to my flower image, cut around it & applied to the card using Stampin’ Dimensionals.

I will admit that I meant to do a background on the piece of Whisper White Cardstock prior to doing my stamping, but forgot all about it until I had put the card together……

Until next time, Happy Stampin’

Friday’s Recipe….

I am a little behind in my postings of late, well to be truthful a lot!

The last Friday of the month is our Recipe Swap arvo at the Community Centre.  This week we had a recipe from Bronwyn.

I am also tryng to use up some of my stock of the 2010 “In Colours” before they retire in September.  The colours I’ve used here are the ones I am going to really miss, but then knowing Stmpin’ Up! they always replace the old with a lovely new bright range.

Measurements –
Base Card – Concord Crush – 8 1/4″ x 6″ or 21cm x 15cm
Layer 1 – Blushing Bride – 6″ x 2 1/2″ or 15cm x 6.5cm
Layer 2 – DSP – 6″ x 2 1/8″ or 15cm x 5.5cm
Layer 3 – Poppy Parade – 5 3/8″ x 4 1/8″ or 13.5cm x 10cm
Layer 4 – Whisper White – 5 1/4″ x 4″ or 13cm x 9.5cm

Supplies –
Stamp Set – Fabulous Florets
Ink – Blushing Bride
Cardstock – Poppy Parade, Blushing Bride, Concord Crush, Whisper White
DSP – In Colours Designer Series Paper Stack
Ribbon – 1/2″ Poly-Stitched – Blushing Bride
Punches – Scallop Trim Border
Accessories – Stampin’ Dimensionals, Snail Adhesive

I printed the recipe out onto the piece of Whisper White Cardstock & adhered to  the piece of Poppy Parade Cardstock with Snail Adhesive & set aside.

The piece of Blushing Bride Cardstock was punched along both long sides with the Scallop Trim Border Punch, adhered to the piece of Concord Crush Cardstock with Snail Adhesive.  The piece of DSP was adhered to the centre of this strip with Snail Adhesive, ribbon tied around the middle, ends tucked under & a knot tied off to the LHS.

The recipe was then adhered to the Cardstock with Snail Adhesive.

I stamped 3 flower images onto a scrap piece of Whisper White Cardstock, cut around the images & adhered two of the images to the card with Stampin’ Dimensionals while the third image was adhered with Snail Adhesive.

Check back tomorrow & I will have the card we did for those who don’t want to do the recipe page.

Happy Stampin’

Thinking of You….

For the past week or so I’ve been playing with a couple of colours & for the lif eof me, cannot get enough of them together.  This is the first that I finished this morning.  Yep, heaps of unfinished cards, etc sitting on the side of my desk.  To make matters worse they just keep getting moved from one place to another & back again everyday…..

I’ve also been playing with Re-Inkers & Blender Pen.  This is my first card using both.

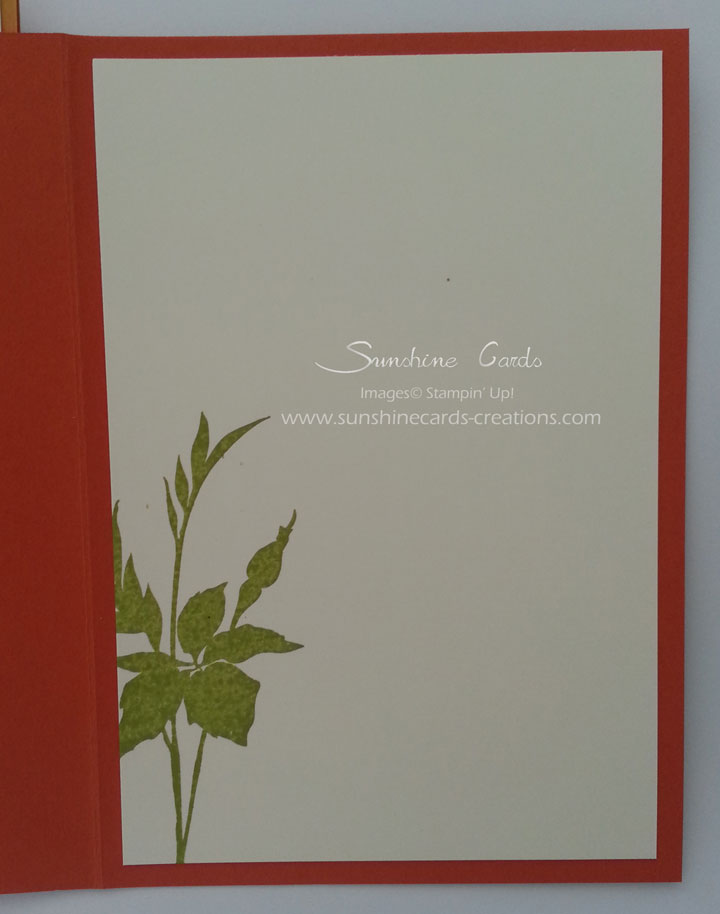
Envelope & Inside card…

Measurements –
Base Card – Sahara Sand – 11 3/4″ x 4 1/8″ or 29.5cm x 10.5cm – Scored in middle & folded in half
Layer 1 – Pink Pirouette – 5 3/4″ x 4″ or 14.5cm x 10cm
Layer 2 – Very Vanilla – 5 5/8″ x 3 7/8″ or 14cm x 9.5cm
Layer 3 – Bravo Burgundy – 2″ x 4 1/4″ or 5cm x 11.5cm
Layer 4 – Very Vanilla – 1 7/8″ x 4″ or 4.5cm x 11cm

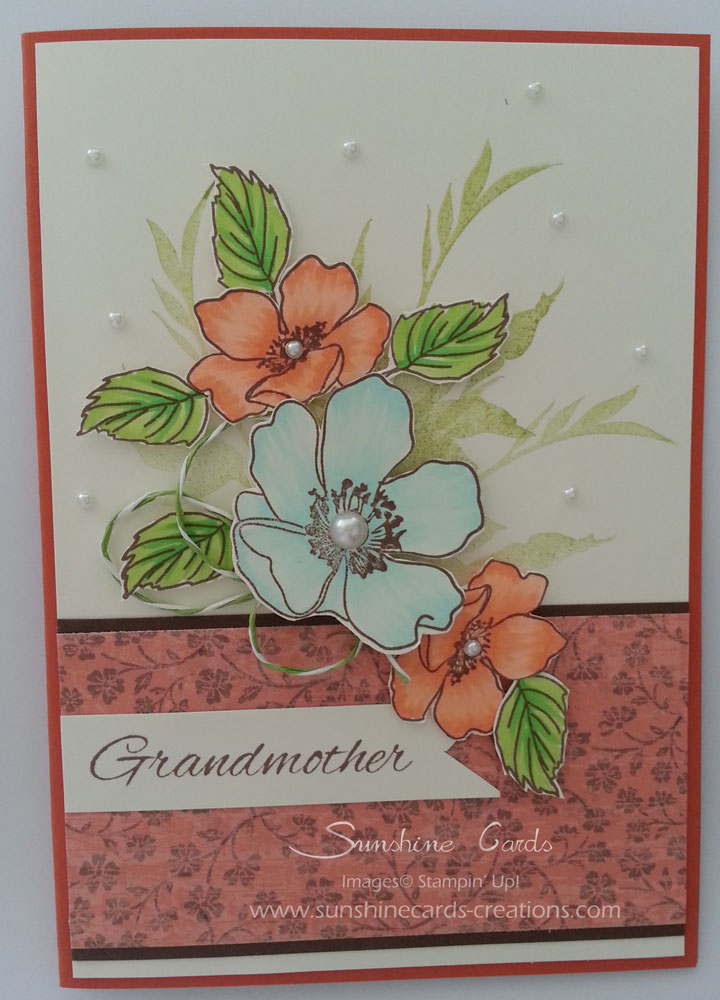
Close up of Embossing & Flowers….

I stamped 2 images onto a scrap piece of Very Vanilla with Staz-On Ink & set aside to dry.  I placed a couple of drops of Pink Pirouette Re-Inker onto a Clear Mount Block, coloured my images with a Blender Pen.  I added a very tiny tiny amount of Bravo Burgundy Re-Inker to the same Block & sort of mixed the 2 together so that I could get a darker colour without being too Bravo Burgundy. I picked this up with my Blender Pen & coloured the flower closer to the middle & blended out towards the edges.  For the centres, I used Bravo Burgundy Re-Inker & Blender Pen to blend, although in the photo it looks a little pink.  I set these aside to dry prior to cutting around images.  Colouring on Very Vanilla Cardstock gives the colour a little more of a soft look then if it had’ve been on Whisper White.

I run the larger piece of Very Vanilla through the Bigshot using Embossing Folder – Flower Garden. This piece was adhered to the piece of Pink Pirouette with Tombow Glue & then to the Base Card – Sahara Sand with Snail Adhesive.

I stamped the stem onto the long piece of Very Vanilla Cardstock using Garden Green Ink & adhered to the piece of Bravo Burgundy Cardstock with Snail Adhesive.  I tied a piece of Bravo Burgundy Ribbon around the bottom & tied a knot. The whole piece was adhered to the Base Card.

I adhered the 2 flower images over the top of the stem with Stampin’ Dimensionals.

The sentiment was stamped direct onto the Base Card with Bravo Burgundy Ink.

A fairly easy card, but one that I like as the Blender Pen & Re-Inkers give the flowers a little bit of depth.  Next time, I will try the same technique using Watercolour Paper, as well as Aqua Painter & Watercolour Paper.

 Supplies –
Stamp SetFabulous Florets*, So Happy For You
Ink – Bravo Burgundy, Pink Pirouette, Garden Green, Staz-On
Cardstock – Sahara Sand, Pink Pirouette, Bravo Burgundy
Embossing FolderFlower Garden*
Ribbon – 1/4″ Grosgrain – Bravo Burgundy
Accessories – Bigshot, Tombow Glue, Snail Adhesive, Blender Pen
Stampin’ Dimensionals, Re-Inkers – Bravo Burgundy, Pink Pirouette
* Summer Mini – ends 31 March 2012
Until next time, Happy Stampin’