Dino Days

G’Day Stampers,

Before I get onto today’s card, I’m happy to say that I have just uploaded new PDF Tutorials for purchase. Simply click on the PDF Tutorial Sale Page. In the next couple of days, there will be more uploaded for you to choose.

Today I am sharing with you a Tripple Pop-Up Card that I created a few weeks ago. It has been sitting on my desk waiting to be finished which I managed to do this morning.

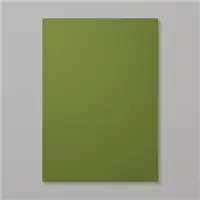
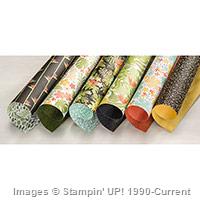
I’ve used the Granny Apple Green DSP from the Brights 6 x 6 DSP Pack along with Whisper White & Granny Apple Green Cardstock.

I’ve teamed the colours with the fun Dino Days Stamp Set as I thought the colours were bright & fun for kids. In fact all the stamping is from the Brights Colour FamilyGorgeous Grape, Coastal Cabana, Mango Melody & Pacific Point. The palm trunks have been stamped in Early Espresso Ink.

The sentiment is from the Happiest of Birthdays Stamp Set & stamped in Pacific Point Ink before die cutting with a shape from the Stitched So Sweetly Dies.

I don’t have a tutorial for you today but if you google Tripple Pop-Up Card, a lot of videos & tutorials will pop up that you will be able to check out.

Have you joined our October Stamp & Card Club yet? It is the males turn to shine with Game On being the start of the show.

For more details, head over to the Stamp & Card Club Page or click on the photo below.

~~~~~~~~~~~~

Our Scrappin’ On the GO! November Class is now OPEN! November is all about the fun & creative Whale of a Time Suite. We’re playing with the Whale Done Stamp Set along with the Whale Builder Punch & the gorgeous Whale of a Time DSP.

~~~~~~~~~~~~

By using the October Host Code QZ97UAX at the bottom of your Shopping Cart, I am able to spoil with –

  • A special Handmade Card created just for you each month when shopping through me!
  • A Mystery Box of retired goodies when place a $100 Online Order

~~~~~~~~~~

~~~~~~~~~~~~

Create Weekly – New sketch each month, along with a weekly PDF Tutorial

Stamp, Ink, Paper Classroom – Classes for Demos

Scrappin’ On the GO! – Monthly subscription classes

Stamp & Card Club – October is Game On & perfect for the males!

Surprise Kits in the Mail – Lots of fun each month with a mystery card kit

~~~~~~~~~~~~

Please feel to contact me if you have any questions.

Happy Stamping!

12 Weeks of Christmas – Week 10


G’Day Stampers,

How any of us have our Christmas Cards in the mail?  I’ve managed to post a few this So-Many-Stars-1---Insideweek only because I am a little restricted in what I do for the next 10 days due to eye surgery but happy to say that it is coming along in leaps & bounds.

Week 10 is all about stars, stars & more stars!  We teamed the So Many Stars Bundle with the Brightly Gleaming Specialty DSPfrom the 2019 Holiday Catalogue.

When I first saw the Stitched Stars Dies, the first thing that jumped into my head was an Interlocking Card & I am happy to say we did one in class a couple of weeks ago!  It’s been so long since I’ve created this type of card that I enjoyed the process.

Download your free tutorial by clicking on the link below.

Shop with me to receive a FREE Tutorial Bundle

Showcase-Tutorial-Bundle

Until next time, Happy Stampin’

Vicky


654.  Season’s Greetings – So Many Stars Bundle

This slideshow requires JavaScript.

Back on Your Feet

Today’s card is one that was created some time ago but never got to share with you.  It is Back-on-Your-Feet-1ausing the cute little set – “Back on Your Feet“!  I’ve combined it with a Dutch Fold.  I think that is what it is called!  It has been adjusted to suit the Australian size card.

I teamed the stamp set up with the gorgeous Mosaic Mood Speciality DSP which I think sites the image.  The lovely little sloth has been coloured with Watercolour Pencils.

Shop with me to receive a FREE Tutorial Bundle

Showcase-Tutorial-Bundle

Until next time, Happy Stampin’

Vicky

641.  Hope Things get Better Soon – Back on Your Feet

Back-on-Your-Feet-1

12 Weeks of Christmas – Week 4

12-Weeks-of-Christmas

G’Day Stampers,

Toda is Week 4 of our 12 Weeks of Christmas & I am happy to say I have a Fancy Fold Winter-Woods-1---InsideCard for you to create over the weekend.  Oh, I also have a new video showing you how I created my card.

To create this card I’ve used the Winter Woods Stamp Set, along with the match In the Woods Dies.  In fact, you could use this set for an occasion!

I’m enjoying creating this fold that much that I’ve managed to create a few special Birthday Cards which I will share with you once they have been received.

This is the video to help you to create your card.

To download Week 4 PDF Tutorial, all you have to do is click on the link below.

Shop with me to receive a FREE Tutorial Bundle

Showcase-Tutorial-Bundle

Until next time, Happy Stampin’

Signature---Vicky-Wright---

635. Thinking of You this Season – Winter Woods

Winter-Woods-1

Wish Big

I saw a card on Pinterest a little time ago & thought it would be ideal for a class.  So last007wm-blog Sunday was the class where we created this wonderful card.  Thank you so much for your inspiration.

I had the DSP & colours out on my desk ready to create & thought they would all go perfectly with the card while at the same time, highlight the fantastic “Garden Blossoms” Bundle from the 2016 Occasions Catalogue.

The card opens into the shape of a box & then folds down flat to fit inside a standard envelope for posting.  On the back is a panel for your greeting.

Until next time, Happy Stampin’

Vicky

009wm-blog

Supplies –

Price: $169.00

Supply List

Built for Free Using: My Stampin Blog

Lotus Blossom

Was again going to be used for our 2nd card last Sunday in our Technique Class, this time with a twist, ie a Tri-Fold Card, but I changed my mind at the last moment & created another card.

If you haven’t created one of these cards before, you need to have a go.  They are a fun little card – 3 1/2″ square in size, but041tc-blog one that packs a WOW!  A small box was created  with the Envelope Punch Board to fit this card.  The Envelope Punch Board makes it so easy to create.

The card uses the Stamp Set –Lotus Blossom” along with the “Best Year Ever” Accessories Pack & matching DSP – Best Year Ever.  All 3 items are from the SAB 2015 Brochure which are FREE products when you spend $AUD90.00 (excluding P&H).  Love, love, love all this gorgeous, bright product.

If you would like to learn how to create this card & 3-Step Stamping, then either check out the dates on the Classes/Workshops Page or contact me to book a day & time to suit you.

Until next time, Happy Stampin’

Vicky

056bb-blog

Petal Parade…

 
In our SAB Classes for February & March, we used the stamp set “Petal Parade” along with the gorgeous DSP – Sweet Sorbet.  Today’s card has been done with the Envelope Punch Board.  The ladies were amazed at how versatile this little board is.  So many options, so little time!
 
To check out the Classes for March & April be sure to click onto the Classes/Workshops Page.  Along with the classes, dates & times, there are also photos.  To book your class, please email or phone.
 
Card Front 
 Inside Card
 
Supplies –
Stamp Set – Petal Parade, Banner Blast, Express Yourself
Ink – Summer Starfruit, Crisp Cantaloupe, Pool Party, Pistachio Pudding, Basic Black
Cardstock – Smokey Slate, Whisper White, Pool party
DSP – Sweet Sorbet
Punches – Scallop Circle, Banner, Itty Bitty Punch Pack, 1 3/8″ Circle
Accessories – Snail Adhesive, Stampin’ Dimensionals, Pearl Jewels, Envelope Punch Board, Sweet Sorbet Accessories Pack – Crisp Cantaloupe Twine
 
Don’t forget to pop back in a couple of days to check out or 2nd card.
  •  To order Stampin’ Up! products online, please Shop Here
  • Want to join my team and be a part of a group that loves to stamp together, Join Here
  • To check out available classes or to attend any of the classes, please Click Here, click on the “Classes/Workshop” Page or email me vickiawright@bigpond.com
Until next time, Happy Stampin’
  
 Vicky

Everything Eleanor….

… was the stamp set we used way back in March for one of our Technique Classes – “Heat & Stick“.

As is the case with our Technique Class, we try & create a card that has a different fold.  Our card for this class was the “Box Card”.  I love how this turned out & surprise, surprise very easy to create.  I did originally see this card from Valita’s Blog.  From memory, I think I sort of adjusted the measurements to suit what I wanted to do.

Some of the products used to create our card have since been retired, but they can easily be replaced with current products.

Supplies –
Stamp Set – Everything Eleanor
Cardstock – Very Vanilla, Early Expresso, Lucky Limeade (Retired)
Ink – Calyspo Coral, Lucky Limeade (Retired), Versmark
DSP – Tea for Two (Retired)
Ribbon – 3/8″ Ruffled – Lucky Limeade (Retired)
Embossing Folder – Honeycomb
Punches – Bird Builder
Accessories – Heat & Stick Powder, Dazzling Diamonds, Stampin’ Dimensionals, Sticky Strip, Snail Adhesive, Multipurpose Liquid Glue, Pearls

 
Bronwen emailed me a photo of one she completed once she went home
 
  • To order Stampin’ Up! products online, please Shop Here
  • Want to join my family, and be a part of a group that loves to stamp together, Join Here
  • To check out available classes or to attend any of the classes, please Click Here, click on the “Classes/Workshop” Page or email me vickiawright@bigpond.com
Until next time, Happy Stampin’
 
Vicky

Cracked Glass…

…was one of the techniques we did back in October.  I decided to do a Christmas Card along with a bit of a different spin on the Step Fold card.

It is another non-traditional Christmas card but the ladies loved it, especially the fold.  The 2nd card we created for this class can be seen in this post.


Until next time, Happy Stampin’

Faux Leather…

…  What a fun technique & one we did a couple of weeks ago in our Technique Class.

Not only did we get to make a big mess with Embossing Powder, but we got to play with the Stampin’ Up! Wheels, which a couple of the ladies had not used previously. 

I did do a similar car to the one here sometime ago, so decided to step it up a bit using new products.  Of course, we had to create it using “girly” colours.  The best part is I think this colour – “Melon Mambo” really showcases the Faux Leather Technique to perfection.

 
Until next time, Happy Stampin’